
Craving a restaurant-quality meal that’s easy to make at home? My crispy chicken tenders recipe will transform your dinner game. These homemade chicken tenders are packed with flavor and boast an incredible crunch that beats any takeout option.
Panko breading is the secret weapon in this crispy chicken recipe. Unlike traditional breadcrumbs, panko creates a lighter, extra-crispy exterior that will have everyone asking for seconds. With just a few simple ingredients, you can whip up these delicious tenders in under 30 minutes.
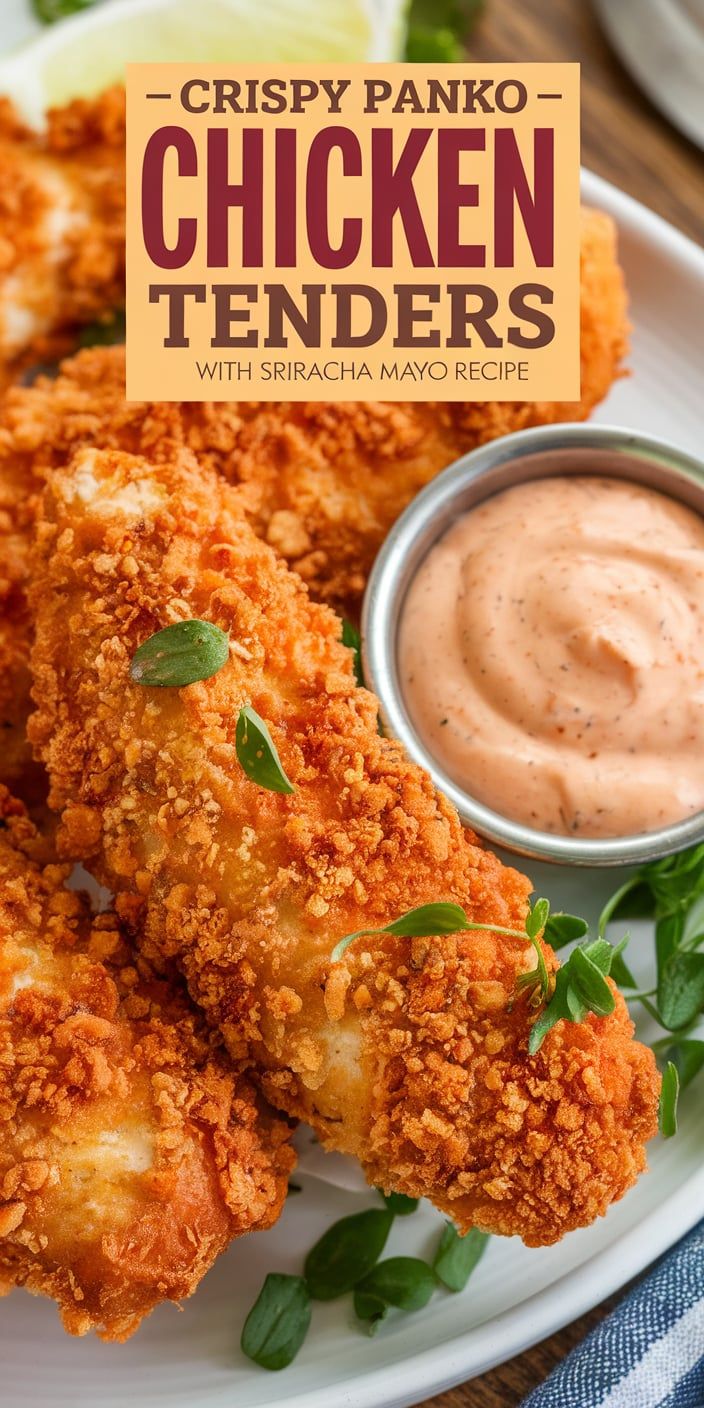
The star of this dish is the spicy sriracha mayo dip that adds a kick of flavor to every bite. Whether you’re cooking for family or hosting a casual gathering, these homemade chicken tenders will be the highlight of your meal. Get ready to become the ultimate home chef with this foolproof recipe!
Why These Homemade Chicken Tenders Are Better Than Takeout
Crafting homemade chicken tenders isn’t just a cooking adventure—it’s a game-changing approach to enjoying your favorite comfort food. When comparing homemade vs takeout, my kitchen experiments have revealed some surprising advantages that make restaurant-quality chicken tenders right at your fingertips.
Diving into the world of healthy chicken tenders starts with understanding the key differences between store-bought and homemade options. Let me break down why making your own is a total win.
The Secret Behind Restaurant-Quality Crunch
Achieving that perfect crispy exterior is all about technique. Panko breadcrumbs are the magic ingredient that transforms ordinary chicken into a restaurant-quality chicken experience. Unlike traditional breadcrumbs, panko creates an incredibly light, extra-crunchy coating that stays crisp even after cooling.
- Lighter and crispier texture
- More even coating
- Better adhesion to chicken
Health Benefits of Making Your Own Tenders
Healthy chicken tenders begin with ingredient control. When you prepare them at home, you can:
- Choose high-quality, lean chicken
- Control oil and salt amounts
- Avoid preservatives and additives
Cost-Effective Meal Prep Option
| Expense Category | Takeout Cost | Homemade Cost |
|---|---|---|
| Chicken Tenders | $12-$15 | $4-$6 |
| Breading Ingredients | Included in price | $1-$2 |
| Total Meal Cost | $15-$20 | $5-$8 |
By investing a little time, you’ll save money and enjoy fresher, healthier meals. The cost savings of homemade vs takeout can be substantial, making this recipe both delicious and budget-friendly.
Essential Ingredients for Perfect Panko Chicken
Creating the ultimate crispy panko chicken requires selecting the right ingredients. I’ll walk you through the key components that transform an ordinary chicken dish into a restaurant-quality meal.
For the chicken breast, quality matters most. I recommend choosing fresh, boneless, skinless chicken breasts that are evenly sized. This ensures consistent cooking and maximum flavor absorption.
- High-quality chicken breast
- Panko breadcrumbs (Japanese-style)
- Seasonings for your blend
- Eggs for coating
- Flour for dredging
Panko breadcrumbs are the secret weapon for achieving that incredible crunch. Unlike traditional breadcrumbs, panko creates a lighter, airier coating that stays crispy longer. I prefer using Japanese-style panko for the most authentic texture.
The seasoning blend is where you can get creative. My go-to mix includes:
- Garlic powder
- Paprika
- Salt
- Black pepper
- Dried herbs
For the sriracha mayo, you’ll need just a few simple ingredients that pack a punch of flavor. Fresh mayonnaise, sriracha sauce, and a touch of lime juice create a creamy, spicy dipping sauce that complements the crispy panko chicken perfectly.
Crispy Panko Chicken Tenders with Sriracha Mayo Recipe
Creating the perfect chicken tenders at home is easier than you might think. I’ll walk you through a delicious recipe that combines crispy breading with a spicy sriracha mayo dip. My chicken preparation technique ensures restaurant-quality results that will impress your family and friends.
Making the Sriracha Mayo Dip
The secret to an amazing sriracha mayo recipe is simple ingredients and perfect balance. I recommend mixing:
- 1/2 cup mayonnaise
- 2-3 tablespoons sriracha sauce
- 1 teaspoon lime juice
- Pinch of salt
Whisk these ingredients until smooth. Taste and adjust the heat level to your preference. The key is creating a creamy, spicy dip that complements the crispy chicken.
Chicken Tender Preparation Tips
For the best chicken preparation, start with boneless, skinless chicken breasts. Cut them into even strips about 1-inch thick. Pat the chicken dry with paper towels to help the breading stick better. Season with salt and pepper for extra flavor.
Breading Station Setup
Mastering the breading technique requires three separate dishes:
- Dish 1: All-purpose flour seasoned with salt and pepper
- Dish 2: Beaten eggs
- Dish 3: Panko breadcrumbs mixed with your favorite seasonings
Dip each chicken tender first in flour, then egg, and finally coat thoroughly with panko breadcrumbs. This method creates an incredibly crispy exterior that locks in moisture.
The trick to perfect breading is keeping your hands dry and working methodically. Press the panko crumbs gently onto the chicken to ensure a thick, even coating that will crisp up beautifully when cooked.
Cooking Methods and Temperature Guide
Perfecting chicken tenders requires understanding different cooking methods. I’ll walk you through the best techniques for achieving crispy, delicious results using frying chicken tenders, baking chicken tenders, and the air fryer method.
Each cooking technique offers unique advantages for preparing your panko-coated chicken tenders. Let’s explore the most popular approaches:
- Deep Frying: Provides the most traditional crispy exterior
- Oil temperature: 350°F
- Cooking time: 3-4 minutes
- Best for maximum crunch
- Baking chicken tenders: Healthier alternative
- Oven temperature: 425°F
- Cooking time: 15-20 minutes
- Requires occasional flipping for even browning
- Air fryer method: Quick and convenient
- Temperature: 390°F
- Cooking time: 8-10 minutes
- Minimal oil needed
Pro tip: Always use a meat thermometer to ensure chicken reaches an internal temperature of 165°F for safe consumption. The right cooking method can transform your chicken tenders from ordinary to extraordinary!
Whichever method you choose, the key is maintaining a consistent temperature and avoiding overcrowding. This ensures each tender comes out golden brown and perfectly cooked.
Serving Suggestions and Pairings
Elevating your chicken tender experience goes beyond the crispy coating. The right side dishes, homemade dipping sauces, and food presentation can transform a simple meal into a culinary delight that impresses everyone at the table.
Best Chicken Tender Sides
Selecting the perfect chicken tender sides can complement your crispy protein and create a balanced meal. I recommend these delicious options:
- Crispy sweet potato fries
- Fresh summer coleslaw
- Roasted garlic parmesan vegetables
- Creamy mac and cheese
- Zesty green salad with herb vinaigrette
Homemade Dipping Sauces to Wow Your Guests
Expand your dipping sauce repertoire beyond the classic sriracha mayo. Homemade dipping sauces can elevate your chicken tenders from good to extraordinary.
| Sauce Name | Key Ingredients | Flavor Profile |
|---|---|---|
| Honey Mustard | Dijon mustard, honey, mayo | Sweet and tangy |
| Smoky BBQ | Ketchup, smoked paprika, brown sugar | Rich and complex |
| Garlic Ranch | Buttermilk, fresh garlic, herbs | Creamy and herbaceous |
Food Presentation Tips
Food presentation transforms an ordinary meal into an Instagram-worthy experience. Try these simple tricks to make your chicken tenders look as delicious as they taste:
- Use wooden cutting boards for rustic charm
- Arrange tenders in a fan pattern
- Garnish with fresh herbs
- Use small ramekins for dipping sauces
- Create height and visual interest on the plate
Storage and Reheating Instructions
Storing chicken tenders properly can help maintain their delicious crunch and flavor. I recommend placing your leftover tenders in an airtight container and refrigerating them within two hours of cooking. When sealed correctly, these tenders will stay fresh for up to 3-4 days in the refrigerator.
For meal prep ideas, these chicken tenders are incredibly versatile. I like to prepare a batch at the beginning of the week and use them in salads, wraps, or as quick protein additions to lunch boxes. When reheating fried chicken, the key is to restore its crispy texture without drying out the meat.
To reheat, I suggest using an oven or air fryer instead of a microwave. Preheat your oven to 375°F and place the tenders on a wire rack over a baking sheet. Warm them for about 10-12 minutes, which helps maintain their crispy panko coating. This method ensures your chicken remains juicy and retains that restaurant-quality crunch you originally achieved during cooking.
If you want to freeze your chicken tenders, wrap them individually in plastic wrap and store in a freezer-safe container. They’ll keep well for up to 2 months. When you’re ready to enjoy them, thaw in the refrigerator overnight and reheat using the oven method I described earlier.