
Craving a delectable dessert that combines simplicity with French elegance? My apple galette recipe is the perfect solution for home bakers looking to create an impressive yet easy French dessert without the fuss of a traditional pie.
This rustic apple tart brings together the best of homemade baking with minimal effort. Unlike complicated pastry techniques, the apple galette celebrates imperfection and allows even novice bakers to create a stunning dessert that looks like it came straight from a Parisian bakery.
What makes this apple galette recipe special is its versatility and straightforward approach. You’ll learn how to transform simple ingredients into a show-stopping dessert that’s equally perfect for a casual family dinner or an elegant dinner party. The free-form pastry means no precise crimping or complex shaping required – just pure, delicious simplicity.
Whether you’re an experienced baker or just starting your culinary journey, this recipe will guide you through creating a mouthwatering dessert that captures the essence of French countryside cooking. Get ready to impress your friends and family with a rustic apple tart that looks and tastes absolutely incredible.
What Makes an Apple Galette Different from a Traditional Pie
When it comes to desserts, the apple galette stands out as a delightful alternative to the classic pie. This French-inspired free-form pastry offers a unique approach to baking that celebrates rustic charm and simplicity.
The French Connection: Origins of Galette
The galette originated in France as a simple, rustic dessert that breaks away from the structured world of traditional pies. Unlike its more rigid cousin, a French galette embraces imperfection and celebrates free-form baking. The word “galette” comes from the French term for a flat, round cake-like pastry that can be sweet or savory.
Rustic vs. Perfect: Embracing Imperfection
What sets a galette apart in the galette vs pie debate is its intentionally unstructured appearance. I love how this dessert doesn’t require perfect crimping or precise edges. The beauty lies in its handmade look:
- No need for a special pie dish
- Edges are simply folded over the filling
- Each galette looks uniquely handcrafted
Free-Form Pastry Benefits
The free-form pastry approach offers several advantages for home bakers. It’s less intimidating and more forgiving than traditional pie-making. Here’s a quick comparison:
| Galette | Traditional Pie |
|---|---|
| Easy to prepare | Requires precise technique |
| Rustic appearance | Demands perfect presentation |
| Minimal equipment needed | Requires specialized pie tools |
Whether you’re a novice baker or a seasoned pro, the apple galette offers a delightful and approachable way to enjoy a classic dessert with a French twist.
Essential Ingredients for the Perfect Apple Galette
Creating a delicious apple galette starts with selecting the right ingredients. The beauty of this rustic French pastry lies in its simplicity and the quality of its core components. I’ll break down the essential apple galette ingredients you’ll need for both the pastry and the filling.
Galette Pastry Ingredients
- All-purpose flour (2 cups)
- Cold unsalted butter (1 cup, cubed)
- Ice water (1/4 cup)
- Salt (1/2 teaspoon)
- Granulated sugar (1 tablespoon)
Apple Filling Ingredients
- Fresh baking apples (4-5 medium-sized)
- Granulated sugar (1/4 cup)
- Ground cinnamon (1 teaspoon)
- Lemon juice (1 tablespoon)
- Unsalted butter (2 tablespoons, diced)
- Optional: Apricot jam for glazing
The key to an exceptional apple galette is using high-quality, fresh ingredients. For the galette pastry ingredients, cold butter is crucial for creating those sought-after flaky layers. When selecting apples for the filling, choose varieties that hold their shape during baking.
| Ingredient Category | Purpose | Recommended Quantity |
|---|---|---|
| Flour | Creates pastry structure | 2 cups |
| Butter | Adds richness and flakiness | 1 cup (cold) |
| Apples | Primary filling ingredient | 4-5 medium apples |
Pro tip: Always keep your ingredients cold when making the pastry. This ensures a tender, flaky crust that’s the hallmark of a perfect apple galette. Don’t worry about making the edges perfectly smooth—the rustic look is part of its charm!
Best Apple Varieties for Your Galette
Choosing the right apples can make or break your galette. The secret to a delicious apple galette lies in selecting the perfect apple varieties that balance flavor, texture, and seasonal availability.
When hunting for the best apples for galette, you’ll want to consider both sweet and tart apple varieties that hold their shape during baking. Not all apples are created equal when it comes to creating the ultimate pastry dessert.
Sweet vs. Tart Apple Profiles
The ideal apple varieties for a galette strike a delicate balance between sweetness and acidity. Some top picks include:
- Honeycrisp: Sweet with a firm texture
- Granny Smith: Tart and crisp, perfect for balancing flavors
- Braeburn: Complex sweet-tart profile
- Jonagold: Honey-like sweetness with a slight tang
Seasonal Apple Selection Guide
Seasonal apples offer the freshest and most vibrant flavors for your galette. Fall brings the most diverse apple varieties, making it the perfect time to experiment with different combinations.
Mixing Apple Varieties for Depth of Flavor
Professional bakers know that mixing apple varieties creates a more complex and interesting dessert. I recommend combining at least two different apple types – one sweet and one tart – to achieve a rich, layered flavor profile in your galette.
Pro tip: Cut your apples into uniform slices to ensure even cooking and a beautiful presentation. The right apple varieties can transform a simple galette into a memorable dessert that showcases the best seasonal apples.
Apple Galette Recipe: Step-by-Step Instructions
Creating an apple galette is easier than you might think. This rustic French-inspired dessert brings together simple ingredients for a stunning result. I’ll walk you through the apple galette recipe that will impress your family and friends.
For the perfect step-by-step galette instructions, you’ll need to follow these key stages carefully. Preparation is crucial when learning how to make apple galette.
- Prepare the pastry dough in advance and chill for at least one hour
- Select firm, crisp apples like Granny Smith or Honeycrisp
- Roll out the dough on a lightly floured surface to about 1/8 inch thickness
- Slice apples thinly and evenly for uniform cooking
- Arrange apple slices in an overlapping circular pattern
- Fold the edges of the pastry over the apple filling
- Brush with egg wash for a golden finish
Bake your apple galette at 375°F for approximately 35-40 minutes until the crust turns golden brown and apples become tender.
| Ingredient | Quantity | Purpose |
|---|---|---|
| All-purpose flour | 1½ cups | Pastry base |
| Cold butter | ½ cup | Creates flaky texture |
| Apples | 3-4 medium | Main filling |
| Sugar | ¼ cup | Sweetness and caramelization |
Remember, the beauty of a galette lies in its rustic appearance. Don’t aim for perfection – embrace the charming, free-form style that makes this dessert so delightful.
Making the Flaky Galette Crust from Scratch
Creating a homemade galette crust is an art that transforms simple ingredients into a stunning pastry. The secret lies in understanding the delicate balance of technique and ingredients that produce a perfectly flaky crust every time.
Secret Tips for Perfect Pastry
Mastering flaky pastry tips starts with a few crucial techniques. Cold ingredients are your best friend when making a galette crust. I always recommend:
- Chill butter and water before mixing
- Use a cold work surface
- Handle the dough minimally
- Rest the dough in the refrigerator for at least 30 minutes
Troubleshooting Common Crust Issues
Pastry troubleshooting can save your galette from potential disasters. Here’s a quick guide to common problems:
| Problem | Solution |
|---|---|
| Tough Crust | Overworked dough – mix ingredients just until they combine |
| Shrinking Crust | Allow dough to rest and relax before rolling |
| Cracking Edges | Keep dough cold and handle gently |
Make-Ahead and Storage Options
A make-ahead galette crust can be a lifesaver for busy bakers. You can prepare the dough up to three days in advance, storing it wrapped tightly in the refrigerator. For longer storage, freeze the unbaked dough for up to one month.
Pro tip: When preparing in advance, wrap the dough in plastic wrap and flatten it into a disk. This makes it easier to roll out when you’re ready to bake.
Serving and Presentation Ideas
Creating a memorable apple galette presentation goes beyond simply baking a delicious dessert. The way you serve and plate your galette can transform an ordinary meal into an extraordinary culinary experience. I’ll share some creative serving galette techniques that will impress your guests and elevate your dessert.
When it comes to galette dessert ideas, presentation is key. Start by selecting the right serving platform – a rustic wooden board or elegant ceramic platter can instantly enhance the visual appeal of your apple galette.
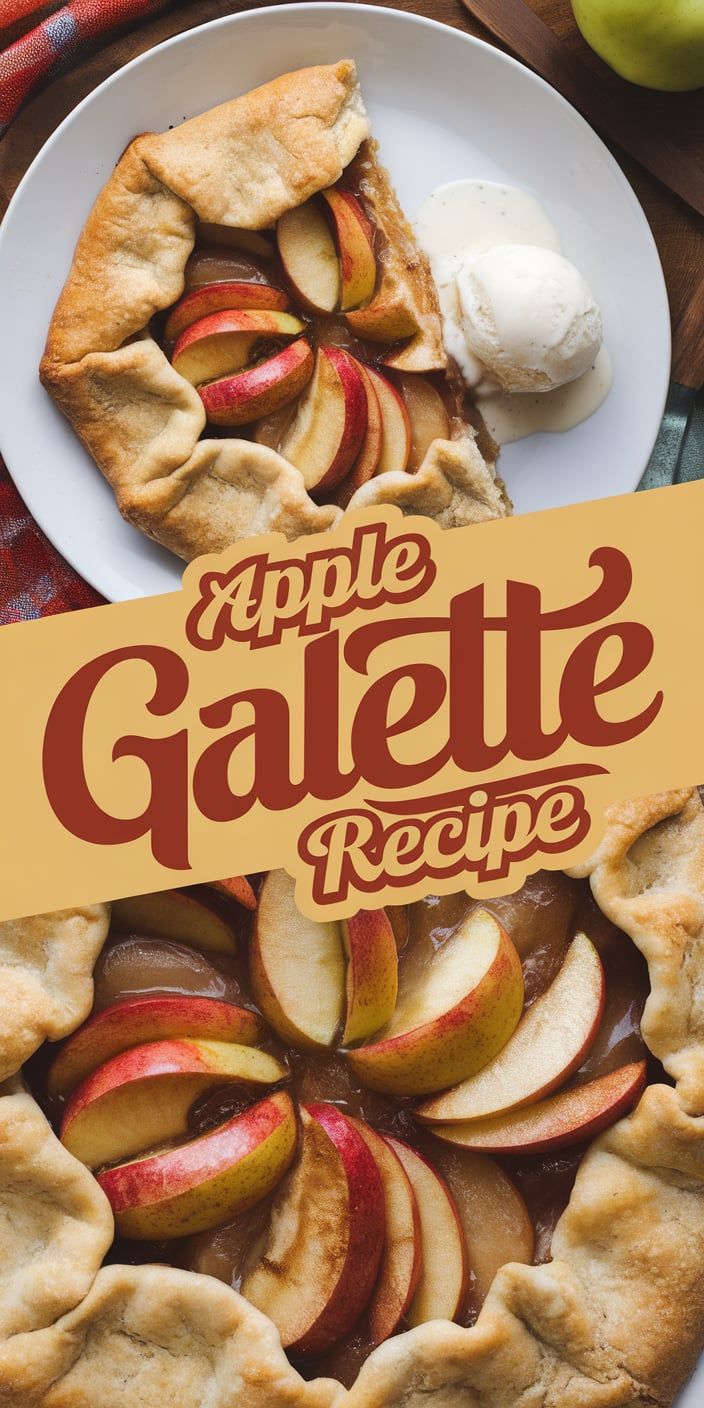
- Serve warm with a scoop of vanilla bean ice cream
- Dust with powdered sugar for an elegant touch
- Drizzle with caramel sauce for extra indulgence
- Garnish with fresh mint leaves or candied apple chips
Consider the occasion when planning your apple galette presentation. For intimate family dinners, a casual slice on individual plates works perfectly. For more formal gatherings, create a more sophisticated display with carefully arranged accompaniments.
| Occasion | Presentation Style | Recommended Accompaniments |
|---|---|---|
| Casual Family Dinner | Rustic, relaxed slice | Vanilla ice cream, whipped cream |
| Dinner Party | Elegant plating | Crème fraîche, caramel drizzle |
| Holiday Gathering | Centerpiece presentation | Spiced rum sauce, candied nuts |
Temperature matters in serving your galette. I recommend serving it slightly warm to enhance the flavors and create a more inviting dessert experience. A slightly warmed plate can help maintain the ideal temperature and add a touch of elegance to your presentation.
Tips for Achieving the Perfect Golden-Brown Finish
Creating a golden-brown galette requires precision and a few expert baking tips. My favorite technique involves preheating the oven to 400°F, which helps develop that beautiful crisp exterior. A dark metal baking sheet can help radiate heat evenly, ensuring your perfect galette crust transforms into a gorgeous amber color.
Egg washing is a secret weapon for achieving a stunning golden-brown finish. I recommend whisking one egg with a tablespoon of water and gently brushing the exposed pastry edges. Sprinkle a light dusting of raw sugar for an extra sparkle and caramelized texture. These simple baking tips can elevate your galette from good to extraordinary.
Visual cues are crucial when determining your galette’s doneness. Look for a rich, uniform golden-brown color across the entire pastry surface. The edges should appear crisp and slightly raised, with a glossy sheen that indicates proper caramelization. When you see these signs, your galette is ready to be pulled from the oven and enjoyed.
Professional bakers know that patience is key to a perfect galette crust. Allow your pastry to rest for 10-15 minutes after baking, which helps set the structure and prevents soggy bottoms. This final step ensures your golden-brown galette looks as stunning as it tastes.