
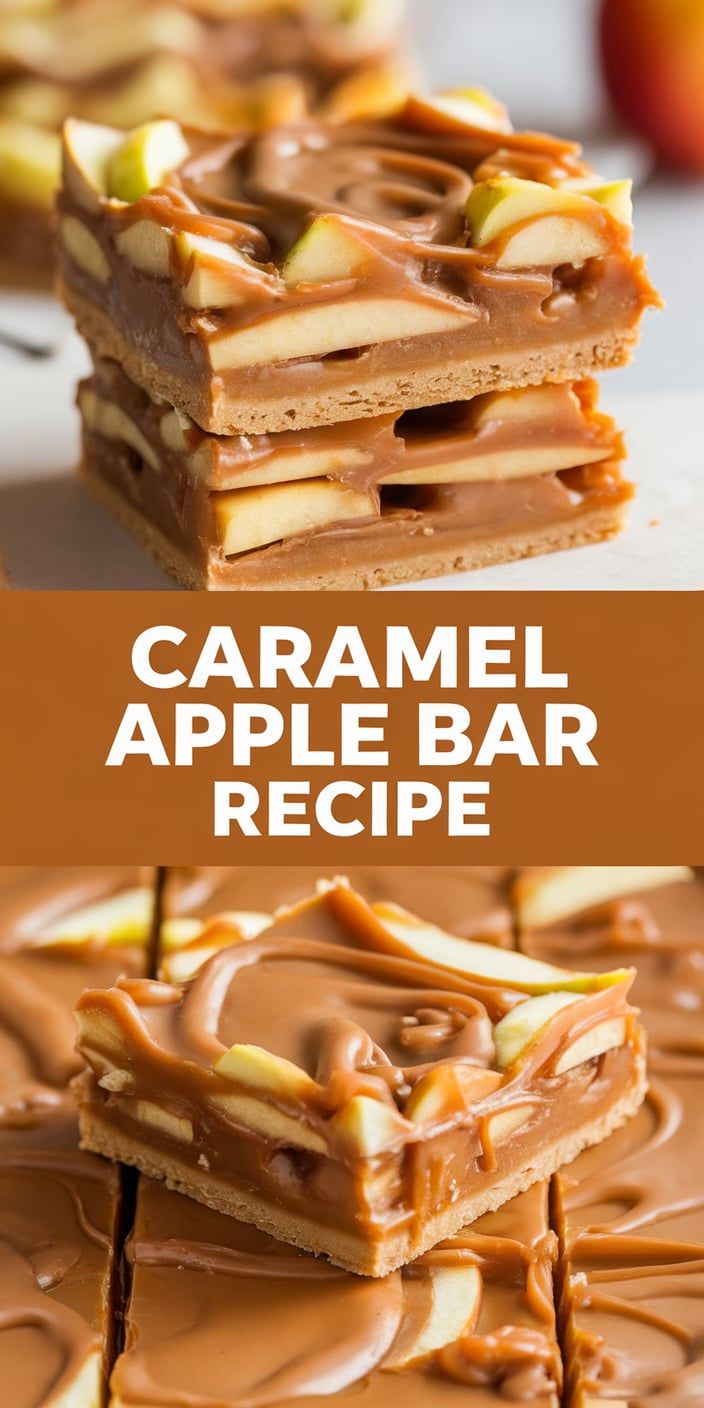
Fall brings the most magical time for homemade apple treats, and these caramel apple bars are my absolute favorite seasonal dessert. With a buttery crust, tender apple filling, and rich caramel drizzle, this recipe transforms simple ingredients into an irresistible fall dessert that everyone will love.
I discovered this caramel apple bars recipe during a weekend baking experiment, and it quickly became a family tradition. The combination of sweet caramel and tart apples creates a perfect balance that makes these bars impossible to resist. Whether you’re hosting a gathering or craving a delightful afternoon snack, these homemade apple treats will not disappoint.
The beauty of this recipe lies in its simplicity. You don’t need advanced baking skills to create a dessert that looks and tastes like it came from a professional bakery. With just a few basic ingredients and some love, you’ll have a crowd-pleasing treat that captures the essence of autumn in every bite.
Why These Caramel Apple Bars Will Become Your New Favorite Dessert
Get ready to fall in love with the most delightful apple dessert bars you’ll ever taste! These caramel apple bars are more than just a simple treat – they’re a culinary experience that combines classic flavors with family-friendly baking excitement.
The Perfect Balance of Sweet and Tart
My easy apple recipe strikes the ultimate flavor harmony. The crisp, tangy apples cut through rich caramel, creating a taste sensation that dances on your palate. Each bite delivers a perfect blend of sweet caramel and bright fruit notes that will have everyone asking for seconds.
- Crisp apple slices provide natural tartness
- Smooth caramel adds decadent sweetness
- Buttery crust complements the filling perfectly
Make-Ahead Convenience for Parties
Hosting doesn’t have to be stressful. These apple dessert bars are a game-changer for busy home cooks. You can prepare them in advance, letting them chill in the refrigerator until party time. This make-ahead magic means less stress and more enjoyment for you and your guests.
Kid-Friendly Kitchen Activity
Baking together creates magical memories. This family-friendly baking project is perfect for introducing children to the joy of cooking. Kids can help measure ingredients, mix the filling, and sprinkle toppings – making it an interactive and fun experience for the whole family.
Essential Ingredients for Your Caramel Apple Bar Recipe
Creating the perfect caramel apple bars starts with selecting the right ingredients. My recipe combines classic flavors and simple components that will transform your baking experience. Let’s dive into the key elements that make these bars irresistible.
Selecting the Best Apple Varieties for Baking
Not all apples are created equal when it comes to baking. For these caramel apple bars, I recommend using apple varieties that hold their shape and offer a balanced sweetness. Top choices include:
- Granny Smith: Provides a tart contrast to the sweet caramel
- Honeycrisp: Offers a perfect balance of sweetness and firmness
- Braeburn: Delivers excellent flavor and maintains texture
Crafting the Perfect Homemade Caramel Sauce
While store-bought caramel sauce works, my homemade caramel sauce elevates these bars to a new level of deliciousness. You’ll need just a few simple ingredients:
- Granulated sugar
- Heavy cream
- Unsalted butter
- Vanilla extract
- A pinch of salt
Building the Shortbread Crust Foundation
The shortbread crust serves as the delectable base for our caramel apple bars. I use a classic combination of ingredients that creates a buttery, crumbly foundation:
- All-purpose flour
- Powdered sugar
- Cold unsalted butter
- Vanilla extract
By carefully selecting these ingredients, you’ll create caramel apple bars that are sure to impress family and friends. Each component plays a crucial role in developing the rich, complex flavors of this delightful dessert.
Kitchen Tools and Equipment Needed
Creating delicious caramel apple bars requires some key baking essentials and kitchen gadgets for desserts. I’ve put together a comprehensive list of tools that will make your baking experience smooth and enjoyable.
An apple peeler is a game-changer when preparing your fruit filling. This handy tool saves time and ensures uniform apple slices for your dessert. While not absolutely necessary, it can significantly streamline your preparation process.
- Mixing Bowls: Choose various sizes for different recipe components
- Measuring Tools
- Liquid measuring cups
- Dry measuring cups
- Measuring spoons
- Baking Equipment
- 9×13 inch baking pan
- Parchment paper
- Pastry cutter or food processor
For those passionate about baking, investing in quality kitchen gadgets for desserts can elevate your culinary skills. I recommend having these tools ready before starting your caramel apple bar recipe.
| Tool | Purpose | Recommended Brand |
|---|---|---|
| Apple Peeler | Quickly prepare apple slices | OXO Good Grips Peeler |
| Pastry Cutter | Create perfect crumb texture | Cuisinart Pastry Blender |
| Baking Pan | Bake and serve bars | USA Pan Rectangular Cake Pan |
Don’t worry if you’re missing a few items. Many of these baking essentials can be substituted or purchased affordably. The key is having fun and enjoying the baking process!
Step-by-Step Baking Instructions
Creating delicious caramel apple bars requires precision and care. I’ll walk you through each step of the layered dessert technique to ensure perfect results every time. Let’s break down the process into manageable stages that will help you master how to make apple bars like a pro.
Preparing the Crust
Start by creating a solid foundation for your dessert. In a large mixing bowl, combine flour, sugar, and cold butter. Use your fingers to work the mixture until it resembles coarse crumbs. Press the crust mixture firmly into a lined 9×13 inch baking pan, ensuring an even layer that will support your apple filling.
- Use cold butter for a flakier crust
- Press crust evenly to create a uniform base
- Prebake the crust for 15 minutes at 350°F
Apple Filling Technique
For the apple layer, select firm baking apples like Granny Smith or Honeycrisp. Slice apples thinly and evenly to ensure consistent cooking. Toss apple slices with cinnamon, brown sugar, and a touch of lemon juice to enhance their natural flavor and prevent browning.
- Slice apples uniformly
- Season with warm spices
- Arrange in overlapping layers for maximum coverage
Caramel Drizzle Tips
The caramel topping transforms these bars from good to extraordinary. I recommend making a quick homemade caramel sauce by melting butter, brown sugar, and heavy cream. Drizzle the warm caramel generously over the apple layer, creating beautiful golden swirls that will make your dessert irresistible.
Bake the completed bars at 350°F for 35-40 minutes until the edges turn golden brown and the filling becomes bubbly. Allow the bars to cool completely before cutting to ensure clean, beautiful slices that showcase your layered dessert technique.
Storage Tips and Serving Suggestions
My caramel apple bars are a delightful dessert that can be enjoyed fresh or stored for later. When it comes to how to store apple bars, I recommend keeping them in an airtight container in the refrigerator. They’ll stay fresh for up to 5 days, maintaining their delicious texture and flavor.
For dessert presentation ideas, I love serving these bars slightly warm. A quick 10-second microwave zap or a brief stint in a low-temperature oven can bring back that just-baked magic. Pro tip for reheating baked goods: always use low heat to prevent drying out the bars.
Elevate your serving game by pairing the bars with a scoop of vanilla ice cream or a light dusting of powdered sugar. If you’re planning ahead, these bars freeze beautifully. Wrap individual portions in plastic wrap, then place in a freezer-safe container. They’ll keep for up to 3 months, ready to thaw whenever you need a sweet treat.
Guests will be impressed by your baking skills, and you’ll have a versatile dessert that works for casual family nights or elegant dinner parties. Remember, the key to great dessert presentation is serving with confidence and a smile!