
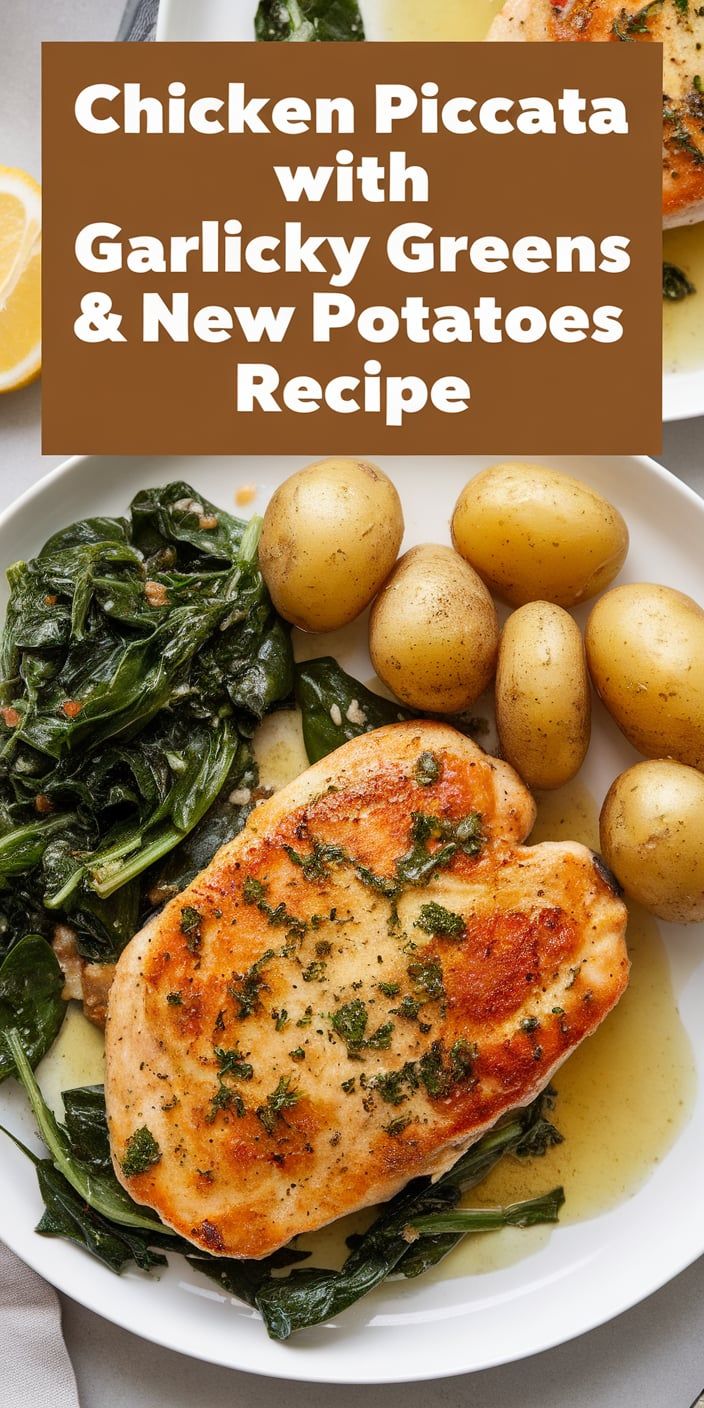
Let me introduce you to an incredible Italian-American recipe that will transform your home cooking: chicken piccata with a delightful twist. This mouthwatering dish combines tender chicken cutlets, a vibrant lemon-caper sauce, and hearty garlicky greens with crispy new potatoes.
My version of chicken piccata elevates the classic recipe by adding nutritious greens and perfectly roasted potatoes. The result is a restaurant-quality meal that’s both elegant and comforting. The zesty lemon-caper sauce brings bright, tangy flavors that complement the juicy chicken perfectly.
Whether you’re cooking for family or hosting a dinner party, this chicken piccata recipe promises to impress. With simple ingredients and straightforward techniques, you’ll create a memorable meal that looks and tastes professionally prepared.
The Perfect Italian-American Classic: Chicken Piccata with a Twist
Chicken piccata represents a delightful fusion of culinary traditions in Italian-American cuisine. This beloved dish tells a rich story of cultural adaptation and flavor innovation that has captured the hearts of home cooks and restaurant chefs alike.
History of Chicken Piccata Origin
The roots of chicken piccata trace back to Italian immigrant communities in the United States. While traditional Italian cooking typically used veal, American kitchens transformed the recipe by substituting chicken, making it more accessible and affordable.
- Originated in Italian-American neighborhoods
- Adapted from classic veal piccata recipe
- Became popular in mid-20th century restaurants
Why Add Greens and Potatoes
I’ve chosen to enhance the classic chicken piccata by incorporating garlicky greens and new potatoes. This twist adds nutritional value and creates a more balanced, satisfying meal that transforms the traditional recipe into a complete dining experience.
Essential Kitchen Tools
Preparing an authentic chicken piccata requires specific kitchen essentials that will elevate your cooking process:
- Heavy-bottomed skillet
- Meat mallet
- Sharp chef’s knife
- Measuring cups and spoons
- Cutting board
Ingredients You’ll Need for This Restaurant-Quality Dish
Creating an authentic chicken piccata requires carefully selected ingredients that bring out the classic flavors of this beloved Italian-American dish. I’ll walk you through the essential chicken piccata ingredients that will transform your home cooking into a restaurant-quality meal.
Chicken and Protein Components
- 4 boneless, skinless chicken breasts
- 1/2 cup all-purpose flour for dredging
- Kosher salt and freshly ground black pepper
- 2 large eggs (for egg wash)
Lemon-Caper Sauce Components
- 1/2 cup fresh lemon juice
- 1/4 cup brined capers, drained
- 1/2 cup unsalted butter
- 1/4 cup chicken stock
Fresh Herbs and Garnishes
- 2 tablespoons chopped fresh parsley
- 2 tablespoons chopped fresh basil
- 1 clove minced garlic
The secret to an exceptional lemon-caper sauce lies in using high-quality, fresh ingredients. I recommend selecting organic lemons for the brightest citrus flavor and purchasing brined capers from a specialty food store for authentic taste.
Pro tip: When selecting chicken breasts, look for uniform thickness to ensure even cooking. If needed, use a meat mallet to pound the chicken to an even 1/4-inch thickness for the most tender results.
Preparing Your Chicken Piccata with Garlicky Greens & New Potatoes Recipe
Creating the perfect chicken piccata requires attention to detail and some key cooking techniques. I’ll walk you through each step of this delightful dish, ensuring you can replicate restaurant-quality results in your own kitchen.
Chicken Preparation Tips
Chicken piccata preparation starts with selecting the right cut. I recommend using boneless, skinless chicken breasts for the most tender results. To prepare:
- Butterfly the chicken breasts carefully
- Place between plastic wrap
- Pound to 1/4-inch thickness using a meat mallet
- Season generously with salt and black pepper
Crafting the Lemon-Caper Sauce
The lemon-caper sauce recipe is the heart of this dish. I’ll share my foolproof method for creating a vibrant, tangy sauce that elevates the chicken:
- Melt butter in a skillet over medium heat
- Add minced garlic and sauté briefly
- Deglaze with fresh lemon juice
- Stir in capers
- Finish with a splash of white wine
Cooking Potatoes and Greens
To complete the meal, I’ll guide you through preparing perfectly cooked potatoes and garlicky greens:
| Ingredient | Cooking Method | Time |
|---|---|---|
| New Potatoes | Boil until tender, then roast | 20 minutes |
| Green Vegetables | Sauté with garlic | 5-7 minutes |
By following these cooking techniques, you’ll create a restaurant-worthy chicken piccata that’s sure to impress your family and friends.
Master the Art of Piccata Sauce
Creating the perfect piccata sauce requires precision and understanding of flavor balancing. My go-to piccata sauce techniques transform a simple chicken dish into a restaurant-quality masterpiece. The key lies in carefully selecting and combining ingredients that complement each other.
To achieve the ideal sauce consistency, I focus on three critical components:
- Fresh lemon juice for brightness
- Butter for richness
- Capers for briny complexity
The secret to exceptional piccata sauce is maintaining the right balance between acidity and richness. I start by deglazing the pan with white wine, which helps capture all the delicious browned bits from the chicken. Gradually whisking in cold butter creates a silky texture that clings perfectly to the meat.
Temperature control is crucial when developing sauce consistency. I recommend using medium-low heat and removing the pan from direct heat while incorporating butter. This prevents separation and ensures a smooth, glossy finish that elevates the entire dish.
My top tip for piccata sauce techniques is to taste and adjust. A pinch of salt or extra lemon juice can transform an average sauce into something extraordinary. The goal is a harmonious blend of tangy, rich, and bright flavors that dance on your palate.
Tips for Perfectly Tender Chicken Cutlets
Mastering chicken cutlet preparation requires skill and precision. I’ll share my top techniques to help you create restaurant-quality chicken cutlets that are consistently tender, juicy, and delicious.
Preparing excellent chicken cutlets starts with understanding key culinary techniques. From proper pounding to expert dredging methods, each step plays a crucial role in achieving that perfect golden-brown exterior and succulent interior.
Proper Pounding Technique
Chicken cutlet preparation begins with even thickness. Use these steps to pound your chicken perfectly:
- Place chicken between plastic wrap or wax paper
- Use a meat mallet or rolling pin
- Pound gently from center outward
- Aim for 1/4-inch thickness
Dredging Secrets
Dredging techniques are essential for creating a crispy, flavorful coating. My preferred method involves a three-step process:
- Seasoned flour mixture
- Egg wash
- Breadcrumb coating
| Dredging Stage | Key Ingredients | Purpose |
|---|---|---|
| Flour Stage | All-purpose flour, salt, pepper | Creates initial binding layer |
| Egg Wash | Beaten eggs, small milk splash | Helps breadcrumbs adhere |
| Breadcrumb Coating | Panko or seasoned breadcrumbs | Provides crispy exterior |
Temperature Control
Cooking temperature is critical for perfect chicken cutlets. I recommend maintaining a medium-high heat around 350-375°F. This ensures a crispy exterior while keeping the inside tender and fully cooked.
Remember, patience and practice are key to mastering these chicken cutlet preparation techniques. With these tips, you’ll create deliciously crispy and tender cutlets every time.
Serving and Plating Suggestions
Creating a restaurant-worthy presentation for your Chicken Piccata requires careful attention to plating techniques that will elevate your home-cooked meal. I’ll guide you through transforming your dish into a visually stunning culinary experience.
Start by selecting a white or neutral-toned plate that allows the vibrant colors of the dish to pop. Arrange the chicken cutlet slightly off-center, creating an elegant diagonal placement. Nestle the garlicky greens and new potatoes strategically around the chicken to create visual balance.
- Garnish ideas to enhance the presentation:
- Fresh parsley sprigs
- Lemon wedges
- Thin lemon slices
- Scattered capers
For wine pairing, I recommend a crisp Pinot Grigio or an unoaked Chardonnay. These wines complement the bright lemon sauce and cut through the richness of the chicken. The acidity in these wines will perfectly match the tangy piccata sauce.
To add a professional touch, drizzle the lemon-caper sauce over the chicken just before serving. Sprinkle some chopped fresh herbs on top for a burst of color and additional flavor. These simple plating techniques will transform your dish from home cooking to gourmet dining.
Storage and Reheating Guidelines
Preserving the delicious flavors of your Chicken Piccata requires careful leftover storage techniques. I recommend storing the chicken, sauce, greens, and potatoes separately in airtight containers. This approach helps maintain the dish’s texture and prevents soggy ingredients. Place each component in sealed containers in the refrigerator, where they’ll stay fresh for up to 3-4 days.
When it comes to reheating techniques, gentle warming is key to food safety and maintaining the dish’s original quality. For the chicken, use a skillet on low heat with a splash of chicken broth to prevent drying out. Warm the potatoes and greens in a preheated oven at 350°F for about 10 minutes. The lemon-caper sauce can be quickly reheated in a small saucepan, stirring continuously to prevent separation.
Freezing is another option for longer-term storage. Wrap the chicken and vegetables separately in freezer-safe containers or heavy-duty aluminum foil. They’ll keep well for up to 2 months. When you’re ready to enjoy your meal again, thaw overnight in the refrigerator and reheat using the methods mentioned above. Always ensure the internal temperature reaches 165°F to guarantee food safety before serving.
Pro tip: Transform your leftovers into a delightful lunch by slicing the chicken and serving it over a fresh salad or creating a quick sandwich with the remaining ingredients. This approach not only reduces food waste but also gives you a delicious meal with minimal effort.