
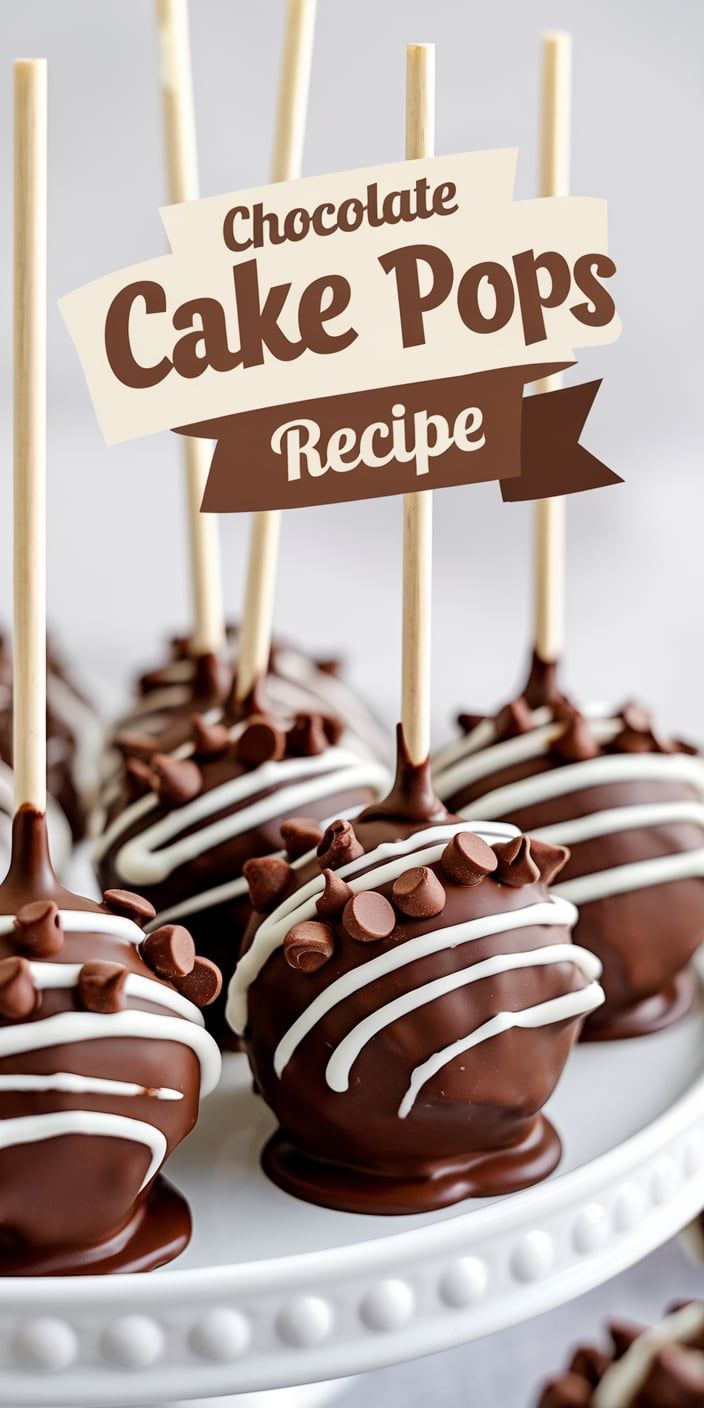
Creating delicious homemade cake pops is my absolute passion! These bite-sized chocolate dessert recipe delights are perfect for parties, gatherings, or just satisfying your sweet tooth. Chocolate cake pops combine the rich flavor of chocolate with a fun, portable treat that everyone loves.
When I first discovered how to make these delectable treats, I was amazed at how simple the process could be. Each cake pop becomes a mini work of art, transforming basic ingredients into something truly spectacular. From birthday parties to casual get-togethers, these homemade cake pops never fail to bring smiles to everyone’s faces.
In this recipe, I’ll walk you through creating the most amazing chocolate cake pops you’ve ever tasted. Whether you’re a baking novice or an experienced home chef, you’ll find these step-by-step instructions easy to follow. Get ready to impress your friends and family with a dessert that’s both delicious and visually stunning!
Why I Love Making Chocolate Cake Pops at Home
Creating chocolate cake pops in my own kitchen has become more than just a baking activity – it’s a delightful experience that brings joy and creativity to my dessert-making routine. The benefits of homemade cake pops are truly remarkable, offering me complete control over every delicious detail.
My passion for cake pop advantages starts with customization. Unlike store-bought treats, homemade cake pops allow me to experiment with flavors, decorations, and ingredients. I can craft unique combinations that match specific themes or personal preferences, which is impossible with pre-made options.
- Personalized flavor selections
- Cost-effective alternative to bakery purchases
- Fun family baking activity
- Creative outlet for dessert design
The economic benefits of homemade cake pops are significant. I’ve discovered that making them at home costs a fraction of purchasing from specialty bakeries. A single batch can yield multiple servings, making them perfect for parties, gatherings, or simply treating myself to a special dessert.
Beyond the practical advantages, cake pops offer an incredible opportunity for bonding. When I invite friends or family into the kitchen, we transform baking into a shared experience. Each person can contribute to decorating, turning a simple recipe into a memorable moment of connection.
Essential Ingredients for Perfect Cake Pops
Creating delicious cake pops starts with selecting the right cake pop ingredients. I’ve learned through years of baking that the quality of your ingredients makes all the difference in the final product. Let me break down the essential components you’ll need to craft amazing chocolate cake pops.
Choosing the Right Chocolate for Cake Pops
The chocolate for cake pops is crucial to achieving that perfect coating. I recommend using high-quality chocolate with a smooth melting consistency. Your options include:
- Dark chocolate (60-70% cocoa content)
- Milk chocolate for a sweeter flavor
- White chocolate for elegant decorations
Best Cake Base Options
Selecting the right cake base for cake pops determines the texture and flavor of your treats. My top recommendations include:
- Classic chocolate cake
- Red velvet cake
- Vanilla sponge cake
- Funfetti cake for playful variations
Frosting and Binding Ingredients
The secret to perfectly formed cake pops lies in the right frosting and binding ingredients. You’ll want to use cream cheese frosting or buttercream to help the cake crumbs stick together. Aim for just enough frosting to create a moldable consistency without making the mixture too wet.
Pro tip: Always use room temperature ingredients for the best mixing and binding results. The right combination of chocolate, cake base, and frosting will elevate your cake pops from good to absolutely spectacular!
Kitchen Tools and Equipment Needed
Creating delicious chocolate cake pops requires the right cake pop tools and cake pop making equipment. I’ve learned through years of baking that having the proper tools can make all the difference in your cake pop success.
Let me share the essential cake pop tools you’ll want in your kitchen:
- Cake pop maker or baking pan
- Electric mixer
- Silicone spatula
- Lollipop sticks
- Melting pot or double boiler
- Styrofoam block for drying
- Decorating brushes
When selecting cake pop making equipment, quality matters. I recommend investing in a few key pieces that will help you create professional-looking treats.
| Tool | Purpose | Estimated Cost |
|---|---|---|
| Cake Pop Maker | Creates uniform cake balls | $30-$50 |
| Candy Melting Pot | Perfect chocolate coating | $20-$40 |
| Decorating Stand | Helps cake pops dry evenly | $15-$25 |
Don’t worry if you don’t have every specialized tool. Many cake pop tools can be substituted with regular kitchen equipment. A baking sheet can replace a styrofoam block, and a regular bowl works for melting chocolate.
Pro tip: Start with basic cake pop making equipment and gradually add more specialized tools as you become more experienced. Your skills will improve with practice, regardless of your initial equipment.
Chocolate Cake Pops Recipe
Creating delicious chocolate cake pops is easier than you might think! My cake pop tutorial will walk you through each step of making these delightful treats that are perfect for parties, gifts, or just satisfying your sweet tooth. With this chocolate cake pop recipe, you’ll become a pro at how to make cake pops in no time.
Cake Preparation Steps
Start by baking a standard chocolate cake in a 9×13 inch pan. Once cooled, crumble the cake into fine, even crumbs in a large mixing bowl. The texture should be consistent and free of large chunks.
- Bake cake at 350°F for 30-35 minutes
- Allow cake to cool completely
- Crumble cake into fine, even pieces
Forming and Shaping the Balls
When learning how to make cake pops, the shaping process is crucial. Mix in frosting gradually until the cake crumbs hold together. Use a small cookie scoop to ensure uniform size, then roll each portion between your palms to create smooth, round balls.
- Add 3-4 tablespoons of frosting
- Mix until mixture is moldable
- Roll into 1-inch diameter balls
- Chill balls for 15-20 minutes
Dipping and Decorating Techniques
For the perfect chocolate coating in your cake pop tutorial, melt chocolate carefully. Dip cake pop sticks into melted chocolate before inserting into chilled cake balls. This helps secure the stick and creates a professional finish.
- Melt chocolate in double boiler
- Dip stick tips in chocolate before inserting
- Carefully dip entire cake pop in melted chocolate
- Tap gently to remove excess coating
- Decorate with sprinkles or drizzled chocolate
Tips for Troubleshooting Common Issues
Creating cake pops can be tricky, and even experienced bakers encounter cake pop problems. Don’t worry! I’ve learned several cake pop troubleshooting techniques that can help you overcome most challenges.
When making cake pops, you might face several common issues. Here are the most frequent problems and their solutions:
- Cake Balls Falling Off the Stick
- Chill cake balls thoroughly before inserting sticks
- Use a small amount of melted chocolate as “glue” when attaching sticks
- Ensure cake mixture is not too wet or dry
- Cracking Chocolate Coating
- Allow cake pops to come to room temperature slowly
- Thin chocolate coating with coconut oil for flexibility
- Avoid sudden temperature changes
I recommend keeping your cake pop mixture consistent. The right balance of cake crumbs and frosting is crucial for cake pop success. Too much frosting makes them too soft, while too little prevents proper binding.
| Problem | Cause | Solution |
|---|---|---|
| Uneven Shapes | Inconsistent cake ball size | Use a cookie scoop for uniform sizing |
| Cake Pops Sliding | Warm environment | Refrigerate between dipping and decorating |
Practice makes perfect with cake pops. Each attempt teaches you something new about cake pop troubleshooting. Don’t get discouraged if your first batch isn’t picture-perfect!
Creative Decorating Ideas and Variations
Transforming cake pops into works of art is one of the most exciting aspects of baking. My creative cake pops have always been the highlight of family gatherings and birthday parties. With a few simple techniques, you can turn these delightful treats into stunning masterpieces that will impress everyone.
When exploring cake pop decorating ideas, I’ve discovered several approaches that can elevate your dessert from simple to spectacular:
- Create themed cake pops for specific occasions
- Experiment with unique color combinations
- Add textural elements for visual interest
- Use professional decorating techniques
Seasonal Decorating Themes
Seasonal themed cake pops are a fantastic way to celebrate holidays and special events. For Halloween, I love creating spooky designs with orange and black coating. Christmas cake pops can feature festive colors like red and green, while summer events call for bright, tropical decorations.
Color and Texture Combinations
Mixing colors and textures can transform simple cake pops into stunning treats. Consider combining smooth chocolate coating with crunchy sprinkles or metallic dragees. Ombré color techniques can create sophisticated designs that look professionally crafted.
Party-Perfect Presentations
Presentation is key when serving cake pops at events. I recommend using decorative stands, arranging them in creative patterns, or packaging them individually with ribbons for a gorgeous display. Your guests will be amazed by these delightful, bite-sized desserts that are as beautiful as they are delicious.
Storage and Make-Ahead Instructions
Storing cake pops correctly can help you prepare delicious treats in advance and maintain their perfect texture and flavor. I’ll share my best tips for make-ahead cake pops that will keep them fresh and delightful.
When it comes to storing cake pops, you have several options depending on your timeline:
- Room Temperature Storage:
- Keep cake pops in an airtight container
- Place parchment paper between layers
- Consume within 2-3 days
- Refrigerator Storage:
- Wrap individually in plastic wrap
- Store in sealed container
- Good for up to 7 days
- Freezer Storage:
- Ideal for make-ahead cake pops
- Wrap tightly in plastic and foil
- Freeze for up to 6 weeks
For the best make-ahead cake pops, I recommend preparing the cake balls and freezing them before final coating. This technique helps maintain texture and makes decorating easier. Thaw frozen cake pops in the refrigerator overnight before serving to prevent condensation.
Pro tip: Always let cake pops come to room temperature before serving to ensure the best taste and texture. Storing cake pops properly will help you create impressive desserts with minimal last-minute stress.
Serving Suggestions and Party Presentation Ideas
When it comes to cake pop serving ideas, I’ve discovered some fantastic ways to turn these delightful treats into show-stopping desserts. A gorgeous cake pop display can transform any gathering from ordinary to extraordinary. At my last family celebration, I created a stunning vertical display using a styrofoam cone covered in metallic paper, inserting cake pops at different heights to create a dramatic centerpiece.
For elegant party presentations, I recommend mixing cake pop displays with varying heights and styles. Consider using vintage cake stands, rustic wooden boards, or sleek modern trays to showcase your chocolate cake pops. Color coordination is key – match your cake pop decorations to your event’s theme or color scheme. I love creating themed cake pop displays for birthdays, weddings, and holiday gatherings that instantly wow guests.
Transportation can be tricky with delicate cake pops. My go-to solution is using specialized cake pop holders or styrofoam blocks wrapped in decorative paper. These ensure your treats remain secure and perfectly positioned during transit. For gift packaging, clear cellophane bags tied with coordinating ribbons make these sweet treats look professionally prepared and irresistibly tempting.
Remember that presentation is about creativity and personal style. Experiment with different cake pop serving ideas to find what works best for your event. Whether you’re hosting an intimate gathering or a large celebration, these bite-sized delights are sure to be the star of the dessert table.