
Welcome to my kitchen! As a passionate baker, I’m thrilled to share my favorite classic red velvet cake recipe that has been a treasured Southern dessert in my family for generations. This homemade red velvet cake isn’t just a dessert – it’s a slice of culinary tradition that captures the heart of American baking.
The magic of this classic red velvet cake lies in its stunning crimson color and incredibly soft, velvety texture. Each bite tells a story of rich chocolate undertones and a delicate crumb that melts perfectly in your mouth. What makes this Southern dessert so special is its unique blend of cocoa, buttermilk, and that signature vibrant red hue.
My recipe promises to deliver a showstopping homemade red velvet cake that will impress your family and friends. Whether you’re celebrating a special occasion or simply craving a decadent treat, this classic recipe is sure to become a staple in your baking repertoire.
Why Red Velvet Cake Holds a Special Place in American Baking
Red velvet cake represents more than just a dessert in American baking traditions. It’s a culinary icon that tells a rich story of creativity, innovation, and cultural heritage. The unique characteristics of red velvet cake have captivated bakers and dessert lovers for generations.
The Fascinating History Behind Red Velvet
The red velvet cake history dates back to the early 1900s, emerging during a time of significant culinary experimentation. Originally, the cake’s distinctive color came from a chemical reaction between cocoa powder and buttermilk, not artificial food coloring. During the Great Depression, the Adams Extract Company popularized the bright red version we know today.
- Originated in the early 20th century
- Initially created through natural cocoa reactions
- Became commercially popular in the 1940s
What Makes Red Velvet Unique
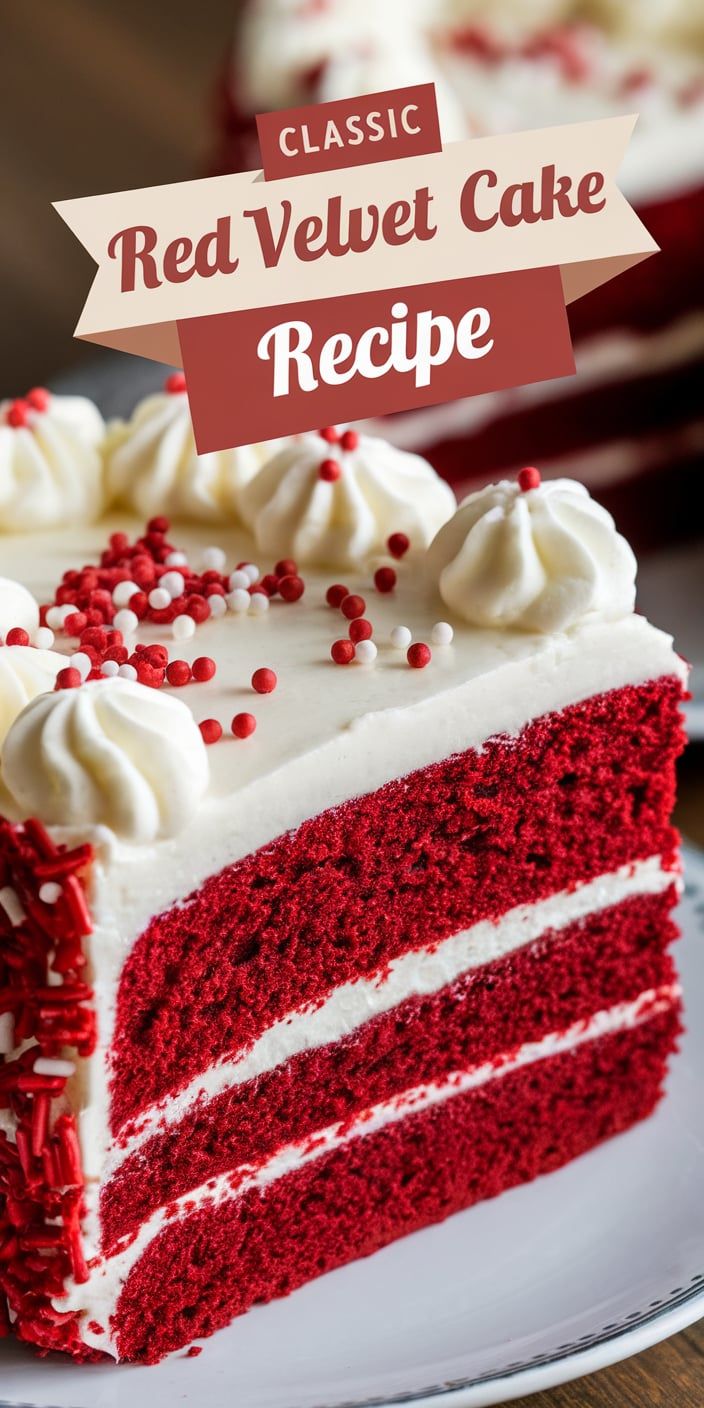
Red velvet’s unique red velvet characteristics set it apart from other cakes. The subtle cocoa flavor, combined with a velvety texture, creates a truly distinctive dessert. The cream cheese frosting adds a tangy complement that balances the cake’s sweetness perfectly.
| Characteristic | Description |
|---|---|
| Texture | Smooth and velvet-like |
| Flavor Profile | Mild cocoa with tangy cream cheese |
| Color | Vibrant red |
My Personal Connection to This Recipe
Growing up in the South, red velvet cake was a staple at family gatherings. My grandmother’s recipe, passed down through generations, represents more than just a dessert—it’s a cherished family tradition that connects us to our culinary roots.
Essential Ingredients for the Perfect Red Velvet Cake
Creating an authentic red velvet cake starts with selecting the right red velvet cake ingredients. I’ll walk you through the key components that make this dessert so special and help you understand why each ingredient matters.
The foundation of a great red velvet cake involves several crucial elements. Buttermilk in red velvet plays a transformative role, providing moisture and a subtle tanginess that defines the cake’s unique flavor profile. This ingredient helps create a tender crumb that melts in your mouth.
- All-purpose flour (2 1/2 cups)
- Granulated sugar (1 1/2 cups)
- Cocoa powder for red velvet (2-3 tablespoons)
- Buttermilk (1 cup)
- Vegetable oil (1/2 cup)
- Large eggs (2)
- Red food coloring (2 tablespoons)
- Vanilla extract (1 teaspoon)
- White vinegar (1 teaspoon)
- Baking soda (1 teaspoon)
The magic of cocoa powder for red velvet lies in its ability to provide a subtle chocolate undertone without overwhelming the cake’s delicate flavor. I recommend using high-quality unsweetened cocoa powder for the best results. When combined with the other ingredients, it creates that signature deep red color and rich taste that makes red velvet cake so irresistible.
Pro tip: Always use room temperature ingredients to ensure even mixing and a smooth batter. Fresh buttermilk and high-quality food coloring will elevate your red velvet cake from good to extraordinary.
Classic Red Velvet Cake Recipe: Step-by-Step Instructions
Creating the perfect red velvet cake recipe requires precision and passion. I’ll guide you through each step of how to make red velvet cake, ensuring your baking adventure is both enjoyable and successful.
Preparing Your Baking Equipment
Before diving into your red velvet baking tips, gather these essential tools:
- Two 9-inch round cake pans
- Electric mixer
- Large mixing bowls
- Measuring cups and spoons
- Cooling rack
- Sifter or fine-mesh strainer
Mixing the Batter
The secret to an incredible red velvet cake recipe lies in careful ingredient preparation. Start by bringing all ingredients to room temperature. This ensures smooth mixing and consistent texture.
- Sift together dry ingredients: flour, cocoa powder, and salt
- Cream butter and sugar until light and fluffy
- Add eggs one at a time, mixing thoroughly
- Incorporate buttermilk and vanilla extract
- Gradually mix in dry ingredients
- Add red food coloring for signature vibrant color
Baking Tips for Best Results
When learning how to make red velvet cake, temperature and technique matter. Preheat your oven to 350°F and prepare pans with butter and flour. Bake for 25-30 minutes, checking doneness with a toothpick. Let cakes cool completely before frosting.
My red velvet baking tips include avoiding overmixing and using fresh ingredients for the most delectable results. With practice, you’ll master this classic American dessert!
Cream Cheese Frosting and Assembly Techniques
Creating the perfect cream cheese frosting recipe is an art that can transform your red velvet cake from good to extraordinary. I’ll share my tried-and-true method for making a silky smooth frosting that complements the rich flavor of red velvet cake.
For the cream cheese frosting recipe, you’ll need these key ingredients:
- 16 oz cream cheese, softened
- 1/2 cup unsalted butter, room temperature
- 4 cups powdered sugar
- 1 tsp vanilla extract
- Pinch of salt
When learning how to frost red velvet cake, temperature matters. Start by beating the cream cheese and butter until completely smooth. Gradually add powdered sugar, mixing on low speed to prevent a powdery mess. The key is achieving a creamy, spreadable consistency.
Red velvet cake assembly requires patience and precision. Begin by leveling your cake layers with a serrated knife. Place the first layer on a cake stand and spread a generous amount of cream cheese frosting. Carefully stack the next layer, ensuring it’s centered and level.
For a professional finish, apply a thin crumb coat first. Refrigerate the cake for 15 minutes, which helps seal in crumbs. Then, generously frost the entire cake with your remaining cream cheese frosting. You can create beautiful texture by using an offset spatula or piping decorative rosettes around the edges.
Pro tip: Keep your frosting tools clean and smooth by occasionally dipping your spatula in hot water. This trick helps create that flawless, bakery-style finish every home baker dreams of achieving.
Tips for Storing and Serving Your Red Velvet Masterpiece
After creating your stunning red velvet cake, proper storage is crucial to maintaining its delightful texture and flavor. When learning how to store red velvet cake, I recommend keeping it in an airtight container at room temperature for up to 3 days. If you’re planning to enjoy it later, the refrigerator becomes your best friend for extending the red velvet cake shelf life.
Serving red velvet cake is an art form in itself. I always suggest removing the cake from the refrigerator about 30 minutes before serving to allow it to reach room temperature. This helps restore its soft, velvety texture and brings out the rich cream cheese frosting’s full flavor profile. Pair your slice with a cold glass of milk or a hot cup of coffee for an absolutely divine experience.
For longer-term storage, freezing is an excellent option. Wrap individual slices or the entire cake tightly in plastic wrap and then in aluminum foil. When you’re ready to enjoy, thaw the cake in the refrigerator overnight. Pro tip: Never leave your red velvet cake at room temperature for more than 2 hours to ensure food safety and maintain its incredible taste.
If you’ve made extra frosting, store it separately in an airtight container in the refrigerator for up to a week. This way, you can always touch up your cake or create a fresh batch of cupcakes whenever the craving strikes. Remember, a well-stored red velvet cake is a delicious cake!