
Craving a delightful quick dessert that transforms simple ingredients into something magical? My easy apple crisp recipe is your ultimate solution for a mouthwatering homemade apple crisp that will impress everyone at the table.
I’ve perfected this recipe to be incredibly simple, requiring minimal preparation time and delivering maximum flavor. Whether you’re a busy home cook or someone who wants a delectable dessert without spending hours in the kitchen, this quick dessert will become your new favorite.
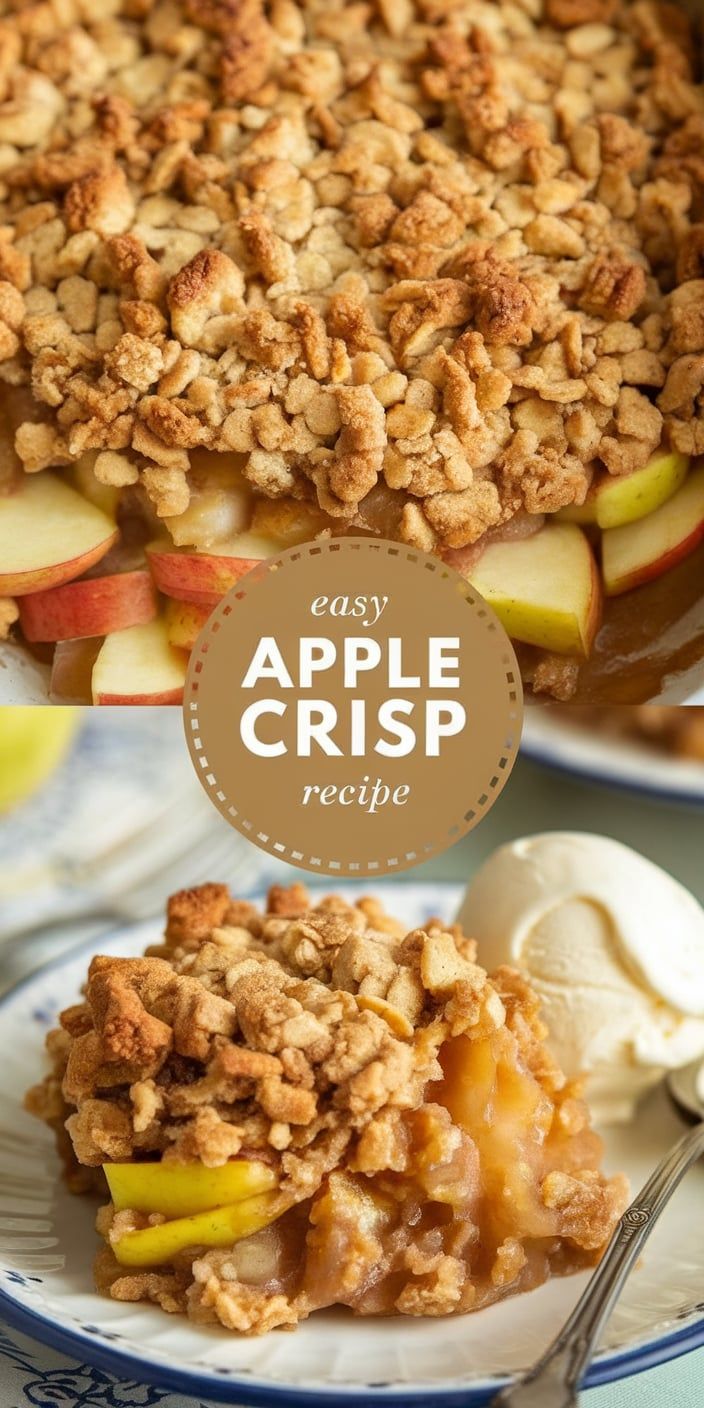
The beauty of this homemade apple crisp lies in its simplicity. With just a few pantry staples and fresh apples, you can create a warm, comforting dessert that feels like a big hug on a plate. No fancy techniques or complicated steps – just pure, delicious goodness that comes together in minutes.
Get ready to discover a foolproof recipe that will make you look like a baking pro, even if you’re a complete beginner in the kitchen. Let’s dive into this irresistible apple crisp that’s sure to become a staple in your dessert repertoire!
Why This Apple Crisp Recipe Will Become Your Go-To Dessert
Discovering the perfect dessert that combines simplicity, deliciousness, and comfort can be a game-changer for home bakers. My apple crisp recipe is exactly that – a beginner-friendly dessert that promises to become a staple in your kitchen. Let me share why this comfort food will win your heart and become your ultimate go-to treat.
Perfect for Beginner Bakers
Baking can seem intimidating, but this apple crisp recipe breaks down those barriers. With straightforward steps and minimal technical skills required, even novice bakers can create a stunning dessert. The recipe forgives small mistakes and allows for creativity, making it an ideal starting point for anyone wanting to explore the world of baking.
- No complex techniques needed
- Simple ingredient list
- Easy-to-follow instructions
- Foolproof method for success
Year-Round Comfort Food
One of the best aspects of this affordable dessert recipe is its versatility. Whether it’s a chilly winter evening or a warm summer afternoon, apple crisp adapts to every season. You can serve it warm with vanilla ice cream in winter or enjoy it chilled as a refreshing summer treat.
| Season | Serving Suggestion |
|---|---|
| Winter | Warm with cinnamon vanilla ice cream |
| Summer | Chilled with fresh whipped cream |
| Fall | Paired with caramel drizzle |
| Spring | Topped with fresh berries |
Budget-Friendly Ingredients
Creating a delicious dessert doesn’t mean spending a fortune. This apple crisp recipe uses common pantry staples that are affordable and easily accessible. Most ingredients you’ll likely already have in your kitchen, making it an economical choice for satisfying your sweet tooth.
- Apples
- Flour
- Sugar
- Butter
- Cinnamon
Essential Ingredients for the Perfect Apple Crisp
Creating a delicious apple crisp starts with selecting the right apple crisp ingredients. I’ll guide you through the essential baking essentials that transform simple apple dessert components into a mouthwatering treat.
Apple Filling Ingredients
- 6-7 medium apples (preferably Granny Smith or Honeycrisp)
- 1/4 cup granulated sugar
- 2 tablespoons all-purpose flour
- 1 teaspoon ground cinnamon
- 1/4 teaspoon nutmeg
- 2 tablespoons fresh lemon juice
The key to a perfect apple crisp is choosing apples that balance sweetness and tartness. I recommend using a mix of apple varieties to create depth of flavor in your dessert.
Crumbly Topping Ingredients
- 1 cup all-purpose flour
- 1 cup rolled oats
- 3/4 cup brown sugar
- 1/2 cup unsalted butter (cold and cubed)
- 1/2 teaspoon ground cinnamon
- 1/4 teaspoon salt
These baking essentials will help you create a crispy, golden topping that perfectly complements the soft apple filling. The combination of flour, oats, and butter creates a texture that’s both crunchy and tender.
Pro tip: Make sure your butter is cold when mixing the topping. This helps create those delightful, crumbly clusters that make apple crisp so irresistible.
Easy Apple Crisp Recipe: Step-by-Step Instructions
Creating a delicious apple crisp doesn’t have to be complicated. I’ll walk you through the apple crisp recipe instructions that will help you make a mouthwatering dessert even if you’re a beginner baker. Let’s break down how to make apple crisp with simple steps that guarantee delectable results.
Preparing the Apple Filling
Selecting the right apples is crucial for your apple crisp recipe. I recommend using a mix of tart and sweet varieties like Granny Smith and Honeycrisp. Here’s how to prepare the filling:
- Wash and peel 6-7 medium-sized apples
- Slice apples into uniform 1/4-inch thick pieces
- Toss apple slices with:
- 1/4 cup granulated sugar
- 1 teaspoon ground cinnamon
- 2 tablespoons all-purpose flour
Making the Crumbly Topping
The secret to an incredible crisp is the topping. My baking tips include creating a perfectly textured crumb that’s both crunchy and buttery:
- Combine in a bowl:
- 1 cup all-purpose flour
- 1 cup brown sugar
- 1/2 cup cold butter, cubed
- 1/2 cup rolled oats
- Use your fingers to mix until crumbly
- Sprinkle evenly over apple mixture
Baking Tips for Best Results
Achieving the perfect apple crisp requires attention to baking details. Follow these expert tips to ensure a golden, bubbling dessert:
| Baking Tip | Details |
|---|---|
| Oven Temperature | 375°F (190°C) |
| Baking Time | 45-50 minutes |
| Doneness Indicator | Golden brown topping, bubbling edges |
Pro tip: Let the apple crisp cool for 15-20 minutes before serving to allow the filling to set. This ensures clean, beautiful slices and prevents burning your mouth on hot filling.
Best Apple Varieties and Substitutions
Choosing the right apple varieties can make or break your apple crisp recipe. As a passionate baker, I’ve discovered that not all apples are created equal when it comes to baking. The best apples for baking have a perfect balance of sweetness and tartness, with a firm texture that holds up during cooking.
For the ultimate apple crisp, I recommend these top apple varieties for crisp:
- Granny Smith: Tart and firm, perfect for balancing sweet toppings
- Honeycrisp: Crisp texture with a sweet-tart flavor profile
- Braeburn: Holds shape well and offers complex flavor
- Golden Delicious: Soft texture that creates a creamy filling
When considering fruit substitutions, you have several exciting options. Pears work wonderfully as an alternative to apples, bringing a similar texture and subtle sweetness. Peaches can add a summer twist to the classic crisp, while mixed berries create a vibrant and tangy dessert.
| Apple Variety | Flavor Profile | Baking Performance |
|---|---|---|
| Granny Smith | Tart and Sharp | Excellent Holding Shape |
| Honeycrisp | Sweet-Tart | Maintains Crispness |
| Braeburn | Complex and Balanced | Holds Structure Well |
Pro tip: Mix two or three different apple varieties to create a more complex and interesting flavor profile in your crisp. This approach ensures depth of taste and interesting texture variations that will impress your family and friends.
Serving Suggestions and Storage Tips
When it comes to apple crisp serving ideas, I’ve discovered the perfect ways to elevate this classic dessert. A scoop of premium vanilla ice cream transforms the warm, crumbly treat into a decadent experience. For an extra touch of indulgence, I recommend drizzling caramel sauce or sprinkling some chopped nuts on top.
Dessert pairings can make or break your apple crisp experience. I love serving this dish with a steaming cup of French press coffee or a smooth Earl Grey tea. On special occasions, a glass of dessert wine like Moscato can complement the sweet, fruity flavors beautifully. The key is balancing the warm, spiced crisp with a beverage that enhances its rich taste.
Leftover storage is crucial for maintaining the crisp’s delightful texture. I always let the dessert cool completely before covering it with aluminum foil or transferring it to an airtight container. When stored in the refrigerator, your apple crisp will stay fresh for up to 3-4 days. Reheat individual portions in the oven at 350°F for 10-15 minutes to restore that wonderful crispy topping and warm, gooey center.
Pro tip: If you want to prepare this dessert ahead of time, you can assemble the crisp and refrigerate it uncooked. Just pop it in the oven when you’re ready to serve, adding about 10-15 extra minutes to the baking time. This makes it perfect for dinner parties or family gatherings!