
Welcome to my ultimate BBQ ribs recipe that will transform your backyard cooking! I’ve spent years perfecting the art of creating mouthwatering homemade BBQ ribs that are so tender, they practically fall off the bone. This isn’t just another recipe – it’s a culinary adventure that will elevate your grilling skills to pro levels.
My BBQ ribs recipe is designed to help home cooks create restaurant-quality dishes right in their own kitchen. Whether you’re a grilling novice or a seasoned barbecue enthusiast, these instructions will guide you through creating the most delectable tender ribs you’ve ever tasted.
Preparing amazing BBQ ribs isn’t just about following steps – it’s about understanding the technique, selecting the right ingredients, and mastering the cooking process. In the following sections, I’ll break down everything you need to know to create incredible ribs that will impress your family and friends.
Get ready to embark on a flavor-packed journey that will make you the star of every backyard cookout. Your perfect BBQ ribs adventure starts right here!
The Secret Behind Mouthwatering BBQ Ribs
Crafting the perfect BBQ ribs starts with understanding the fundamentals of meat selection and preparation. Not all ribs are created equal, and choosing the right types of ribs can make or break your barbecue experience.
When it comes to BBQ ribs, you’ll encounter several delicious options that can elevate your grilling game. Let me break down the most popular types of ribs for BBQ enthusiasts:
- Baby Back Ribs: Tender and lean, these come from the top of the rib cage
- Spare Ribs: Meatier and more flavorful, cut from the belly side
- St. Louis-Style Ribs: Trimmed spare ribs with a more uniform shape
Choosing the Perfect Cut
Selecting the best ribs for BBQ requires a keen eye for meat quality. Look for ribs with consistent marbling and a fresh, pinkish-red color. The meat should feel firm to the touch and have a minimal amount of surface moisture.
Understanding Meat Quality
Meat quality plays a crucial role in your BBQ success. I recommend paying attention to these key factors:
- Marbling: Fine white fat streaks that ensure juiciness
- Color: Bright pink to red indicates freshness
- Thickness: Consistent meat coverage for even cooking
Pro tip: Always purchase ribs from a reputable butcher who understands the nuances of meat quality. The right selection can transform your BBQ from good to extraordinary.
Essential Ingredients for BBQ Ribs Recipe
Crafting the perfect BBQ ribs starts with selecting the right BBQ ribs ingredients. I’ve learned that quality matters most when preparing a mouth-watering rib dish. The key is to choose ingredients that will elevate your meat’s flavor and create a memorable dining experience.
For my ultimate dry rub for ribs, I recommend gathering these essential ingredients:
- Pork spare ribs or baby back ribs
- Brown sugar
- Paprika
- Garlic powder
- Kosher salt
- Black pepper
- Cayenne pepper
- Onion powder
When preparing your rib seasoning, balance is crucial. The combination of sweet and savory spices creates a complex flavor profile that transforms ordinary ribs into a culinary masterpiece. I always recommend using fresh, high-quality spices to ensure maximum taste.
Pro tip for home cooks: experiment with your dry rub proportions. Some pitmasters prefer a spicier blend, while others lean towards a sweeter profile. The beauty of BBQ ribs is in personalizing your recipe to suit your taste buds.
Professional chefs understand that great ribs begin with exceptional ingredients. Investing in premium meat cuts and fresh spices will dramatically improve your BBQ results.
Preparing Your Ribs Like a Pro
Getting ready to prepare ribs is an art that requires precision and care. The right preparation can transform ordinary meat into a mouthwatering BBQ masterpiece. I’ll walk you through the essential steps to ensure your ribs are perfectly prepared before hitting the grill.
Removing the Membrane: A Critical First Step
To remove rib membrane, you’ll need a sharp knife and a paper towel. Start by locating the thin, white membrane on the back of the ribs. Slide the knife under the membrane at one end of the rack, then grip it with the paper towel and pull firmly. The entire membrane should come off in one smooth motion.
- Use a butter knife or your fingers to start lifting the membrane
- Pull slowly and steadily to ensure complete removal
- Check that no membrane remains to ensure tender ribs
Trimming and Seasoning Techniques
Seasoning ribs is where the magic happens. I recommend trimming any excessive fat, leaving a thin layer for flavor. Pat the ribs dry with paper towels to help the seasoning stick better.
| Trimming Tips | Seasoning Recommendations |
|---|---|
| Remove hanging pieces of meat | Use kosher salt as base seasoning |
| Trim excess surface fat | Apply black pepper generously |
| Create even rack surface | Add paprika for color and flavor |
Dry Rub Application Mastery
The key to an incredible dry rub is even distribution. Sprinkle the seasonings from about 6 inches above the ribs, allowing them to fall naturally. Use your hands to gently massage the rub into every crevice, ensuring complete coverage.
- Mix your dry rub ingredients thoroughly
- Apply rub generously but not excessively
- Let ribs sit with rub for 30-60 minutes before cooking
Mastering the Smoking Process
Smoking ribs is an art that requires patience and skill. Low and slow cooking transforms tough meat into tender, flavorful perfection. I’ll guide you through the essential BBQ smoking techniques that will elevate your rib game to professional levels.
Choosing the right wood is crucial for smoking ribs. Different woods impart unique flavors that can make or break your BBQ experience. Here are my top wood recommendations:
- Hickory: Strong, classic BBQ flavor
- Apple wood: Sweet and mild taste
- Mesquite: Intense, bold flavor
- Cherry: Mild and slightly sweet
Temperature control is the heart of successful low and slow cooking. I recommend maintaining a consistent temperature between 225-250°F throughout the smoking process. This gentle heat breaks down tough connective tissues, creating melt-in-your-mouth ribs.
| Wood Type | Flavor Profile | Best For |
|---|---|---|
| Hickory | Strong, bacon-like | Beef and pork ribs |
| Apple | Sweet and mild | Poultry and pork |
| Mesquite | Bold and intense | Beef ribs |
To check if your ribs are perfectly done, use the bend test. Grab the ribs with tongs and gently bounce them. If they start to crack but don’t break, they’re ready. Alternatively, look for an internal temperature of 190-203°F for maximum tenderness.
Remember, patience is key in BBQ smoking techniques. Rush the process, and you’ll miss out on the incredible flavors that low and slow cooking can deliver. Take your time, monitor your temperature, and enjoy the journey of creating perfect smoked ribs.
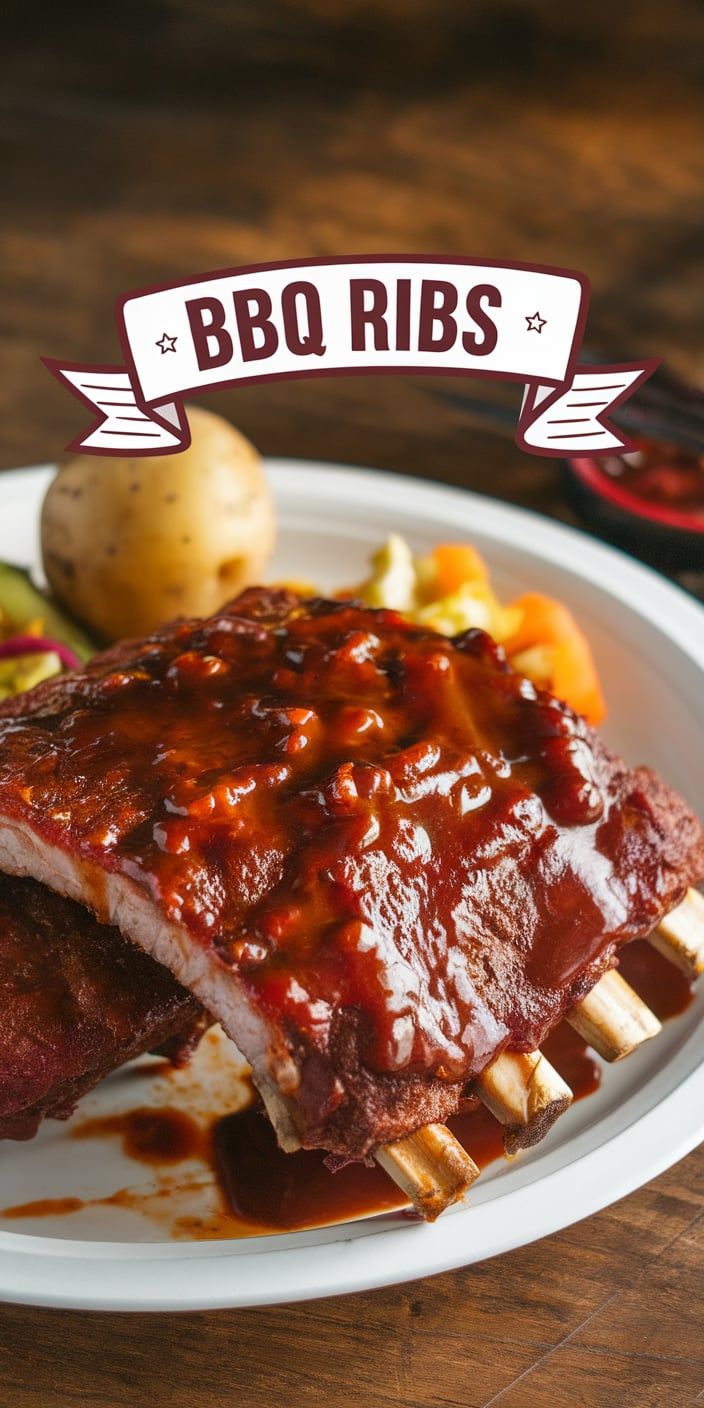
BBQ Sauce and Glazing Techniques
Creating the perfect homemade BBQ sauce is an art that can elevate your caramelized BBQ ribs from good to extraordinary. The right sauce can transform your grilling experience, adding depth and complexity to every bite.
Crafting Your Homemade BBQ Sauce
My go-to homemade BBQ sauce recipe combines rich flavors that complement smoked meats perfectly. Here are the key ingredients you’ll need:
- 1 cup ketchup
- 1/2 cup brown sugar
- 1/4 cup apple cider vinegar
- 2 tablespoons Worcestershire sauce
- 2 cloves minced garlic
- 1 teaspoon smoked paprika
Mastering Glazing Ribs Techniques
When glazing ribs, timing is everything. I recommend applying your homemade BBQ sauce during the last 15-20 minutes of cooking. This prevents burning while allowing the sauce to caramelize beautifully.
Achieving Perfect Caramelization
For those irresistible caramelized BBQ ribs, follow these pro tips:
- Brush sauce in thin layers
- Keep temperature around 275-300°F
- Let each layer set for 5-10 minutes
- Watch for a glossy, sticky exterior
The secret to mouthwatering BBQ ribs lies in patience and technique. Your homemade BBQ sauce will create a flavor profile that will impress every BBQ enthusiast at your gathering.
Serving and Storage Tips
When it comes to serving BBQ ribs, presentation is key. I recommend cutting the rack into individual portions just before serving to keep the meat juicy and tender. Pair your ribs with classic sides like creamy coleslaw, corn on the cob, or baked beans to create a complete meal that’ll impress your guests.
For storing leftover ribs, wrap them tightly in aluminum foil or place them in an airtight container. They’ll stay fresh in the refrigerator for up to 3-4 days. When you’re ready to enjoy them again, reheating BBQ ribs requires a gentle touch to prevent drying out. I suggest using the oven method – wrap the ribs in foil and warm them at 250°F for about 20-25 minutes to restore their original moisture and flavor.
Pro tip: If you want to maintain the crispy exterior while reheating, unwrap the foil for the last 5 minutes of warming. This trick helps bring back that delicious caramelized surface without making the meat tough. Remember, low and slow is the secret to keeping your leftover ribs as delectable as when they first came off the grill.
Always let your ribs rest for a few minutes after reheating to redistribute the juices. This ensures each bite is as succulent as the first serving. With these serving and storage tips, you’ll transform your BBQ ribs into a meal that tastes just as incredible the second time around.