14 Simple Valentine’s Day Desserts to Share
Fourteen simple Valentine's Day desserts starring chocolate, ripe strawberries and red velvet, each one easy enough to pull off on a regular weeknight.
Now that the kids are grown and gone, Valentine’s Day at our place means a quiet supper for two and something sweet that Tom and I can linger over. I gathered fourteen easy desserts here that lean on the big February favorites, deep chocolate, ripe strawberries and that tangy red velvet. Some are no bake treats, some are cookies or bars, and a handful look far fancier than the effort they take. My advice is to choose one that sets up overnight so the evening itself feels calm and unhurried.
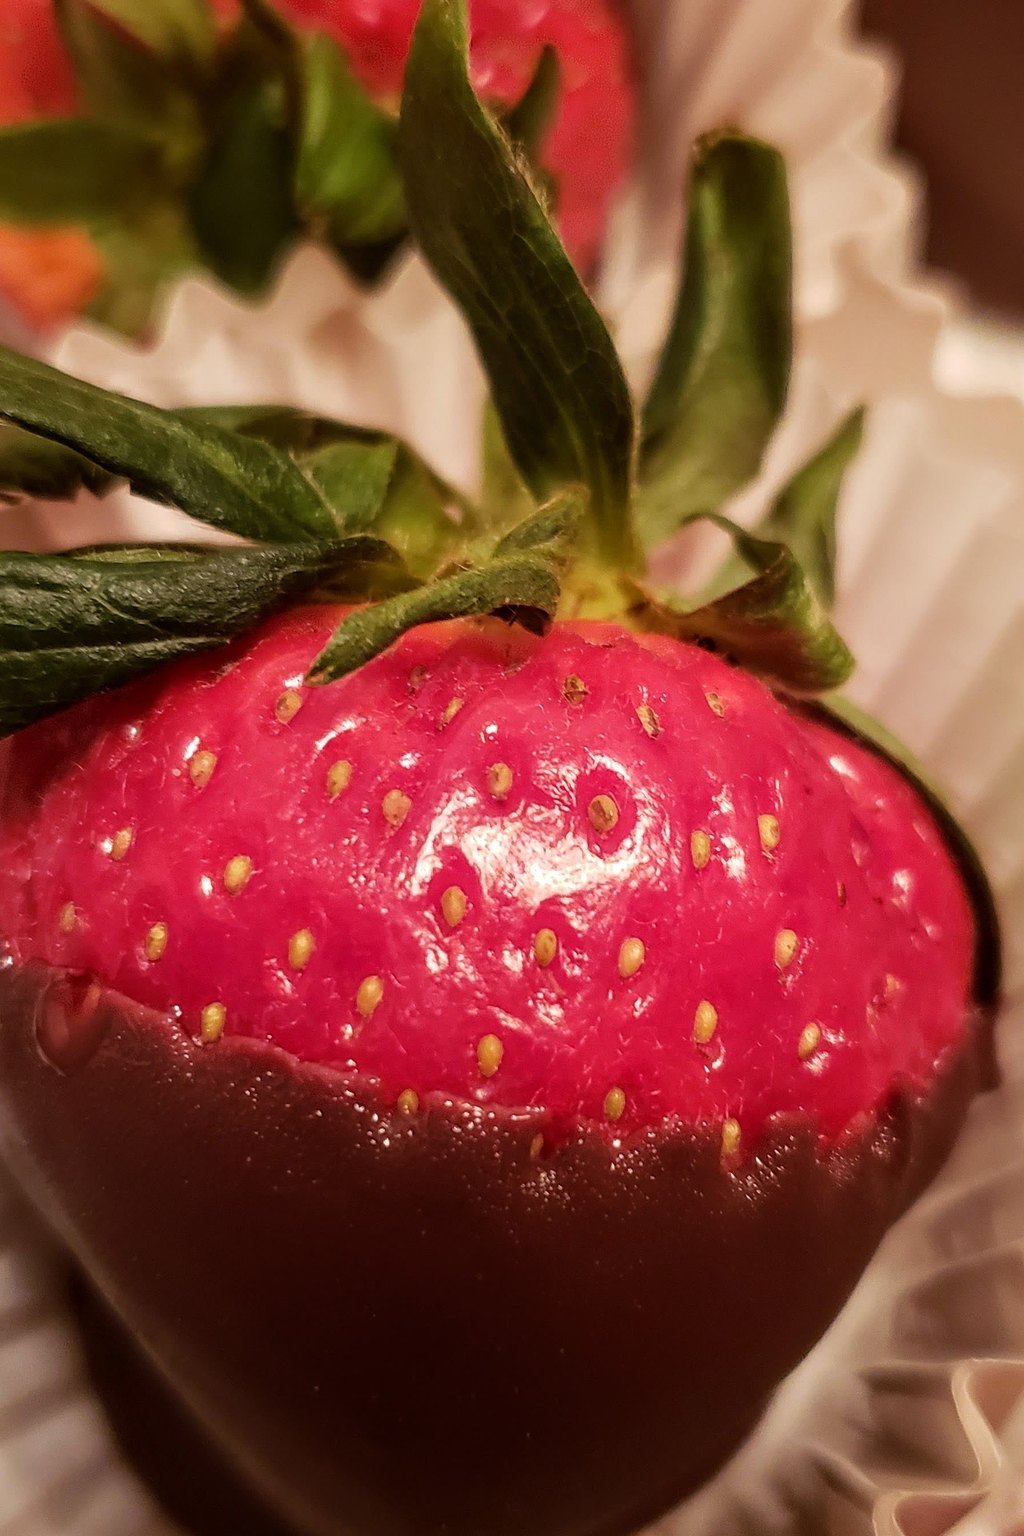
1) Chocolate Covered Strawberries
1) Chocolate Covered Strawberries
Each berry is sweet and a touch tart inside a thin semisweet coating that cracks cleanly with every bite. Stirring in a little coconut oil gives the chocolate a pretty shine and keeps it fluid for dipping, no tempering required. A lacy white chocolate drizzle plus a few crunchy coatings turns a plain tray into a sweet shop display.
Arrange them on a pretty plate with a few rose petals scattered around for a romantic touch. They are my favorite way to end a Valentine's dinner for two, with a glass of sparkling wine or cider. The grandkids love helping dip and decorate, so I sometimes make a batch with them the afternoon before.
Ingredients
1 pound fresh strawberries with stems
8 ounces semisweet chocolate, chopped
2 ounces white chocolate, chopped
1 teaspoon coconut oil
1/2 teaspoon coconut oil for the white chocolate
2 tablespoons red or pink sprinkles
2 tablespoons finely chopped toasted almonds
2 tablespoons crushed graham crackers
1 pinch flaky sea salt
Parchment paper for the tray
Pick berries that are red right up to the stem but still firm, since soft ones leak juice under the chocolate. Let them come to room temperature before dipping, because cold fruit can make the shell crack and sweat. If the chocolate thickens partway through, give it another 10 seconds in the microwave and stir well.
Instructions
Wash the berries, then pat each one dry with paper towels and leave them resting on a clean towel for about 15 minutes. Even a single drop of water can make melted chocolate turn thick and grainy, so this drying time really matters.
Cover a rimmed sheet pan with parchment. Pour the sprinkles, chopped almonds and graham cracker crumbs into their own little bowls so they are ready to go.
Put the semisweet chocolate and 1 teaspoon of coconut oil in a bowl that can go in the microwave. Heat it in 30 second rounds and stir thoroughly between each one until it turns silky and shiny, which takes roughly 90 seconds in all.
Grab a berry by its green top and dunk it into the chocolate until about three quarters is covered. Let the excess run back into the bowl, then dip the bottom in one of the toppings or keep it bare, and lay it on the parchment.
Melt the white chocolate with the other 1/2 teaspoon of coconut oil using the same short bursts. Scrape it into a small zip top bag, cut off a tiny tip and zigzag fine lines across the bare berries. Sprinkle flaky salt over a handful of them.
Refrigerate the pan for 15 to 20 minutes, only until the shells feel firm to the touch. Plan to eat them the day you make them, when the chocolate snaps and the fruit is at its juiciest.
My grandkids line up to help with these every February, and there is really no way to ruin them. They feel like a treat from a candy counter, yet the oven never gets turned on.
Dip them no earlier than 8 hours before serving and leave them uncovered in the refrigerator. A lid holds in humidity, and the berries begin to leak juice beneath their shells.
2) Red Velvet Cupcakes
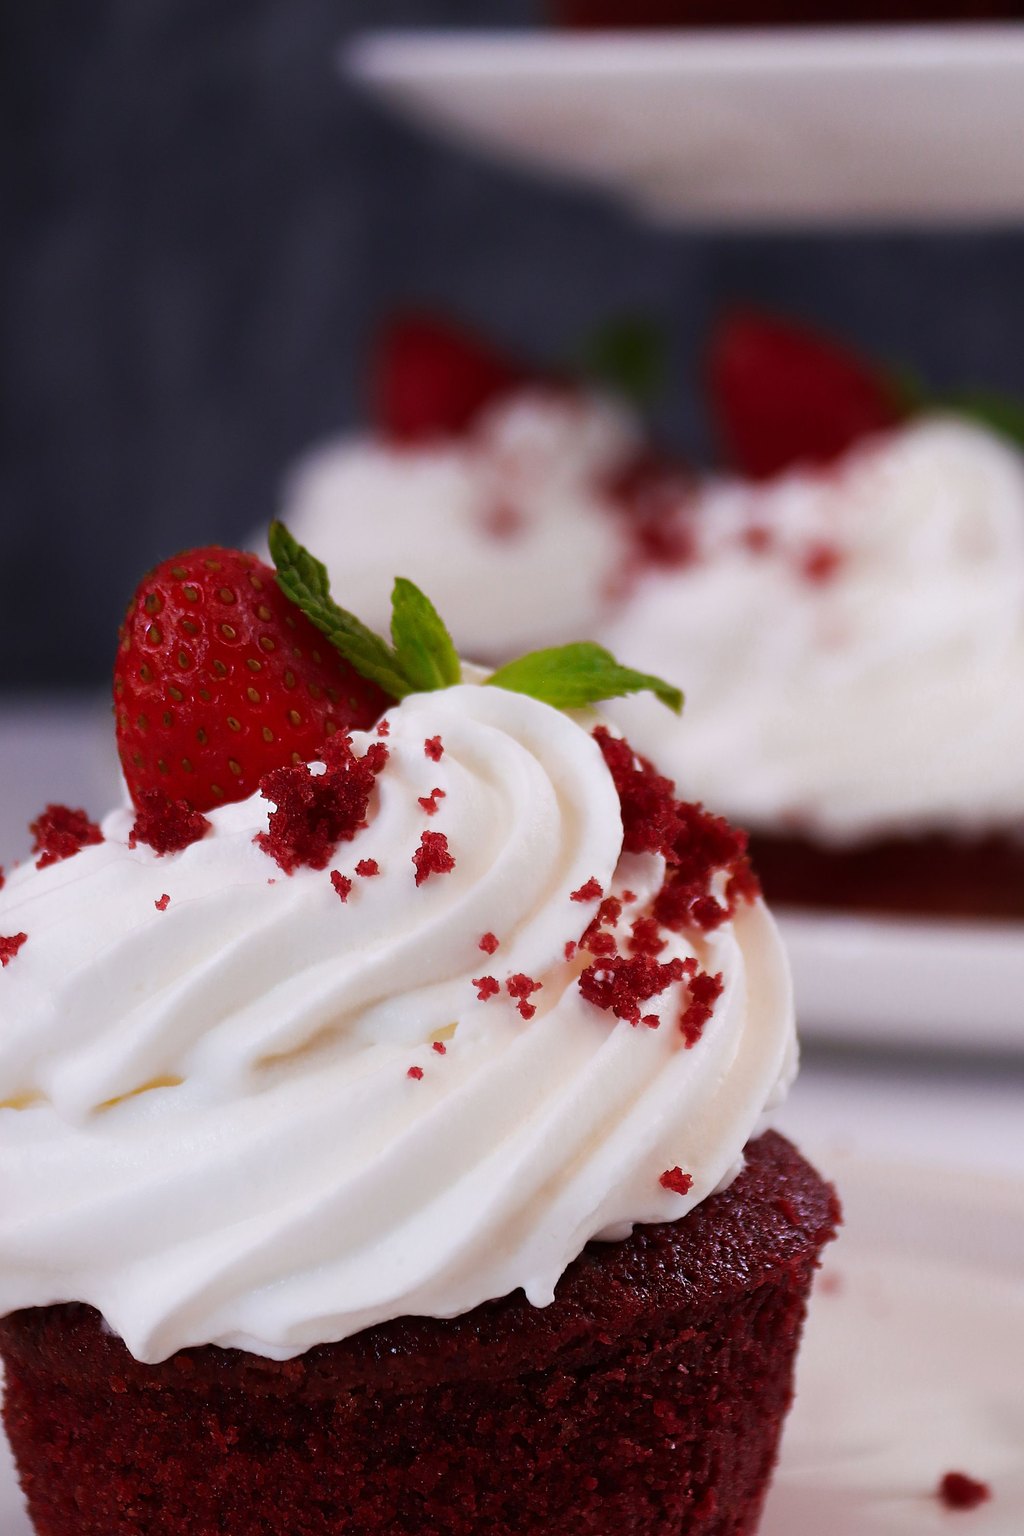
2) Red Velvet Cupcakes
These cupcakes have a soft, plush crumb from buttermilk and oil, along with a light whisper of cocoa. A spoonful of vinegar works with the baking soda to give them extra rise and a faint tang. A thick swirl of cream cheese frosting cuts the sweetness and makes them look straight out of a bakery case.
Top each one with a candy heart or a few red sprinkles for a classroom party. They make a fun dessert for a family Valentine's supper, set out on a tall cake stand. I bring a dozen to my book club every February, and the plate always comes home empty.
Ingredients
For the cupcakes
1 1/4 cups all purpose flour
1 tablespoon unsweetened cocoa powder
1/2 teaspoon baking soda
1/2 teaspoon salt
3/4 cup granulated sugar
1/2 cup vegetable oil
1 large egg, room temperature
1/2 cup buttermilk, room temperature
1 tablespoon red food coloring
1 teaspoon white vinegar
For the frosting
8 ounces cream cheese, softened
1/4 cup unsalted butter, softened
2 cups powdered sugar
If you use gel coloring, about 1 teaspoon gives the same deep red as the liquid kind. Keep the cream cheese cool but soft, since warm cream cheese makes a runny frosting that will not hold a swirl. Frosted cupcakes belong in the fridge, but let them sit out about 20 minutes before serving for the softest crumb.
Instructions
Set the oven to 350F and fit paper liners into a standard 12 cup muffin tin.
In a medium bowl, whisk together the flour, cocoa, baking soda and salt. In a bigger bowl, combine the sugar, oil and egg and whisk until no lumps remain, then add the buttermilk, red coloring and vinegar and whisk again until the color looks even.
Tip the flour mixture into the wet bowl and fold with a rubber spatula only until the last dry streaks vanish. Stirring past that point gives you a chewy, tough cupcake instead of a tender one.
Spoon the batter into the liners so each cup sits roughly two thirds full. Bake for 18 to 20 minutes, until the tops bounce back under a light touch and a toothpick poked into the middle shows only a few damp crumbs.
Leave the cupcakes in the tin for 5 minutes, then set them on a cooling rack until they are cool all the way through, about 45 minutes.
For the frosting, put the cream cheese and butter in a bowl and beat them at medium speed for about 2 minutes, until creamy. Add the powdered sugar, plus a little vanilla if you like it, and keep beating until light and fluffy. Pipe or spread it over the cooled cupcakes and serve.
I bake a dozen whenever the grandkids are coming for a February visit, and they never last past dessert. The little ones love that bright red color, and Tom goes straight for the frosting.
Keep frosted cupcakes covered in the refrigerator for up to 3 days. Give them about 20 minutes on the counter before you serve them so the crumb turns soft again.
3) Molten Chocolate Lava Cakes
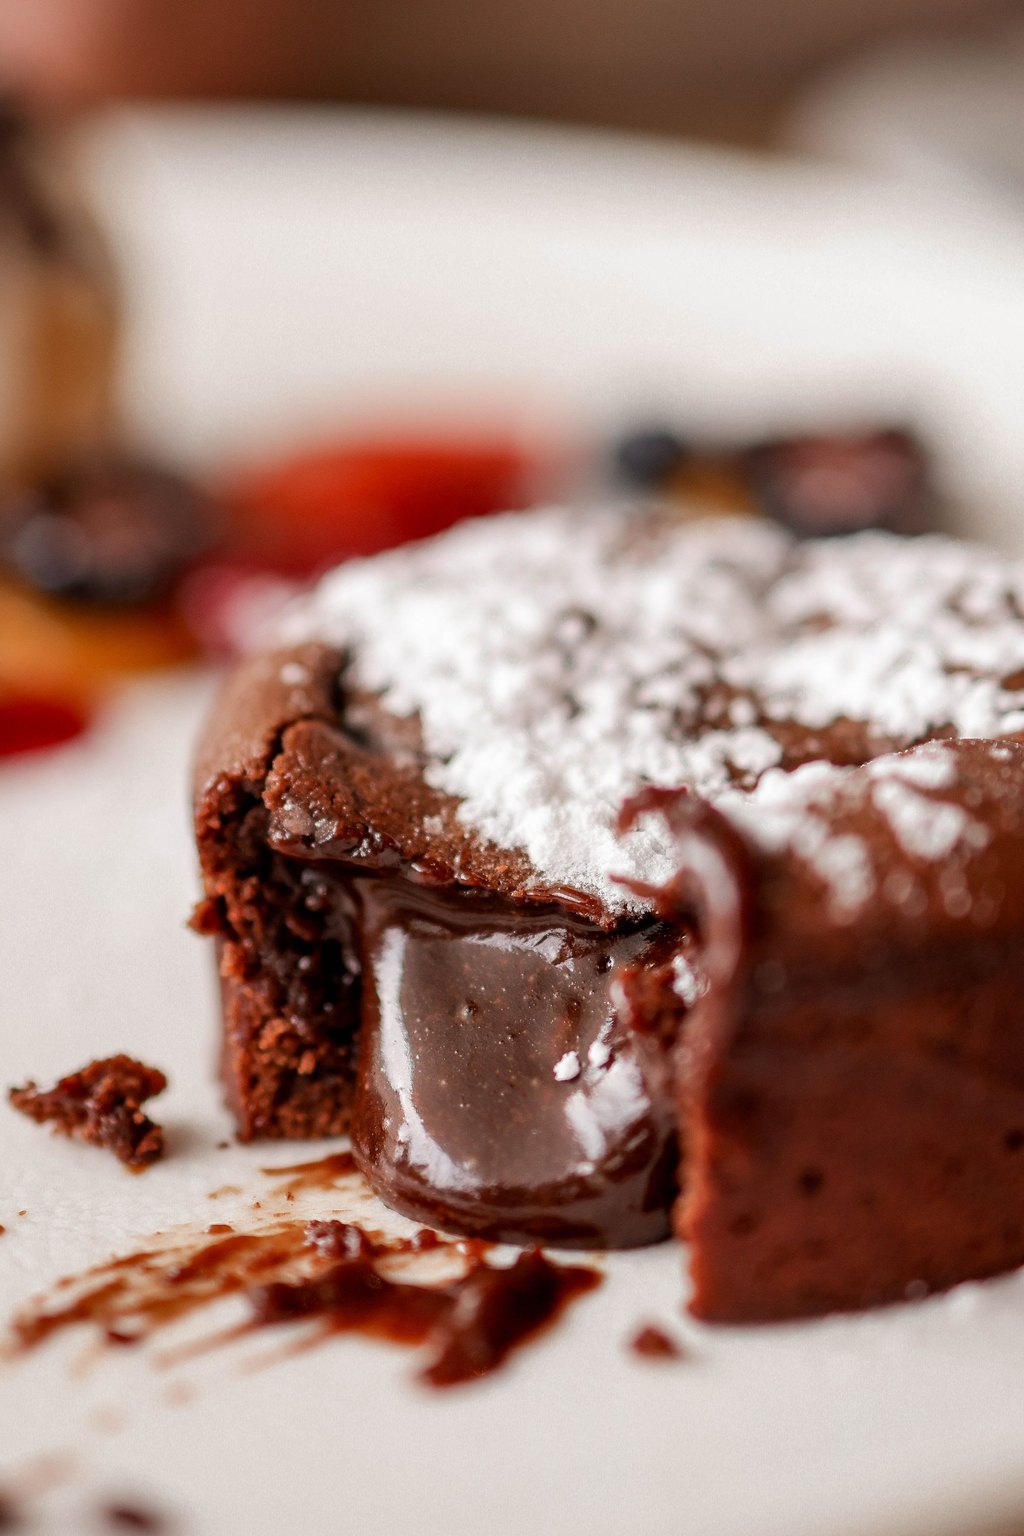
3) Molten Chocolate Lava Cakes
A thin, tender cake wall surrounds a hot pool of chocolate that runs out across the plate at the first cut. The whole secret is taking them out of a very hot oven while the centers are still underdone. A couple of extra yolks give the middle a silky richness, so even a small portion feels luxurious.
This is my favorite date night dessert for Tom and me, served with a small scoop of vanilla ice cream melting on the side. Bring them to the table on your prettiest plates while still warm, and let everyone make their own first cut. A cup of coffee or a small glass of dessert wine is a lovely partner.
Ingredients
1/2 cup unsalted butter, plus more for the ramekins
4 ounces semisweet chocolate, chopped
2 large eggs
2 large egg yolks
1/4 cup granulated sugar
1/8 teaspoon salt
2 tablespoons all purpose flour
1 teaspoon vanilla extract
1 tablespoon unsweetened cocoa powder for dusting
Powdered sugar for serving
Fresh raspberries for serving
Fill the ramekins up to a day ahead, cover and refrigerate them, then add 2 to 3 minutes to the baking time since they start cold. Ovens vary, so pull them at the first sign of firm sides rather than waiting for the full 14 minutes. For Tom and me, I bake two and keep the other two in the fridge for the next night.
Instructions
Preheat the oven to 425F. Rub four 6 ounce ramekins all over with butter, sprinkle cocoa powder inside, and knock out whatever cocoa does not stick. Place them on a rimmed sheet pan.
Combine the butter and chocolate in a microwave safe bowl and heat in 30 second rounds, stirring each time, until completely smooth. Set it aside for 2 minutes to cool slightly, since very hot chocolate can cook the eggs.
In a separate bowl, whisk the whole eggs, yolks, sugar and salt for about a minute, until the mixture lightens in color and thickens a bit. Add the vanilla and whisk once more.
Gently fold the melted chocolate into the egg mixture. Sprinkle the flour over the top and fold only until you no longer see any dry bits. Spoon the batter evenly into the four ramekins.
Bake for 12 to 14 minutes. You want the sides to look firm and set while the very middle still wobbles when you give the pan a little shake.
Rest the cakes for 1 minute. Slide a thin knife around each one, place a dessert plate on top and flip it over. Shake on some powdered sugar, scatter raspberries alongside and serve while warm.
Whenever I make these, Tom is convinced I slaved over the stove for hours. In truth they come together in about 30 minutes, which is exactly how I like my fancy desserts.
Fill the ramekins as much as a day early, cover them, and keep them chilled. If they go into the oven cold from the refrigerator, bake them 2 or 3 minutes longer.
4) Strawberry Shortcake
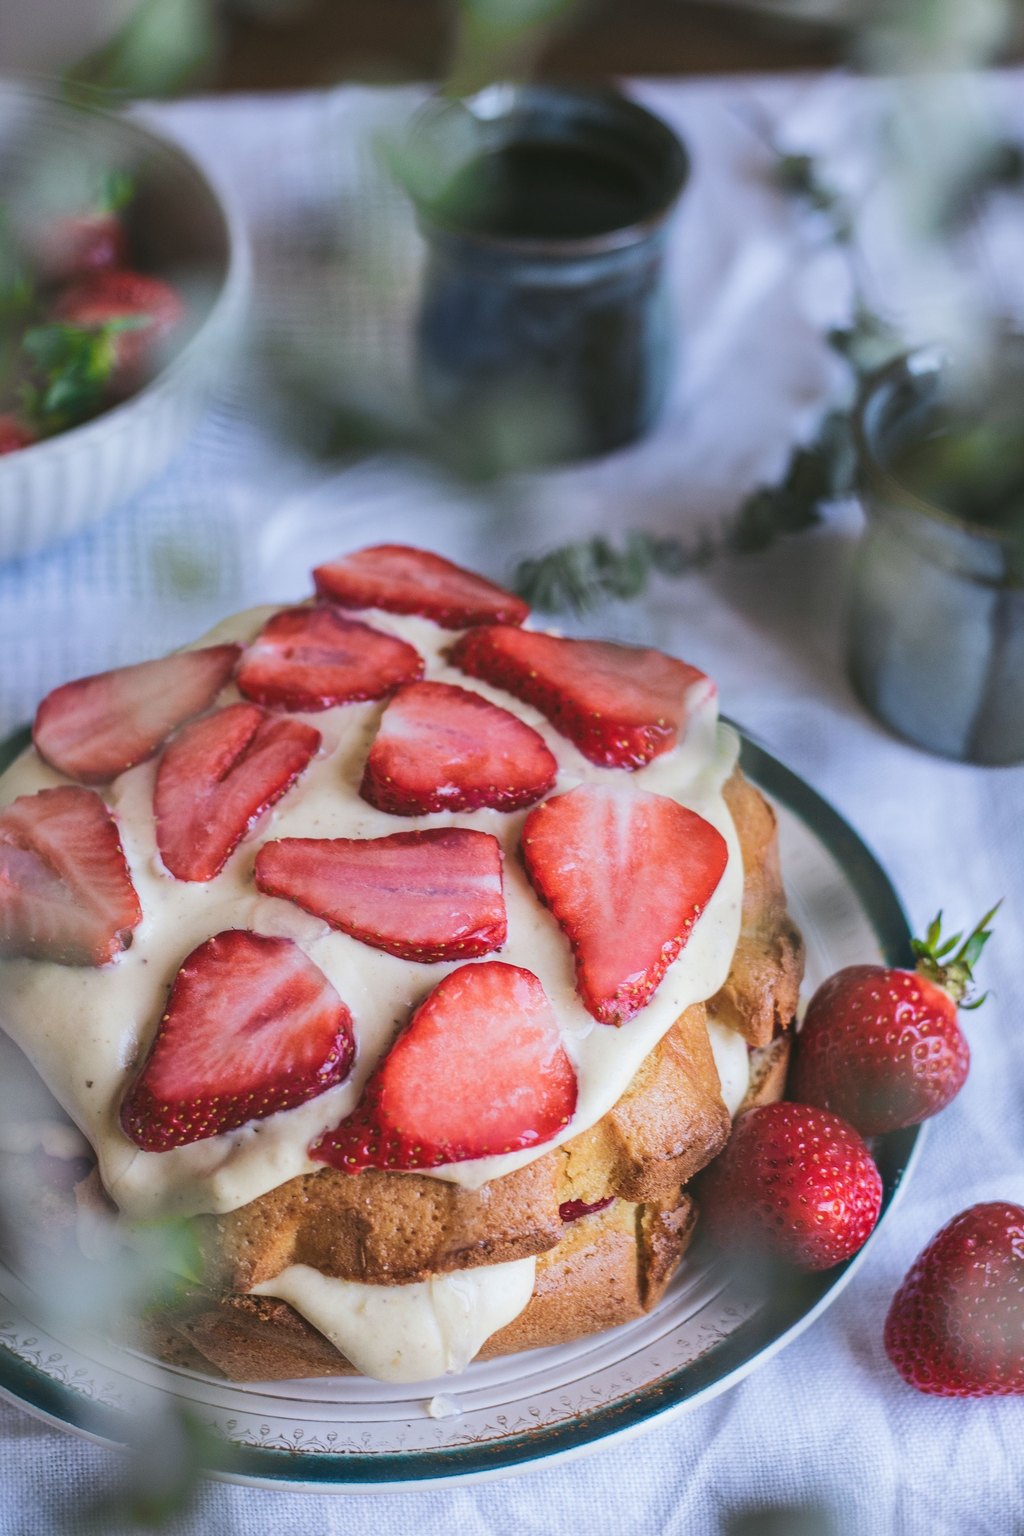
4) Strawberry Shortcake
This old fashioned version uses a tender cream biscuit with a crunchy sugar top in place of a spongy cake. Letting the berries sit in sugar creates a ruby syrup that soaks right into the warm biscuit. Soft, lightly sweetened whipped cream brings the crisp, tender and juicy parts together in every forkful.
Build these right at the table so everyone can pile on as much cream and fruit as they like. It is a nice lighter choice after a heavy dinner and just as lovely at a summer picnic. For a party, layer the pieces in clear glasses so the red berries and white cream show through.
Ingredients
For the biscuits
2 cups all purpose flour
3 tablespoons granulated sugar
1 tablespoon baking powder
1/2 teaspoon salt
1/2 cup cold unsalted butter, cubed
3/4 cup heavy cream, plus 2 tablespoons for brushing
For the berries and cream
1 1/2 pounds fresh strawberries, hulled and sliced
1/4 cup granulated sugar for the berries
1 cup heavy whipping cream
2 tablespoons powdered sugar
1 teaspoon vanilla extract
Keep the butter and cream very cold until the biscuits go into the oven, since cold fat is what makes them light and tender. The sugared berries are best within 3 or 4 hours, and after that they turn soft and lose their fresh bite. Biscuits can be baked earlier in the day and warmed at 350F for 5 minutes before you split them.
Instructions
Sprinkle 1/4 cup sugar over the sliced berries, stir, and let them stand for at least 30 minutes. The sugar draws out the juice and makes a bright, natural syrup.
Preheat the oven to 425F and lay parchment on a baking sheet. Stir the dry ingredients, meaning flour, sugar, baking powder and salt, together in a large bowl.
Work the cold butter cubes into the flour with a pastry blender or your fingertips until the bits are roughly the size of small peas. Pour in 3/4 cup of cream and stir only until a rough, shaggy dough comes together.
Turn the dough out onto a floured counter and press it into a round about 1 inch thick. Using a round cutter that measures 2 1/2 inches, stamp out 8 biscuits, pushing straight down with no twist. Brush the tops with the remaining cream and sprinkle on a bit of sugar.
Bake for 14 to 16 minutes, until both the tops and the bottoms are golden. Let them cool for 10 minutes.
Beat the heavy cream with the powdered sugar and vanilla until it holds soft peaks. Slice each biscuit in half, cover the bottom half with berries and their syrup, pile on whipped cream and set the top half back on.
My mother made shortcake for every birthday when I was a girl, so to me it tastes like a celebration. When the whole crew is home, I set out the parts and let everyone build their own.
Bake the biscuits that morning and store them in a paper bag on the counter. Just before serving, warm them at 300F for 5 minutes so they taste like they came straight from the oven.
5) Easy Chocolate Mousse
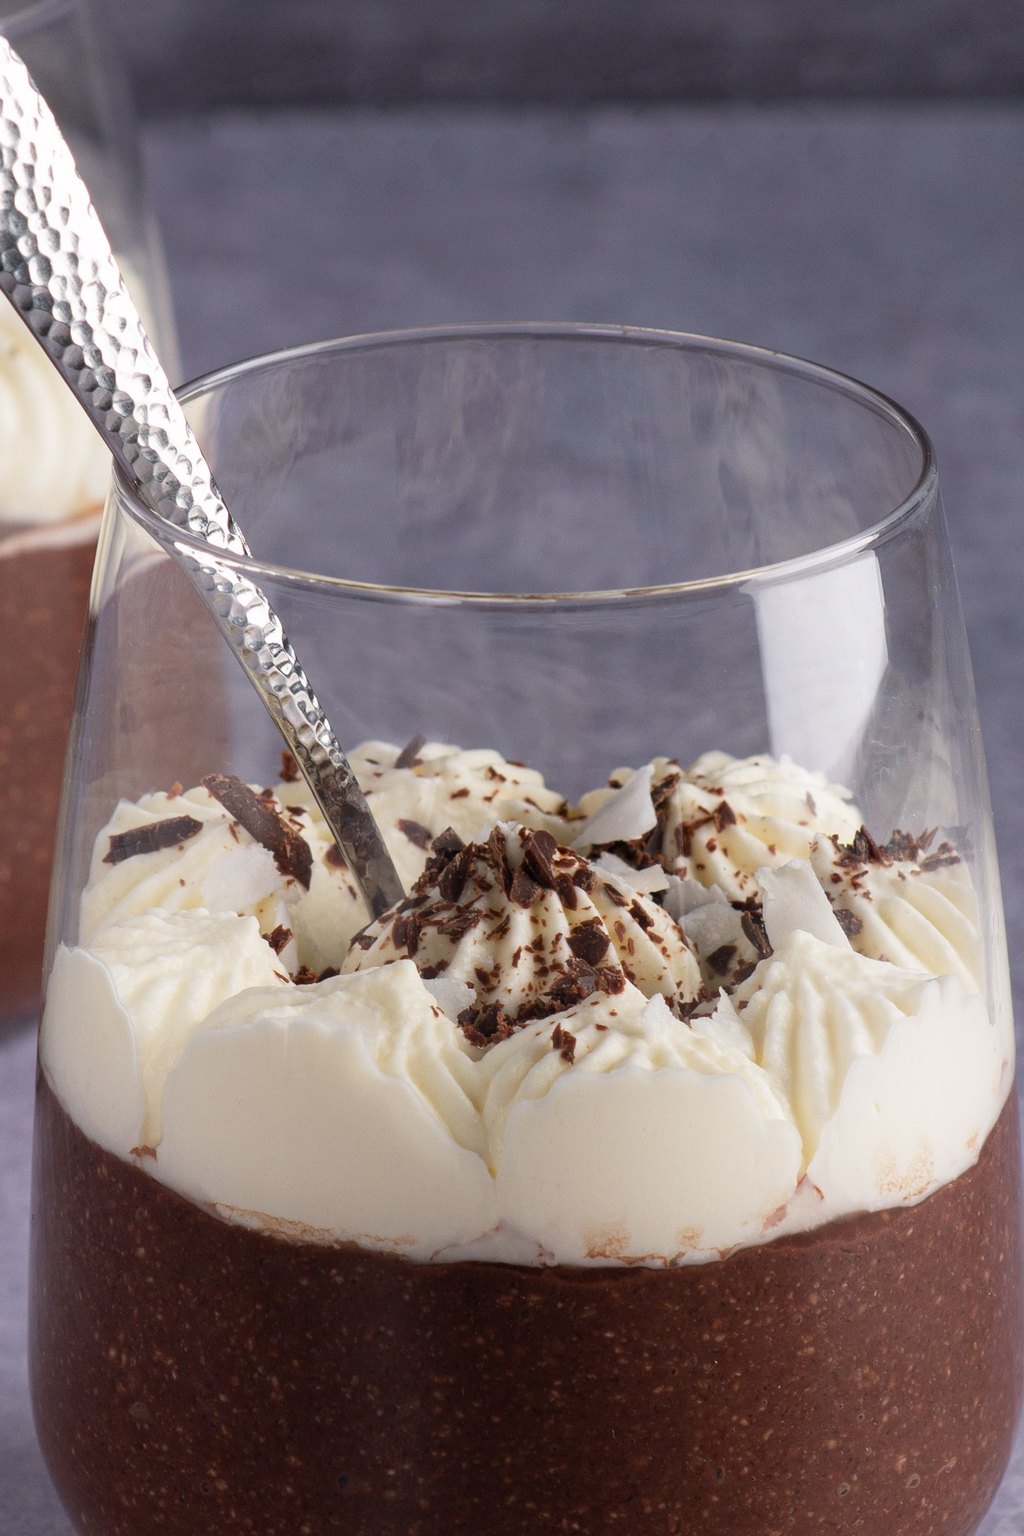
5) Easy Chocolate Mousse
This mousse feels light and fluffy on the spoon but tastes rich and full of chocolate. Turning the yolks into a quick cooked custard keeps it safe to eat and gives it a velvety texture. The small splash of coffee stays in the background and simply makes the chocolate taste deeper.
Serve it in stemmed glasses with a fresh raspberry and a little mint for a fancy finish. It is rich, so small portions are plenty after a nice dinner. A plate of crisp butter cookies on the side adds a nice crunch and gives guests something to dip.
Ingredients
6 ounces bittersweet chocolate, chopped
2 tablespoons unsalted butter
3 tablespoons strong brewed coffee
1 1/2 cups heavy whipping cream, divided
3 large egg yolks
3 tablespoons granulated sugar
1/8 teaspoon salt
1 teaspoon vanilla extract
Whipped cream for topping
Chocolate shavings for topping
Chop the chocolate finely so the warm custard melts it completely without leaving lumps. If the custard looks at all lumpy, pour it through a fine strainer before it goes over the chocolate. When little ones are eating, decaf coffee or a splash of milk works fine in place of regular coffee.
Instructions
Put the chopped chocolate, butter and coffee into a large bowl that can handle heat.
Pour 1/2 cup of the cream into a small pot and set it over medium heat until you see steam rising. Meanwhile whisk the yolks, sugar and salt in another bowl, then drizzle in the hot cream a little at a time while whisking so the yolks warm up gently.
Return everything to the saucepan and set it over low heat. Stir the whole time until the custard thickens slightly and an instant read thermometer shows 160F, about 3 minutes.
Pour the warm custard over the chocolate and leave it alone for 1 minute, then whisk until glossy and smooth. Add the vanilla and let the bowl sit until it reaches room temperature, roughly 15 minutes.
Beat the other 1 cup of cream until it forms soft peaks. Stir a third of the whipped cream into the chocolate to loosen it, then fold in the rest with a gentle hand until you see no more white streaks.
Divide the mousse among 6 small glasses or jars. Cover them and refrigerate for at least 2 hours, until set. Finish each with whipped cream and a few chocolate shavings right before serving.
Chocolate mousse sounds like a restaurant thing, but this one needs only a saucepan and a single mixing bowl. Spooned into little jars, it turns an ordinary Tuesday supper for two into a date night.
You can make the mousse as much as 2 days early and keep it covered in the refrigerator. Wait to add the whipped cream until serving time so it stays light and airy.
6) Red Velvet Crinkle Cookies
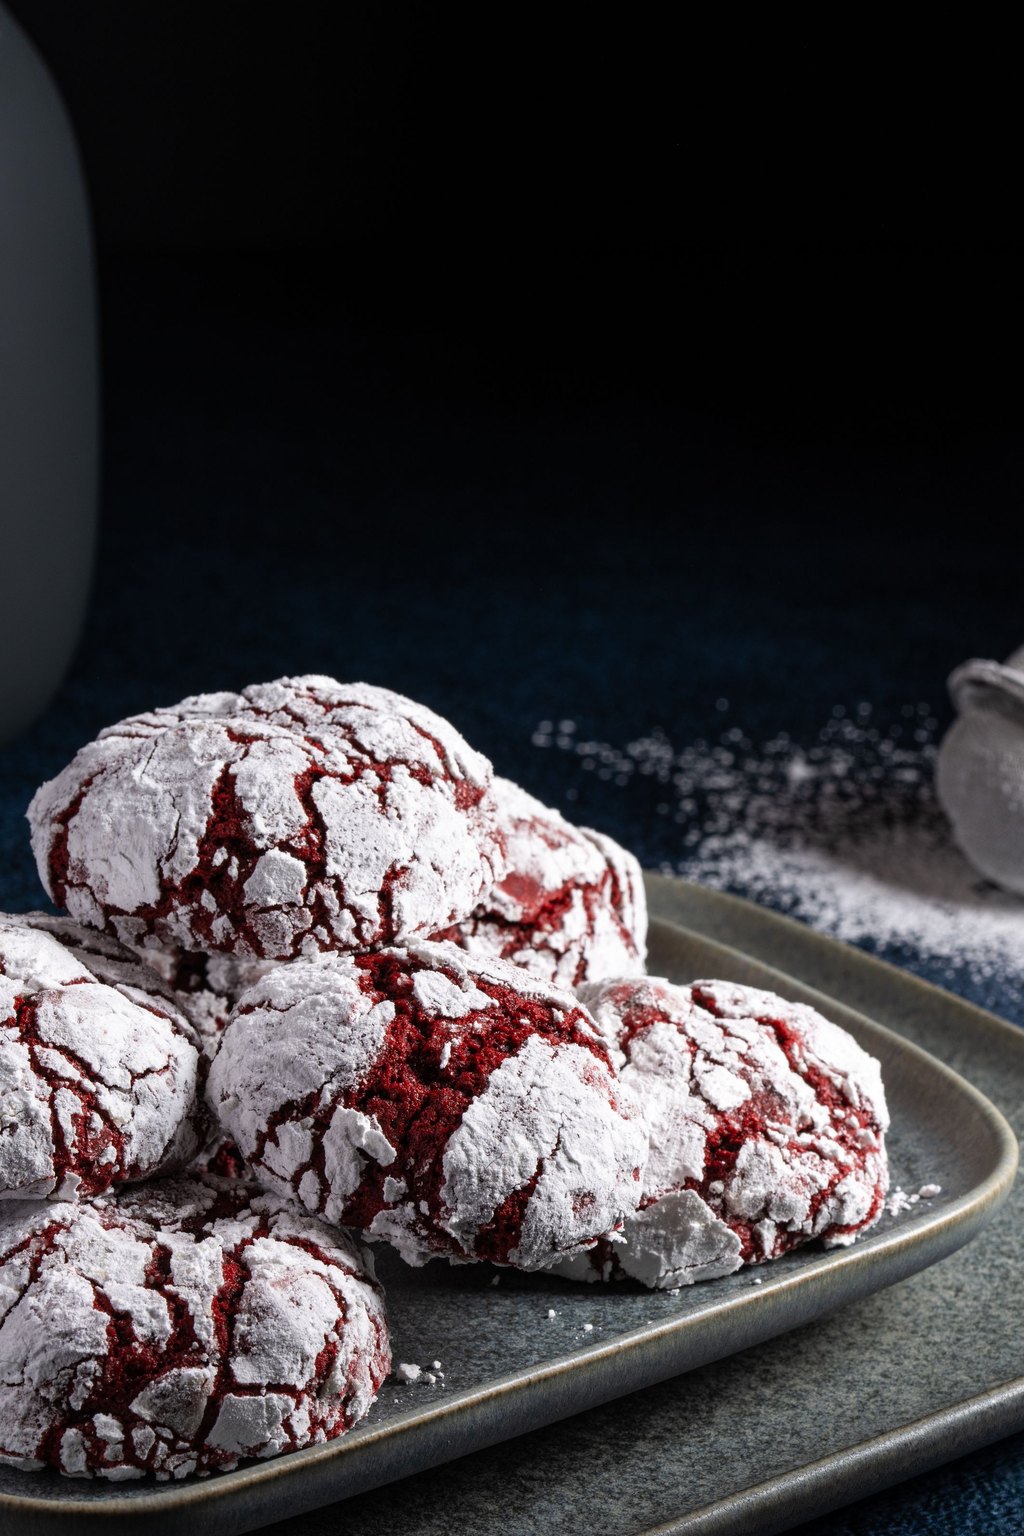
6) Red Velvet Crinkle Cookies
These cookies come out soft and almost fudgy inside, with a cracked coat of white sugar on top. A first roll in granulated sugar keeps the powdered sugar from dissolving, so the outside stays bright and snowy. Flashes of deep red showing through the cracks make a plate of them look stunning.
Pile them on a white plate so the red cracks really stand out. Packed in a small box with tissue paper, they make a sweet gift for teachers, neighbors and friends. They also look festive on a Christmas cookie tray, so I bake them more than once a year.
Ingredients
1 1/2 cups all purpose flour
1/4 cup unsweetened cocoa powder
1 teaspoon baking powder
1/4 teaspoon salt
1/2 cup unsalted butter, softened
1 cup granulated sugar
1 large egg
1 tablespoon milk
1 teaspoon vanilla extract
1 tablespoon red gel food coloring
1/2 cup powdered sugar for rolling
1/4 cup granulated sugar for rolling
Work with half the dough at a time and keep the rest in the fridge, since cold dough spreads slower and gives deeper, prettier cracks. A pair of food safe gloves keeps the red coloring off your hands while you roll. Store the cookies in a single layer, because the powdered sugar smudges when they are stacked.
Instructions
Whisk the flour with the cocoa, baking powder and salt in a bowl and set it aside.
Using a mixer on medium speed, beat the butter with 1 cup of the sugar for about 2 minutes, until pale and fluffy. Add the egg, milk, vanilla and red gel coloring and keep beating until the dough is one even shade of red.
Turn the mixer to low, add the flour mixture and mix only until it disappears. Cover the bowl and refrigerate the dough for 1 hour, which firms it up enough to roll easily.
Get the oven heating to 350F and cover two cookie sheets with parchment. Pour the granulated sugar into one shallow dish and the powdered sugar into another.
Portion the dough into balls of about 1 tablespoon each. Roll every ball in the granulated sugar first, then bury it in the powdered sugar for a thick coat. Arrange them on the sheets with 2 inches of space around each one.
Bake for 10 to 12 minutes. They are ready once they have spread out, cracked across the tops and look set around the edges. The middles will still seem soft. Leave them on the pan for 5 minutes before moving them to a cooling rack.
Crinkle cookies are my go to for gift tins because they look like a lot of work and need no decorating at all. Rolling the dough in sugar is a favorite job for the grandkids.
Chilled dough holds in the refrigerator for up to 3 days, so you can bake a fresh batch on the day itself. Once baked, they stay soft in a sealed tin for about 4 days.
7) Raspberry Swirl Cheesecake Bars
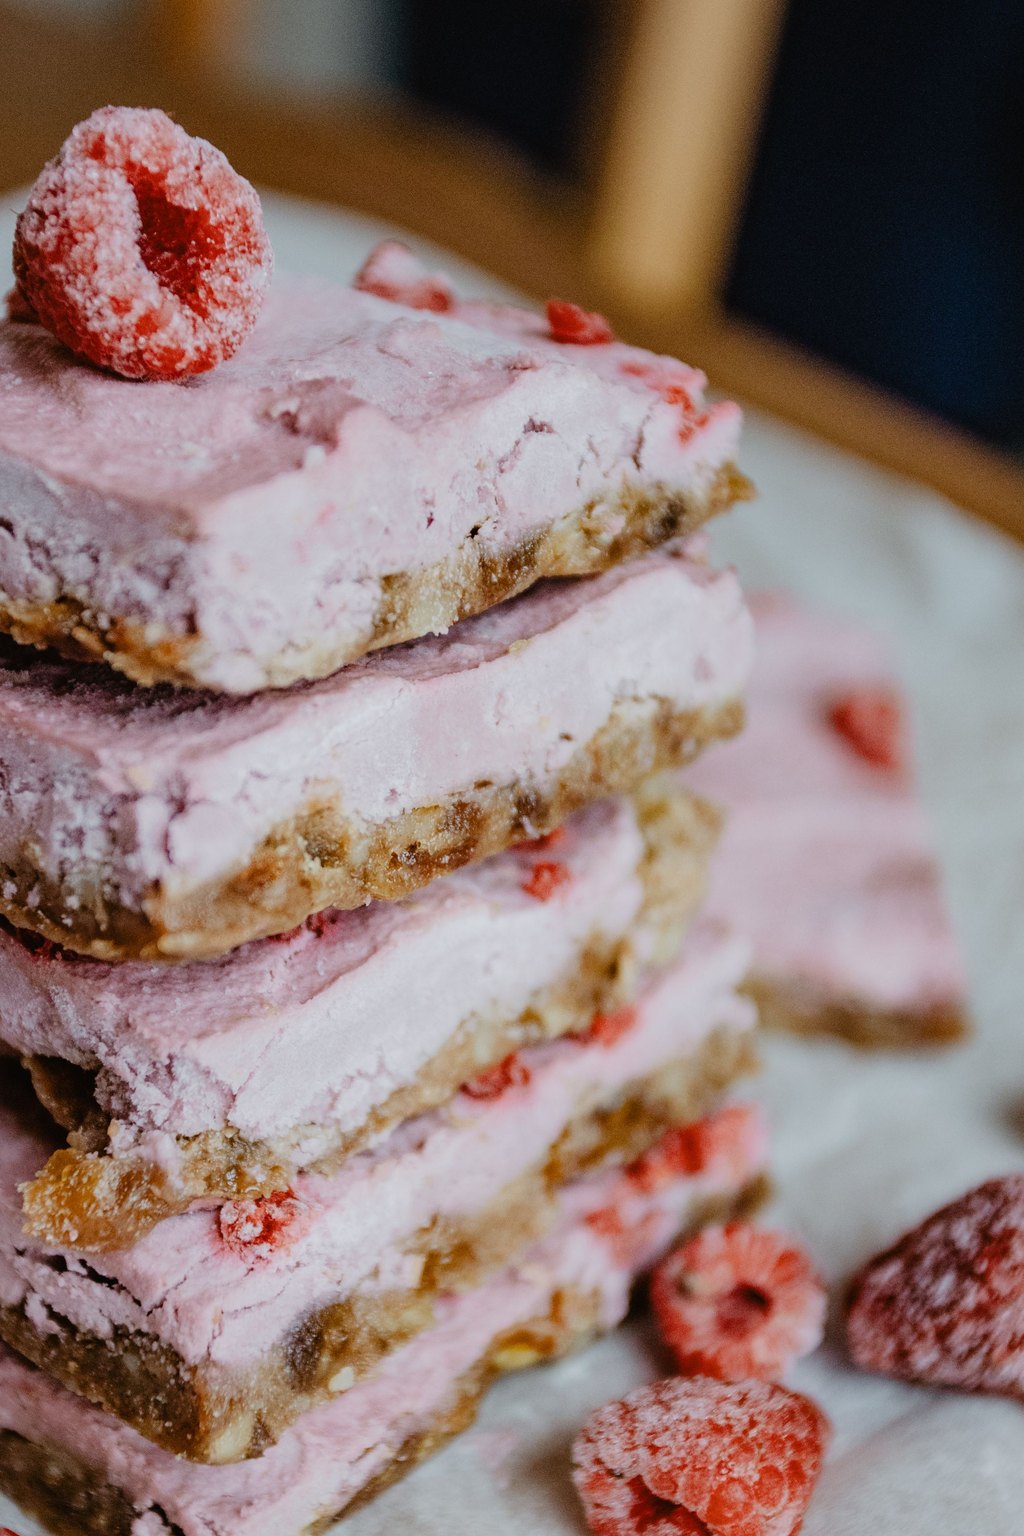
7) Raspberry Swirl Cheesecake Bars
These squares deliver smooth, tangy cheesecake from a simple square pan, and you can skip the water bath entirely. A fast homemade raspberry sauce marbles across the top with tart flavor and soft pink swirls. Underneath, a buttery graham crust keeps every bar sturdy enough to eat out of hand.
Cut them into small squares for a party tray, since a little cheesecake goes a long way. A few fresh raspberries and a sprig of mint on top make them look like they came from a bakery. They are a lovely dessert for a ladies luncheon or a bridal shower.
Ingredients
For the crust
1 1/2 cups graham cracker crumbs
6 tablespoons unsalted butter, melted
2 tablespoons granulated sugar
For the filling
16 ounces cream cheese, softened
1/2 cup granulated sugar
2 large eggs, room temperature
1/2 cup sour cream
1 teaspoon vanilla extract
1 tablespoon all purpose flour
1 cup fresh or frozen raspberries
2 tablespoons granulated sugar for the sauce
1 teaspoon lemon juice
Frozen raspberries work just as well as fresh and often taste better in winter. Press firmly on the pulp in the strainer with the back of a spoon so you get every drop of sauce. If the sauce seems runny, simmer it another minute or two, since thin sauce sinks into the filling instead of swirling on top.
Instructions
Preheat the oven to 325F. Fit parchment into an 8 inch square pan and let the paper hang over two of the sides so you can lift the bars out later.
Mix the graham crumbs with the melted butter and 2 tablespoons of sugar. Press the mixture tightly into the bottom of the pan and bake for 10 minutes.
In a small saucepan over medium heat, cook the raspberries with 2 tablespoons sugar and the lemon juice for 5 minutes, mashing the fruit as it softens. Push the sauce through a fine mesh strainer to catch the seeds, then let it cool.
On medium low speed, beat the cream cheese with 1/2 cup sugar until completely smooth. Add the eggs one by one, followed by the sour cream, flour and vanilla, mixing only until everything is blended.
Spread the filling over the baked crust. Dot the top with spoonfuls of the raspberry sauce and pull a butter knife through the dots to create swirls.
Bake for 30 to 35 minutes. The edges should be firm while the middle jiggles just a little. Let the pan cool for 1 hour, then refrigerate for at least 2 hours. Cut with a knife dipped in hot water for clean slices.
I adore cheesecake but have no patience for springform pans anymore, so these bars are my easy way around it. They cut into neat squares that look lovely on a dessert tray.
The bars also freeze well, lasting as long as 2 months. Wrap the cold slab snugly in plastic wrap and then foil, and thaw it in the refrigerator overnight before you slice it.
8) Chocolate Fondue
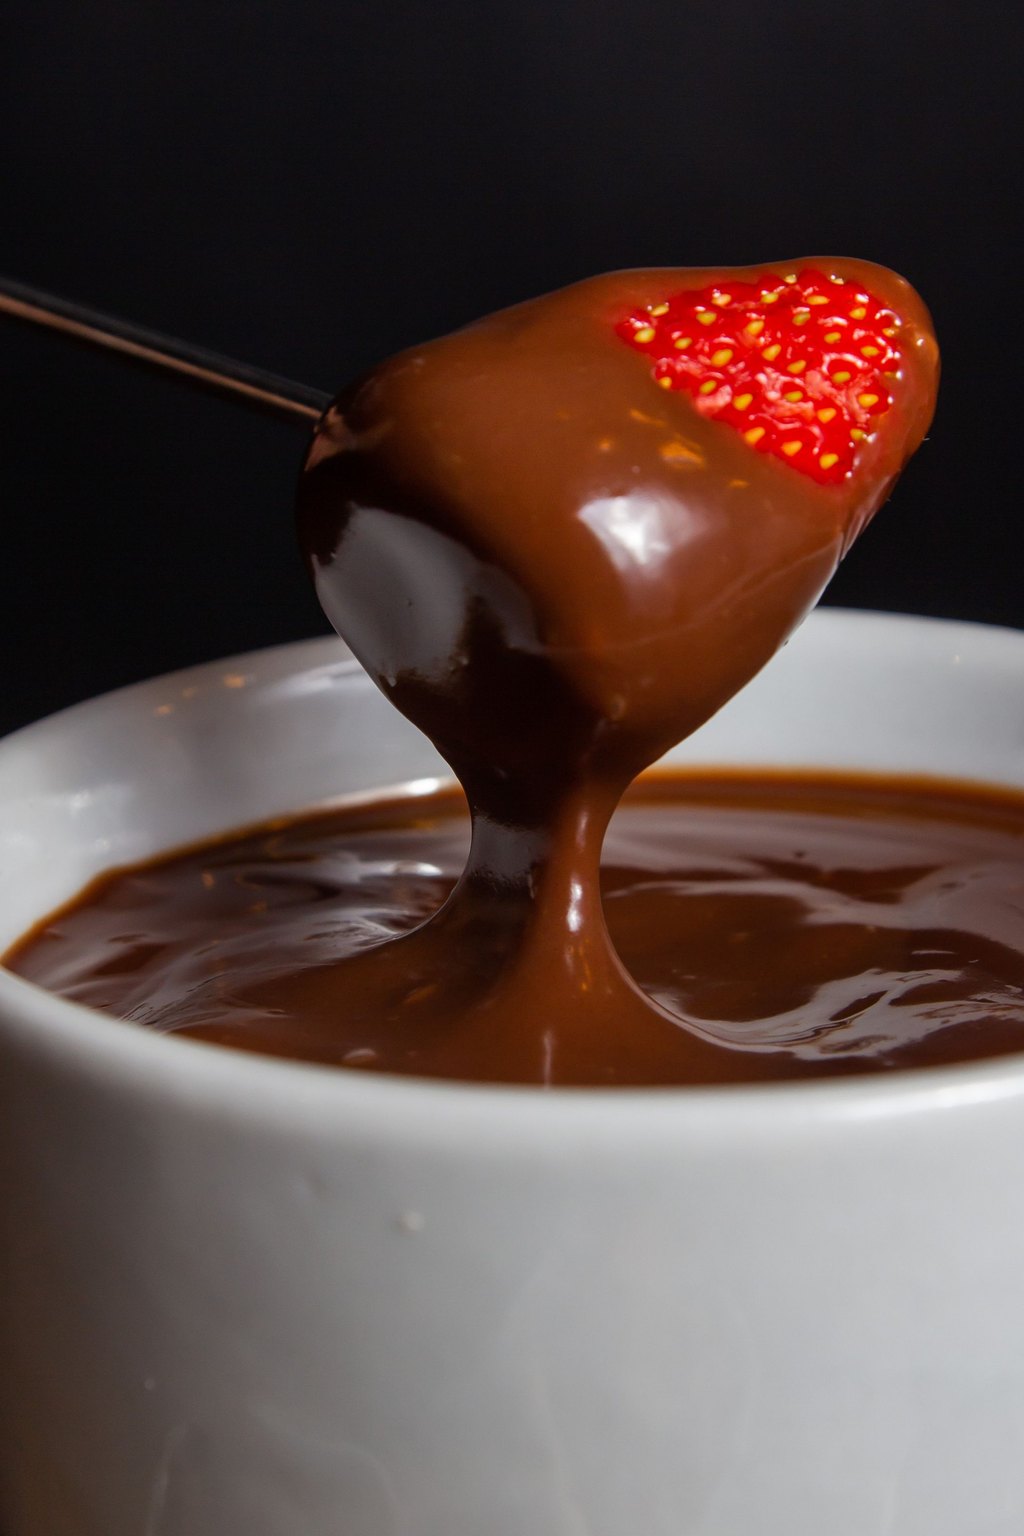
8) Chocolate Fondue
This fondue is a warm, glossy chocolate sauce meant for dunking fruit, cubes of cake and salty pretzels. Blending semisweet with milk chocolate keeps the flavor rich while staying gentle enough for young taste buds. Low, patient heat matters most here, because boiling cream will leave the chocolate gritty.
Set it in the middle of the table and turn dessert into a family game night that the grandkids talk about for weeks. Add other dippers like apple slices, graham crackers or shortbread cookies for more variety. It also makes a cozy evening in for Tom and me with a few strawberries and an old movie.
Ingredients
8 ounces semisweet chocolate, chopped
2 ounces milk chocolate, chopped
3/4 cup heavy cream
1 tablespoon unsalted butter
1 teaspoon vanilla extract
1 pinch salt
1 pound strawberries
2 bananas, sliced
2 cups cubed pound cake
2 cups large marshmallows
1 cup pretzel rods, broken in half
Bars of chocolate melt more smoothly than chips, which contain stabilizers that keep them from turning silky. Toss the banana slices with a little lemon juice so they do not brown while they sit on the platter. For two, halve everything and keep the fondue warm in a small bowl set over a pot of hot water.
Instructions
Rinse the strawberries and dry them thoroughly. Slice the bananas into coins and cube the pound cake into 1 inch pieces. Lay out every dipper on one big platter.
Pour the cream into a small, heavy saucepan and warm it over medium low heat until tiny bubbles appear around the rim, about 4 minutes. Keep it from reaching a rolling boil.
Take the pan off the burner and drop in the semisweet chocolate, the milk chocolate and the butter. Leave it untouched for 2 minutes so the chocolate can soften in the warm cream.
Starting in the middle and working out toward the sides, whisk slowly until the sauce turns completely smooth and shiny. Add the vanilla and a small pinch of salt.
Transfer the chocolate to a fondue pot set over a low flame, or to a small slow cooker on the warm setting. Bring it to the table right away with forks or skewers, and put the platter of dippers where everyone can reach it.
As the fondue sits, it may thicken. When that happens, stir in 1 or 2 tablespoons of warm cream to bring it back to a dippable consistency.
When the family is home in February, a fondue pot in the middle of the table keeps everyone talking long after supper. Dessert becomes something we do together instead of just eat.
Cover and refrigerate any leftover fondue for up to 5 days. Warm it in short microwave bursts and pour it over a bowl of ice cream for an easy second round.
9) Homemade Chocolate Truffles
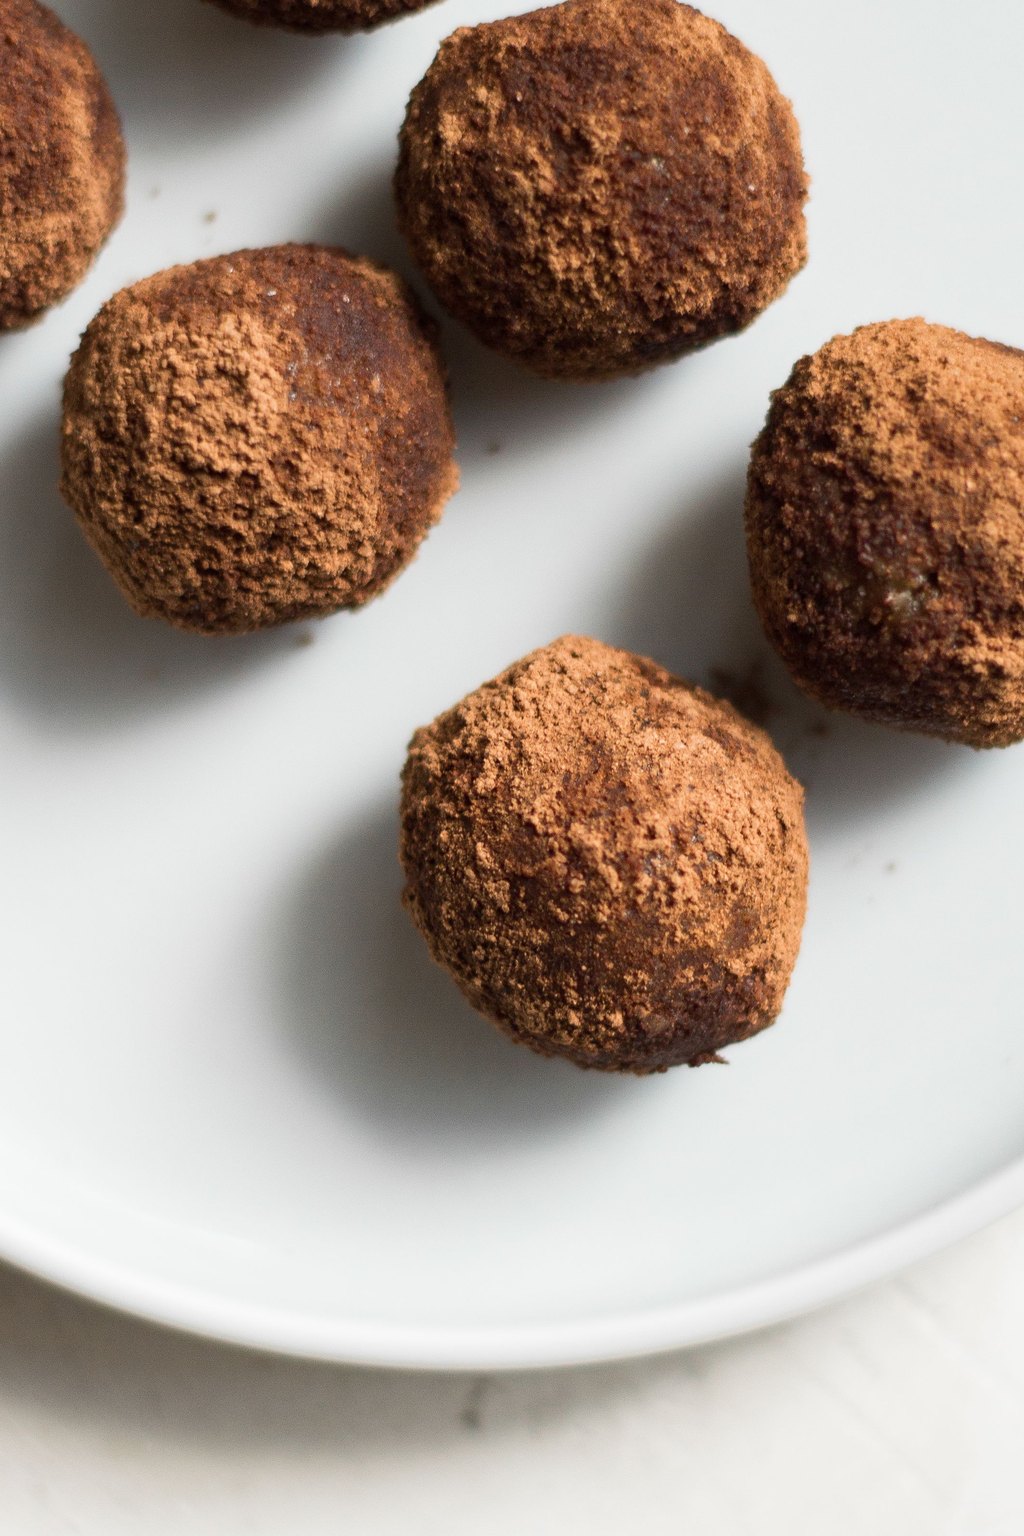
9) Homemade Chocolate Truffles
Truffles start with nothing more than a simple ganache of chocolate and cream, rolled into little balls. Quality bittersweet chocolate gives them a smooth center that melts the moment it hits your tongue. A mix of coatings adds crunch and color, so a small box looks like it came from a fine candy shop.
Box them up in a little tin lined with tissue for a homemade Valentine that beats anything from the store. A plate of them set out after dinner with coffee makes a simple, elegant finish. They are also a sweet thank you for a teacher, a friend or the neighbor who shovels your walk.
Ingredients
8 ounces bittersweet chocolate, finely chopped
1/2 cup heavy cream
2 tablespoons unsalted butter, softened
1 teaspoon vanilla extract
1 pinch salt
1/4 cup unsweetened cocoa powder for rolling
1/4 cup finely chopped pistachios for rolling
1/4 cup shredded coconut for rolling
2 tablespoons red sprinkles for rolling
Mini paper candy cups
Finely chopped chocolate melts evenly in the hot cream, while big chunks leave hard bits in the ganache. Run your hands under cold water and dry them well before rolling, since cool palms keep the ganache from melting. Truffles keep in the fridge for up to 2 weeks or in the freezer for 2 months.
Instructions
Put the finely chopped chocolate into a medium bowl that can take heat.
Heat the cream in a little pot over medium heat until bubbles just begin to form around the edges. Pour that hot cream onto the chocolate and let the bowl sit undisturbed for 3 minutes.
Stir slowly from the middle outward until the mixture turns smooth. Add the butter, vanilla and salt and keep stirring until the ganache looks shiny.
Cover and refrigerate for about 2 hours. It is ready when you can scoop it easily yet still soft enough to dent with a spoon.
Line a sheet pan with parchment. Scoop out small portions with a little cookie scoop or a teaspoon and roll each one quickly between your palms into a 1 inch ball. If the ganache starts to melt in your hands, put the tray back in the refrigerator for 10 minutes.
Coat each truffle in cocoa powder, chopped pistachios, coconut or red sprinkles and tuck it into a paper candy cup. Store them covered in the refrigerator and serve them a little cool, when the middles are creamy yet hold their round shape.
I tuck a few of these into small boxes for our neighbors and the ladies in my garden club every year. They cost a fraction of the store kind and taste so much better.
Keep the truffles in a sealed container in the refrigerator for up to 2 weeks. Set them out about 10 minutes before serving so the centers soften and turn silky.
10) Red Velvet Cheesecake Brownies
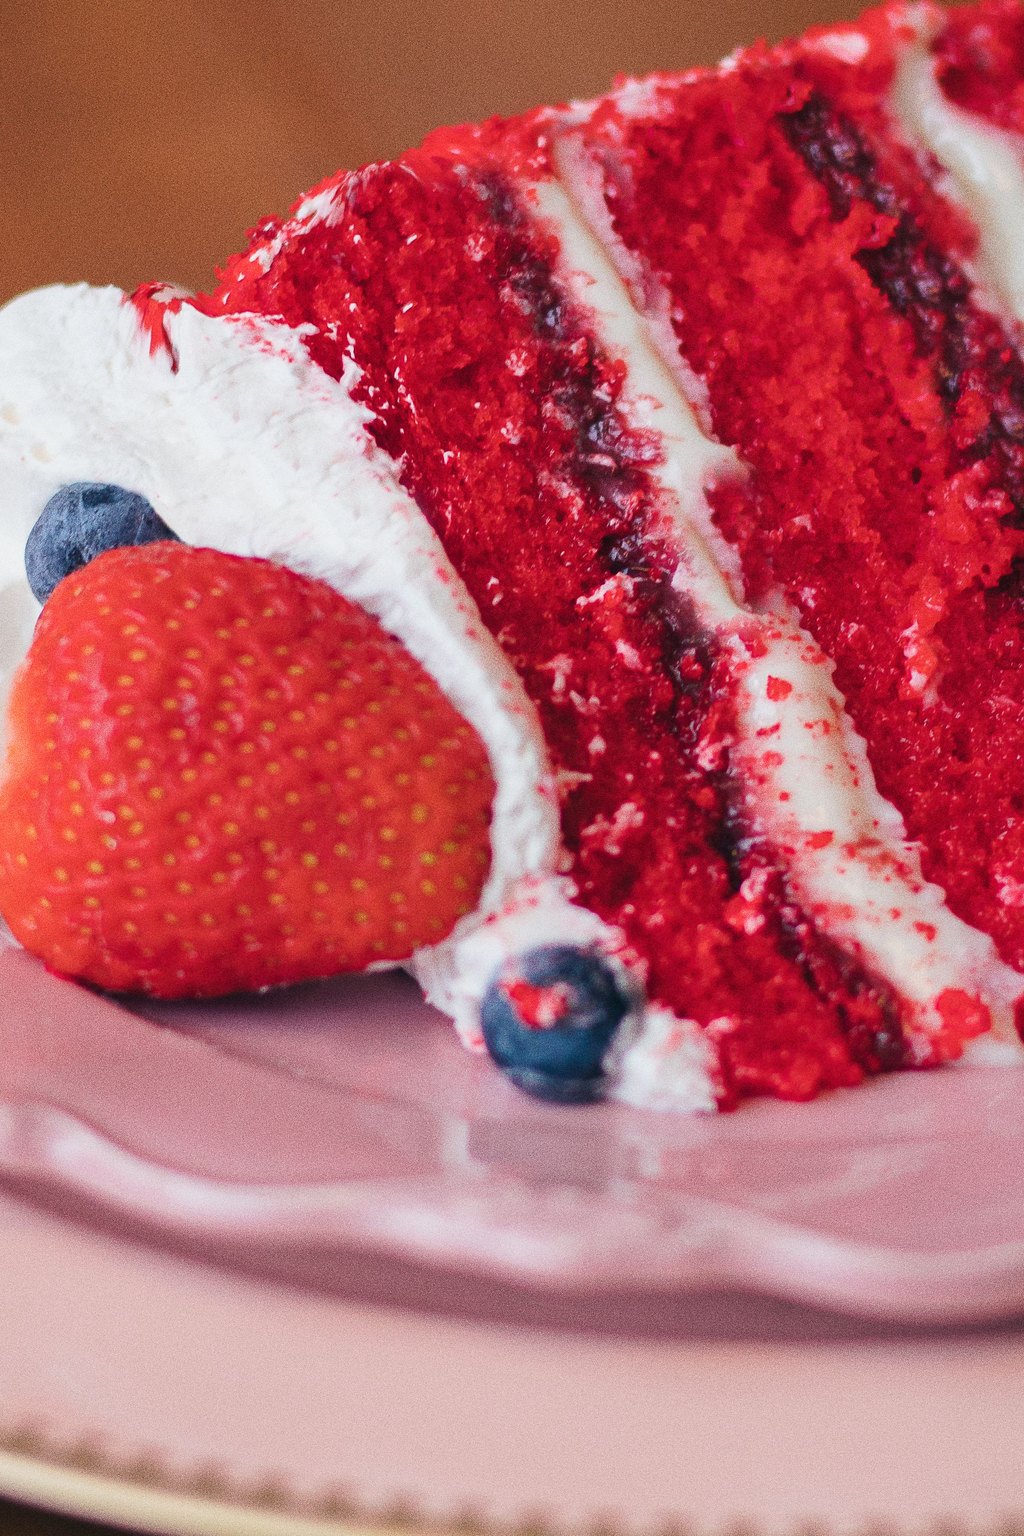
10) Red Velvet Cheesecake Brownies
These squares are as dense and fudgy as any brownie, yet they carry the soft cocoa and gentle tang of red velvet cake. A cream cheese swirl on top adds richness and a striking red and white pattern. Everything comes together in a single bowl, so the dishes are done in minutes.
Wrap each square in parchment and tie it with ribbon for a classroom treat or a little office gift. A glass of cold milk is the perfect partner for one of these. They are rich, so I cut small squares for a party tray next to a bowl of fresh strawberries.
Ingredients
1/2 cup unsalted butter, melted
1 cup granulated sugar
2 tablespoons unsweetened cocoa powder
1 tablespoon red food coloring
1 teaspoon vanilla extract
1 teaspoon white vinegar
2 large eggs
3/4 cup all purpose flour
1/4 teaspoon salt
6 ounces cream cheese, softened
1/4 cup granulated sugar for the swirl
1 large egg yolk for the swirl
Let the melted butter cool for a few minutes so it does not scramble the eggs. For neat squares, chill the cooled brownies for an hour and wipe the knife clean between cuts. Keep them in the fridge because of the cream cheese layer, and let them sit out 15 minutes before serving.
Instructions
Heat your oven to 350F. Cover the bottom and sides of an 8 inch square pan with parchment paper.
In a large bowl, whisk the melted butter with 1 cup of sugar, the cocoa powder, red coloring, vanilla and vinegar. Add the 2 whole eggs and whisk until the batter turns shiny.
Stir in the flour and salt only until combined. Scoop out 1/2 cup of the batter and set it aside, then spread the rest into the prepared pan.
In another bowl, beat the egg yolk with the cream cheese and 1/4 cup sugar until smooth. Drop it over the batter in about 9 dollops and fill the gaps with spoonfuls of the reserved red batter. Run a butter knife through both in loose figure eights. Stop after a few passes, since too much swirling muddies the colors.
Bake for 28 to 32 minutes. The edges should look set and a toothpick in the middle should come out with moist crumbs but no raw batter.
Leave the brownies in their pan until fully cool, about 1 hour. Lift them out using the parchment and cut into 16 squares.
When I crave red velvet but do not feel like frosting a whole cake, these are what I bake. They pack up nicely, so I bring them to church potlucks and to my daughter’s house.
Because of the cream cheese, store the brownies covered in the refrigerator for up to 4 days. They also cut into cleaner squares straight from the cold.
11) Strawberry Pretzel Salad
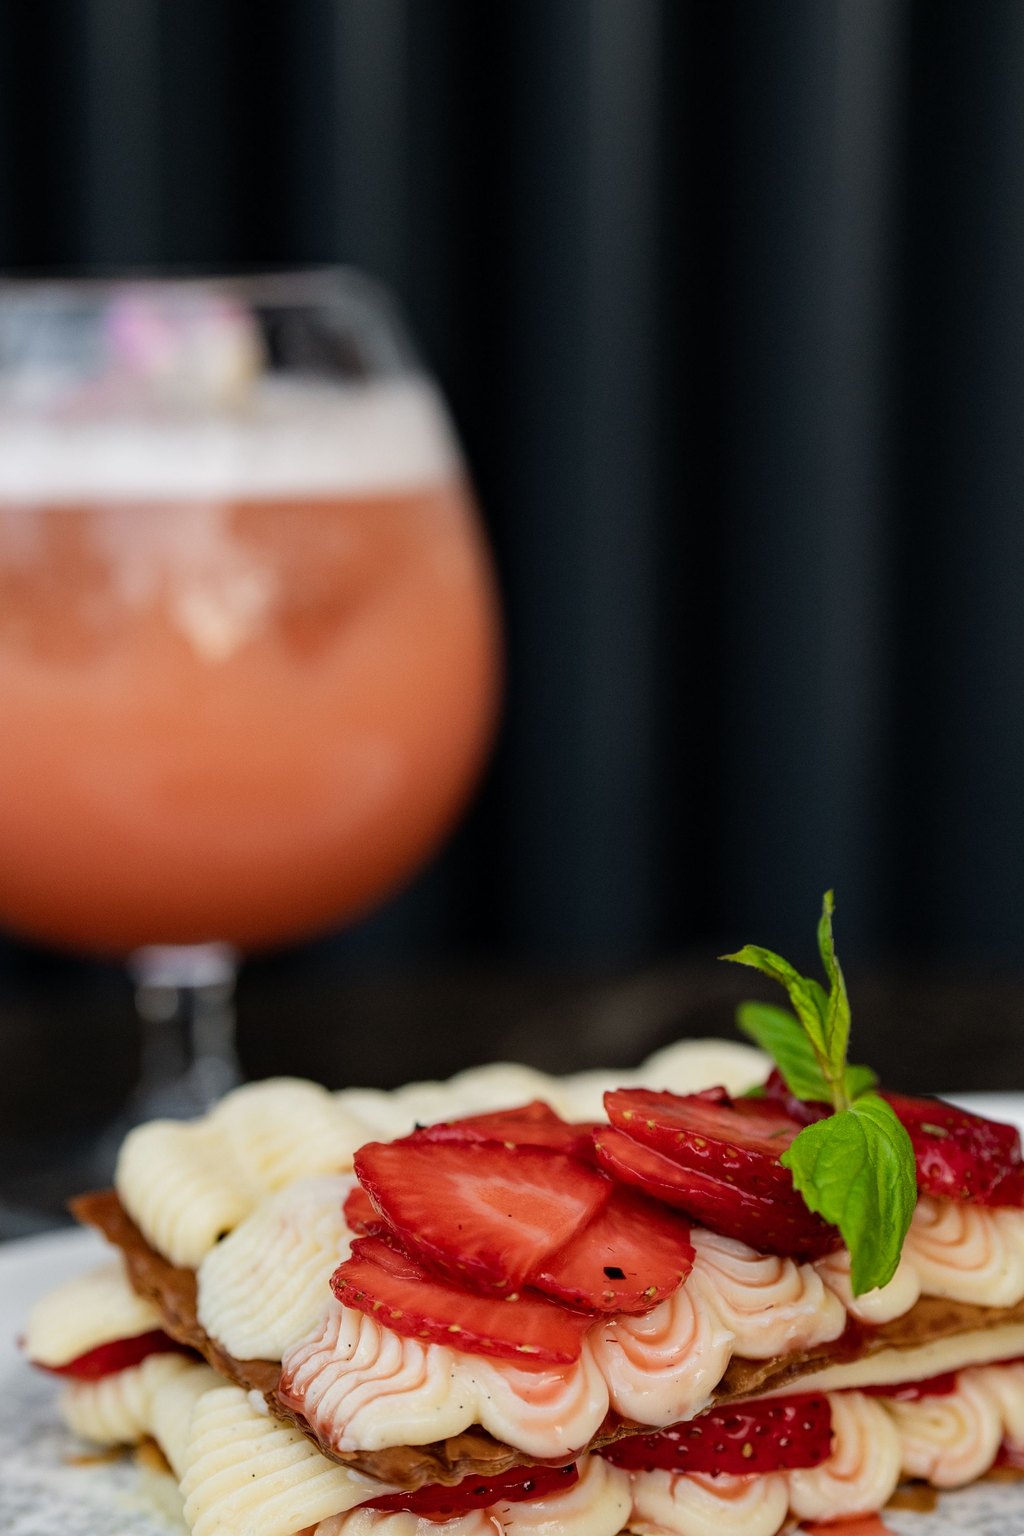
11) Strawberry Pretzel Salad
This old church supper classic layers a salty butter pretzel crust, a sweet cream cheese middle and a shiny strawberry gelatin top. The mix of crunch, creaminess and fruit is exactly why folks come back for another square. Spreading the cream layer right to the edges seals out moisture and keeps the crust crisp.
Carry it to a Valentine's potluck or a family Sunday dinner, and it will be the first dish scraped clean. It is sweet enough to serve as dessert, but plenty of families set it right next to the ham as a side. Garnish each square with a dollop of whipped cream and a fresh strawberry half.
Ingredients
For the crust
2 cups crushed pretzels
3/4 cup unsalted butter, melted
3 tablespoons granulated sugar
For the layers
8 ounces cream cheese, softened
1 cup granulated sugar
8 ounces frozen whipped topping, thawed
6 ounce box strawberry gelatin
2 cups boiling water
1 1/2 cups cold water
4 cups sliced fresh strawberries
Crush the pretzels into small pieces rather than fine dust, so the crust stays crunchy. Use full fat cream cheese, which helps the middle layer set firm instead of soft and runny. Assemble it the day before if you like, but serve it within 24 hours, since the crust slowly softens.
Instructions
Preheat the oven to 350F. Mix the crushed pretzels with the melted butter and 3 tablespoons of sugar, then press the mixture firmly into a 9×13 inch baking dish.
Bake the crust for 10 minutes. Set it on a rack and let it cool all the way, about 30 minutes.
Beat the cream cheese with 1 cup of sugar until smooth. Gently fold the whipped topping into it and spread the mixture over the cool crust, pushing it right up to the sides of the dish to seal the edges. Place it in the refrigerator.
Whisk the strawberry gelatin into the boiling water for about 2 minutes, until no granules remain. Add the cold water and chill until it thickens to about the consistency of raw egg whites, roughly 1 hour.
Fold the sliced strawberries into the thickened gelatin. Carefully pour it over the cream cheese layer and nudge it around with a spoon until the berries are spaced out evenly.
Chill for at least 3 more hours, until the top is fully set and does not feel tacky. Cut it into squares using a sharp knife and serve it nice and cold.
My sister brings this to nearly every holiday meal, and after years of begging I finally got her method. That rosy top layer makes it perfect for a Valentine’s table.
Build it a day early so the gelatin has all the time it needs to firm up. Leftovers keep in the refrigerator, covered, for 2 days before the crust starts to soften.
12) Valentine’s Day Snack Mix
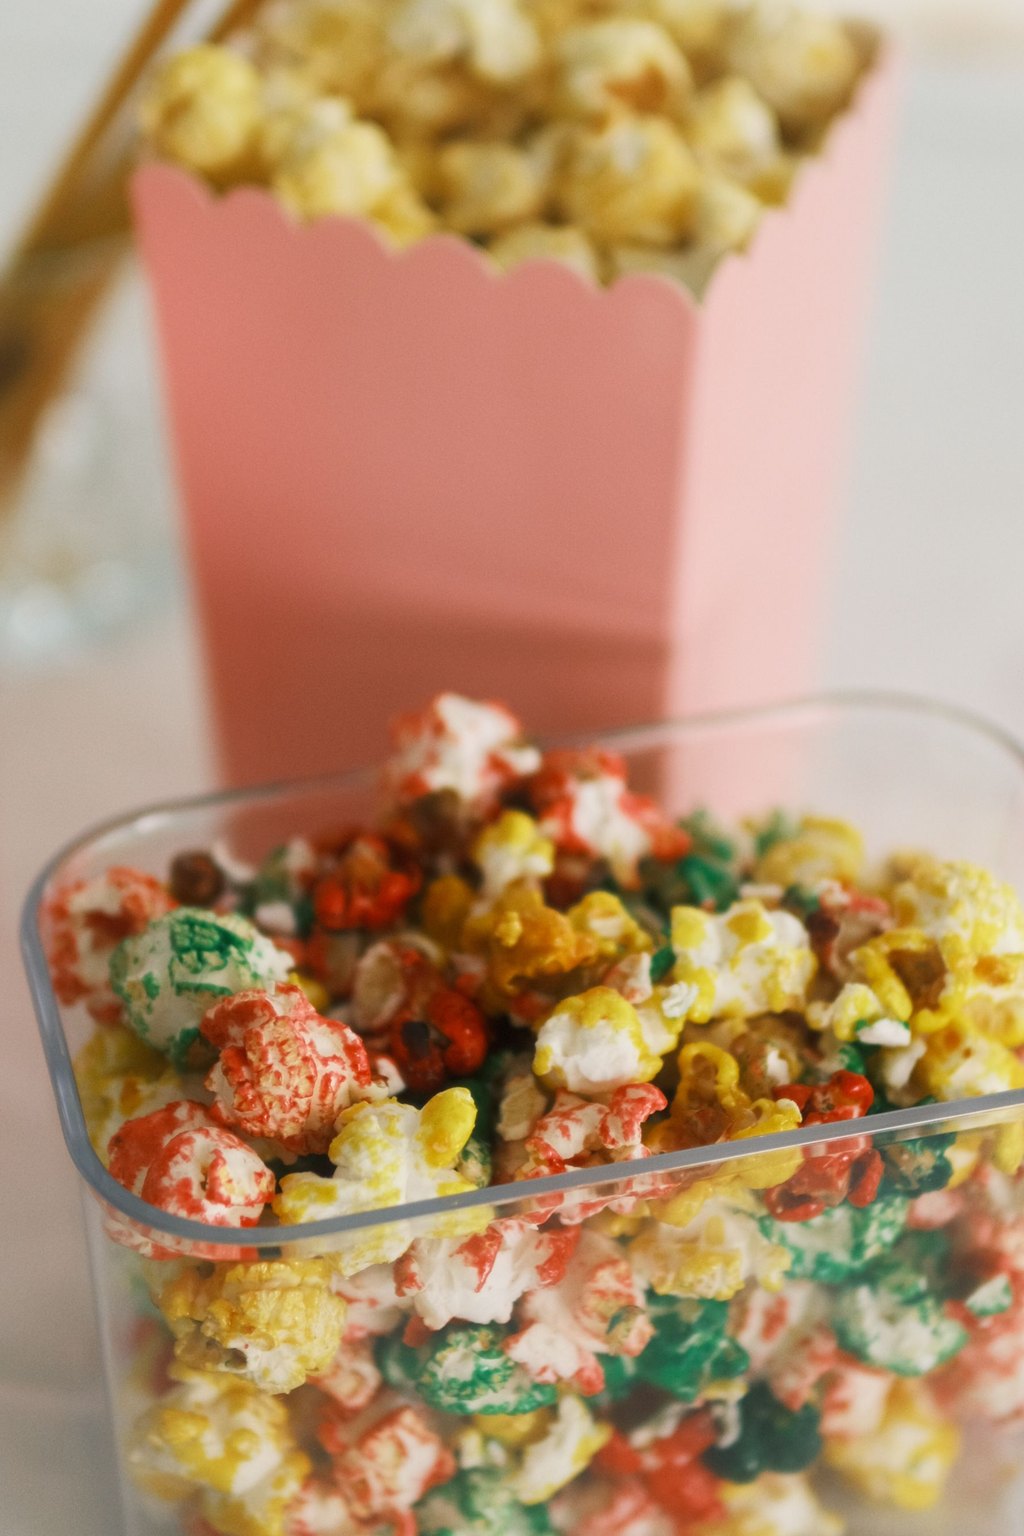
12) Valentine’s Day Snack Mix
This mix coats crunchy cereal squares in melted chocolate and peanut butter, then rolls them in a snowy blanket of powdered sugar. Red and pink candies plus a shower of sprinkles make it look festive for February. It hits salty and sweet at the same time, so stopping at one handful is nearly impossible.
Scoop it into small cellophane bags tied with red ribbon for easy party favors or class treats. Set out a big bowl for a movie night with the grandkids and watch it disappear. It travels well too, so I pack a bag for road trips and long afternoons at the ballpark.
Ingredients
9 cups crispy rice cereal squares
1 cup semisweet chocolate chips
1/2 cup creamy peanut butter
1/4 cup unsalted butter
1 teaspoon vanilla extract
1 1/2 cups powdered sugar
1 cup candy coated chocolate pieces in red and pink
1/2 cup white chocolate chips, melted
2 tablespoons Valentine sprinkles
1/4 teaspoon salt
Watch the chocolate mixture closely in the microwave, since peanut butter and chocolate can scorch quickly. For a nut free version, swap the peanut butter for sunflower seed butter. Store the mix airtight at room temperature for up to a week, away from heat so the drizzle stays firm.
Instructions
Pour the cereal into the biggest bowl you own. You want lots of room to fold so the squares do not break apart.
Combine the chocolate chips, peanut butter and butter in a microwave safe bowl. Heat in 30 second rounds, stirring after each, until melted and smooth, about 90 seconds altogether. Stir in the vanilla and salt.
Pour the warm chocolate mixture over the cereal and fold slowly with a spatula until each piece wears an even coat.
Transfer the chocolate coated squares to a large zip top bag or a container with a tight lid. Add the powdered sugar, close it up and shake until everything is dusted white.
Spread the mix out on a sheet pan lined with parchment. Drizzle the melted white chocolate over the top, then scatter the sprinkles on while the drizzle is still wet so they stick.
Leave the pan on the counter for 30 minutes so the drizzle can set. Once it is completely firm, break the mix into clusters and toss in the red and pink candy pieces.
Nothing on this list is easier, and nothing vanishes faster. I fill small cellophane bags with it for the grandkids to pass out to their classmates.
Keep it in a sealed container on the counter for up to 1 week. For friends with nut allergies, use sunflower seed butter in place of the peanut butter.
13) Flourless Chocolate Cake
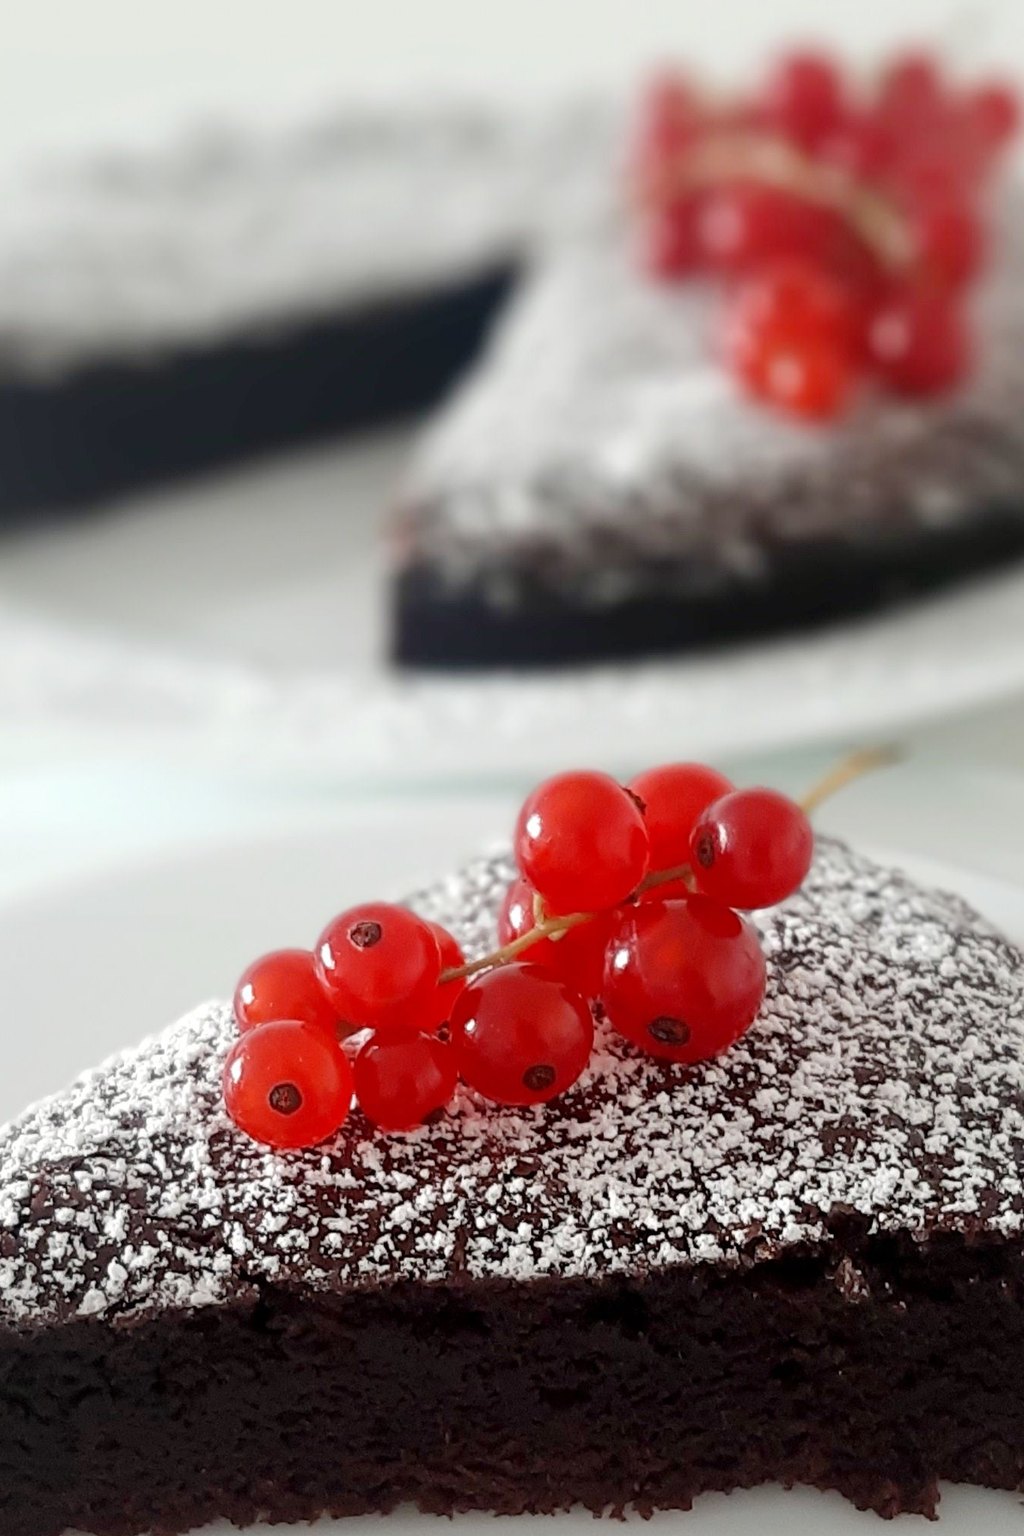
13) Flourless Chocolate Cake
This cake is rich, moist and full of deep chocolate flavor, with a texture closer to fudge than sponge. Since it contains no flour, it happens to be naturally gluten free. A delicate crackly top breaks into a dense middle that only needs whipped cream and a few berries.
Slice thin wedges, since a little of this goes a long way. Serve it with a cup of strong coffee or a glass of red wine for a grown up Valentine's dinner. A drizzle of raspberry sauce across the plate adds a pretty splash of color.
Ingredients
8 ounces bittersweet chocolate, chopped
1/2 cup unsalted butter, cubed
3/4 cup granulated sugar
1/4 teaspoon salt
1 teaspoon vanilla extract
1 teaspoon instant espresso powder
3 large eggs, room temperature
1/2 cup unsweetened cocoa powder
Butter for the pan
Powdered sugar for dusting
Whipped cream for serving
Fresh raspberries for serving
Room temperature eggs blend smoothly into the warm chocolate, while cold eggs can make the batter stiff and dull. Do not worry when the cake sinks a little as it cools, since that is normal for a flourless cake. Wrapped tightly, it keeps 4 days in the fridge and tastes even fudgier served cold.
Instructions
Preheat the oven to 375F. Grease an 8 inch round cake pan with butter, set a circle of parchment in the bottom and butter the paper too.
Melt the chocolate and butter together in a large microwave safe bowl, heating in 30 second rounds and stirring each time, until smooth.
Add the sugar, espresso powder, vanilla and salt and whisk well. Add the eggs one at a time, whisking well after each, until the batter becomes thick and glossy.
Sift the cocoa over the top and whisk only until there are no dry patches left. Scrape the batter into the pan, smooth it out and rap the pan on the counter twice to knock out any big air bubbles.
Bake for 22 to 25 minutes, until a thin crust forms on top and the center reads about 200F on a thermometer. The middle will still look a little soft, which is what you want.
Let the cake sit in the pan for 10 minutes. Run a knife around the side, then turn it out onto a plate. Cool for at least 1 hour, dust it with powdered sugar, then serve slices alongside whipped cream and berries.
I keep this one handy for friends who skip gluten, and no one at the table ever misses the flour. A simple snowfall of powdered sugar is all the decoration it needs.
Honestly, it tastes even better on day two. Wrap it well and leave it on the counter for 2 days, or keep it in the refrigerator for up to 5.
14) Strawberry Panna Cotta
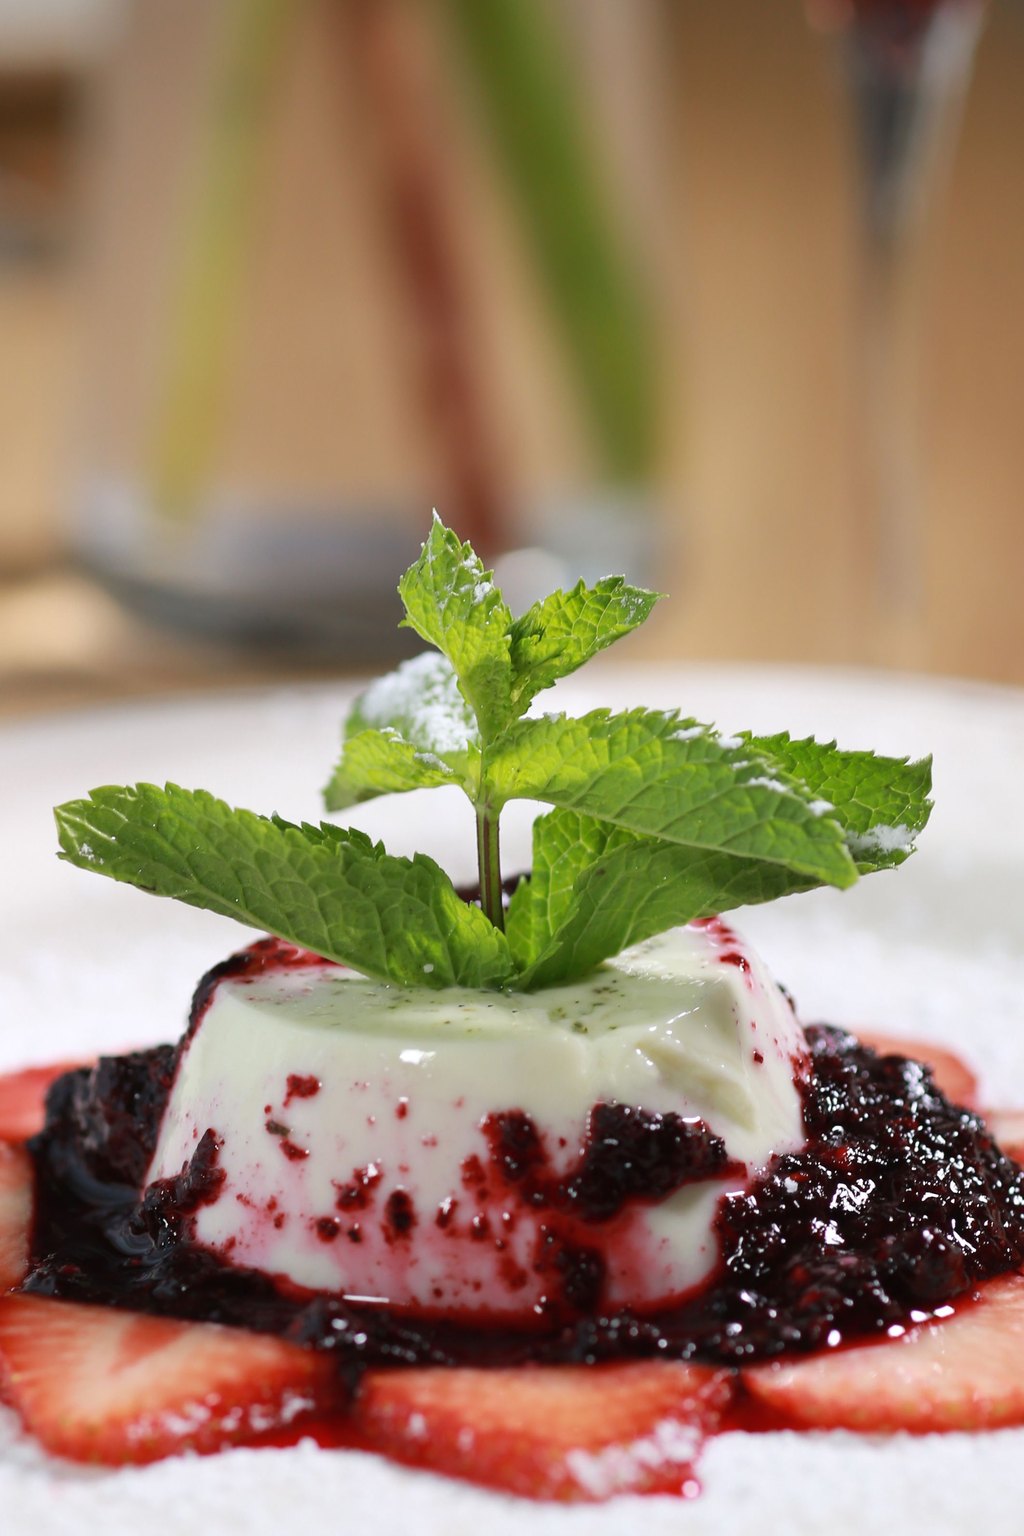
14) Strawberry Panna Cotta
Panna cotta is a classic Italian treat made from sweet cream that is set with just enough gelatin to hold its shape. It is cool and silky on the spoon, a lot like a very tender custard. A quick stovetop strawberry topping adds a pop of red and a fresh, tart contrast.
Present them in clear glasses so the red topping and white cream show off together. It is an elegant end to a romantic dinner at home and light enough after a rich meal. For a family dinner, I set them out on a tray and let everyone grab their own.
Ingredients
For the panna cotta
1 envelope unflavored gelatin, about 2 1/4 teaspoons
3 tablespoons cold water
2 cups heavy cream
1 cup whole milk
1/2 cup granulated sugar
1 teaspoon vanilla extract
For the strawberry topping
2 cups chopped fresh strawberries
3 tablespoons granulated sugar
1 tablespoon lemon juice
Fresh mint leaves for garnish
Never let the cream boil once the gelatin goes in, since high heat weakens its setting power. Stir a full minute so no undissolved gelatin is left behind to make rubbery spots in the glasses. They keep covered in the fridge for up to 3 days, so you can make them well ahead of a dinner date.
Instructions
Pour the cold water into a small bowl, scatter the gelatin over it and leave it for 5 minutes. It will swell and look spongy once it has soaked up all the liquid.
In a saucepan over medium heat, warm the milk, cream and 1/2 cup sugar, stirring now and then, until the sugar melts and the mixture steams, about 5 minutes. Keep it below a boil.
Take the pan off the heat, add the softened gelatin and stir for about 1 minute, until it fully melts into the cream. Stir in the vanilla.
Pour the mixture evenly into 6 small glasses or ramekins. Cover them and refrigerate for at least 4 hours, until set but still gently wobbly.
To make the topping, combine the chopped berries with the lemon juice and 3 tablespoons of sugar in a little pot. Let them bubble gently on medium for 6 to 8 minutes, or until the fruit softens and the juices thicken into a syrup. Let it cool all the way.
Right before serving, spoon the cooled strawberry topping over each panna cotta and finish with a few mint leaves from the garden.
This is my favorite dessert to make ahead, since it takes only about 20 minutes of actual work. It looks like something off a nice restaurant menu.
Panna cotta keeps covered in the refrigerator for up to 3 days. Store the strawberry topping in its own container and spoon it on at the last minute so the layers look neat.
Before You Start Cooking
If you plan to make a few of these, think about your refrigerator space first. The truffles, mousse, panna cotta and cheesecake bars all happily wait a day or two, so you can save the lava cakes or the fondue for a warm, fresh finish on the night itself.
However you spend the holiday, I hope one of these desserts pulls the people you love a little closer. It might be a quiet candlelit supper for two or a noisy fondue night with the grandkids, and either way the sweetest part is the company. Wishing you a very happy Valentine’s Day from Tom and me.
Frequently Asked Questions
Which Valentine's dessert is best to make with children?
Chocolate dipped strawberries and the snack mix are the easiest choices for kids. Neither one uses the oven, so little helpers can dip, shake and sprinkle to their heart's content. The crinkle cookies work well too, because rolling dough balls in sugar is fun and a grownup can handle the hot pans.
Can I prepare these desserts a day early?
Many of them actually improve with a night in the refrigerator. Mousse, panna cotta, truffles, cheesecake bars and the pretzel salad all need chilling time to firm up, so a day ahead is perfect. Save the dipped strawberries for the same day, and bake lava cakes just before you plan to serve them.
Where does the red velvet flavor come from?
Red velvet tastes the way it does because of a little cocoa powder paired with tangy buttermilk and a spoonful of vinegar. Together they create a soft chocolate note with a light tang, much milder than a true chocolate cake. Cream cheese frosting is the traditional match since its tang echoes the cake.