14 Old Fashioned Comfort Food Recipes
Fourteen old fashioned American comfort foods, from pot roast and chicken and dumplings to cheesy baked macaroni, crispy fried chicken and a simmering pot of chili.
Certain evenings need food that feels like a hug, the dishes our mothers made and our grandchildren will someday ask us for. These fourteen American classics cover every craving, from a slow braised pot roast and chicken and dumplings to crunchy fried chicken, bubbling baked macaroni, lasagna, hearty soups and biscuits under sausage gravy. I like to save the longer recipes for Sunday, when the family is home and the kitchen is busy. Make a double batch, because nearly all of these taste better the second day and freeze nicely.
1) Chicken and Dumplings
1) Chicken and Dumplings
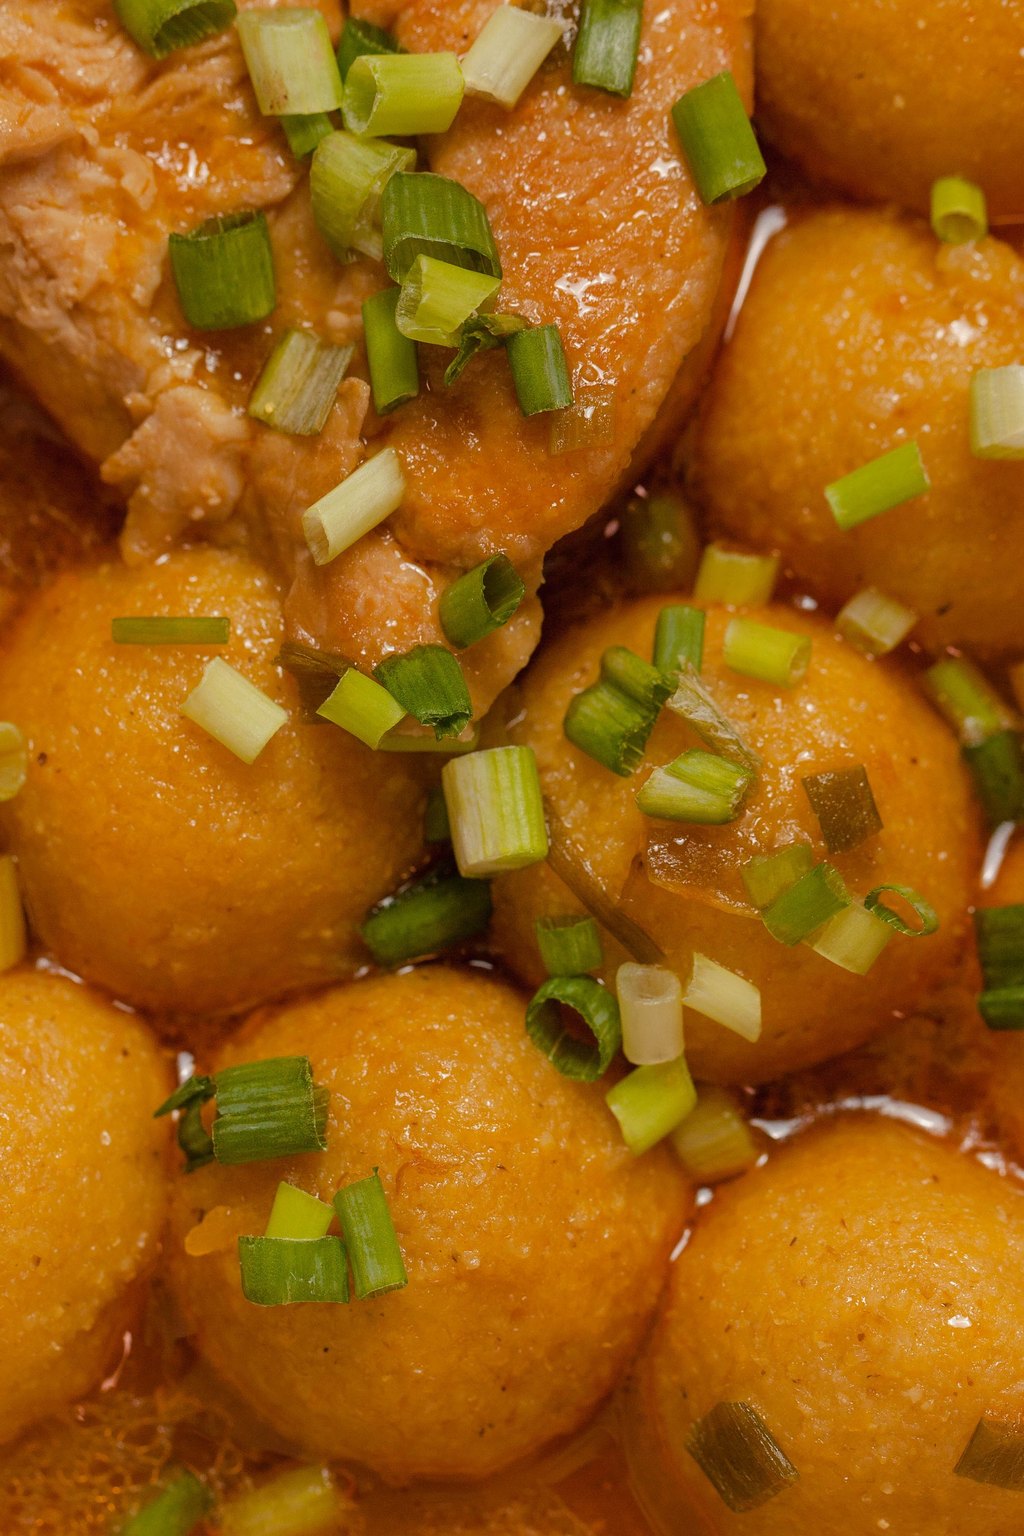
Shredded chicken and tender vegetables bubble away in a thick, creamy broth crowned with fluffy spoonfuls of dough. They steam on the surface, so their tops turn light and airy while the undersides drink in the savory broth. This Southern favorite warms you right down to your toes.
Ladle this into wide, shallow bowls so each person gets a couple of fluffy dumplings on top. A simple side of buttered green beans or a crisp apple salad is all you need. It is the dinner I make when someone in the family is feeling under the weather or just needs a little comfort.
Ingredients
3 tablespoons unsalted butter
1 yellow onion, diced
3 carrots, sliced
3 celery stalks, sliced
3 cloves garlic, minced
1/3 cup all purpose flour
6 cups chicken broth
1 1/2 lbs boneless skinless chicken thighs
1 teaspoon dried thyme
1 teaspoon salt
For the dumplings
2 cups all purpose flour mixed with 1 tablespoon baking powder and 1 teaspoon salt
3/4 cup whole milk
4 tablespoons unsalted butter, melted
Thighs stay tender and juicy through the simmer, so do not swap in breasts unless you watch them closely. Use a small cookie scoop dipped in the hot broth to drop the dough, and it will slide right off. For two, halve both the stew and the dough, and reheat any leftovers with a splash of broth.
Instructions
Set a large Dutch oven on medium heat and melt 3 tablespoons of the butter. Cook the onion, carrots and celery for 6 to 7 minutes, until tender. Add the garlic and stir for a minute.
Scatter the 1/3 cup flour into the pot and keep stirring for 1 to 2 minutes so it loses its raw taste.
Pour in the broth gradually, whisking until smooth. Lay in the whole thighs and add the thyme and salt. Once it boils, turn it down to a simmer and leave the lid off. In 18 to 20 minutes the chicken should register 165F.
Lift the thighs onto a board, pull them into shreds with two forks, and add the meat back to the pot. Keep the stew barely simmering.
For the dumplings, add the milk and melted butter to the seasoned flour and stir only until you have a thick, sticky dough. Overworking makes them heavy.
Spoon rounded tablespoons of dough over the top of the bubbling stew, leaving space between each one.
Put the lid on snugly and let it simmer for 15 minutes. Do not peek. The dumplings are ready when they are puffed and cooked all the way through.
Spoon into bowls and finish with chopped parsley or a grind of black pepper.
This is what I cook when someone I love needs looking after. One spoonful takes me straight back to my mother’s stove.
Keep the lid on while the dumplings cook, because the steam caught under it is what puffs them up. The stew itself can be made a day early, then reheated to a simmer before you add fresh dumplings.
2) Classic Pot Roast
2) Classic Pot Roast
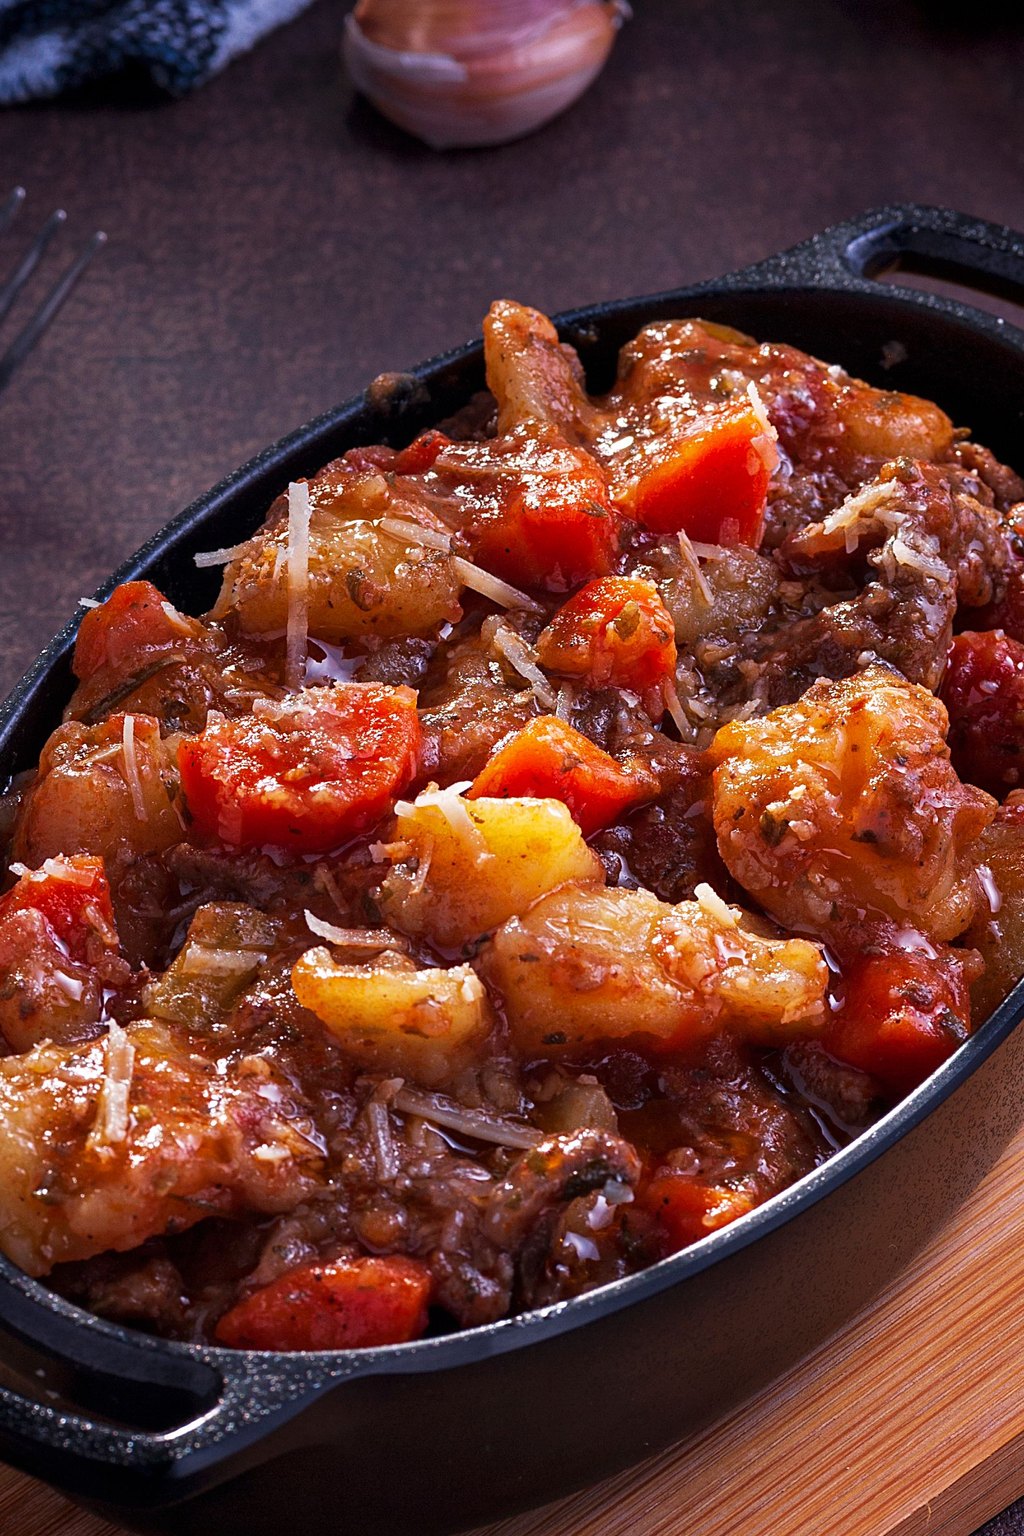
A nicely marbled chuck roast gets a deep brown sear before braising slowly until a fork pulls it apart. Carrots and potatoes join halfway through, so they turn tender without falling to pieces. The herb and red wine braising liquid becomes a ready made gravy at the end.
Pot roast is our traditional Sunday dinner, served on a big platter with the vegetables tucked all around the meat. A basket of warm rolls is perfect for soaking up the gravy. Leftovers make the best hot beef sandwiches the next day, piled on toast with extra gravy.
Ingredients
1 boneless beef chuck roast, 3 to 4 lbs
2 teaspoons salt
1 teaspoon black pepper
2 tablespoons vegetable oil
1 yellow onion, cut into wedges
4 cloves garlic, smashed
2 tablespoons tomato paste
1 cup dry red wine or extra beef broth
2 cups beef broth
1 tablespoon Worcestershire sauce
2 sprigs fresh rosemary
4 sprigs fresh thyme
1 1/2 lbs baby potatoes
4 carrots, cut into 2 inch pieces
Let the roast sit out for about 30 minutes before searing so it browns more evenly. If you skip the wine, add a spoonful of red wine vinegar with the broth for a little tang. Check the liquid once during the long braise, and add a little broth if it drops below a third of the way up the roast.
Instructions
Heat the oven to 325F. Dry the roast with paper towels and season it all over with the salt and pepper.
Warm the oil in a big Dutch oven on medium high. Sear the roast 4 to 5 minutes per side, turning it until every side has a dark brown crust. Set it on a plate.
Turn the burner to medium. Cook the onion wedges for 3 minutes, then add the garlic and tomato paste and stir for a minute.
Add the wine and scrape the bottom of the pot clean. Let it bubble 2 minutes, then pour in the broth and Worcestershire.
Put the roast back in with its juices and tuck the rosemary and thyme sprigs around it. Put the lid on and slide the pot into the oven for 2 hours.
Arrange the potatoes and carrots around the meat, cover again, and return it to the oven. After another 1 to 1 1/2 hours, the beef should be so tender it shreds with a fork.
Lift everything solid onto a warm platter. Spoon the fat off the liquid, pull out the herb stems, and let the juices bubble on a burner for 5 minutes so they reduce.
Slice or pull apart the beef and serve it with the vegetables, spooning lots of the pan juices over everything.
Nothing says Sunday supper at our house like a pot roast perfuming every room. My mother made it this way, and so do I when the kids and grandkids come home.
Chuck is the right cut, since its marbling melts as it braises and leaves the meat tender. Shred any leftovers onto toasted rolls with a little horseradish mayo for terrific sandwiches.
3) Baked Macaroni and Cheese
3) Baked Macaroni and Cheese
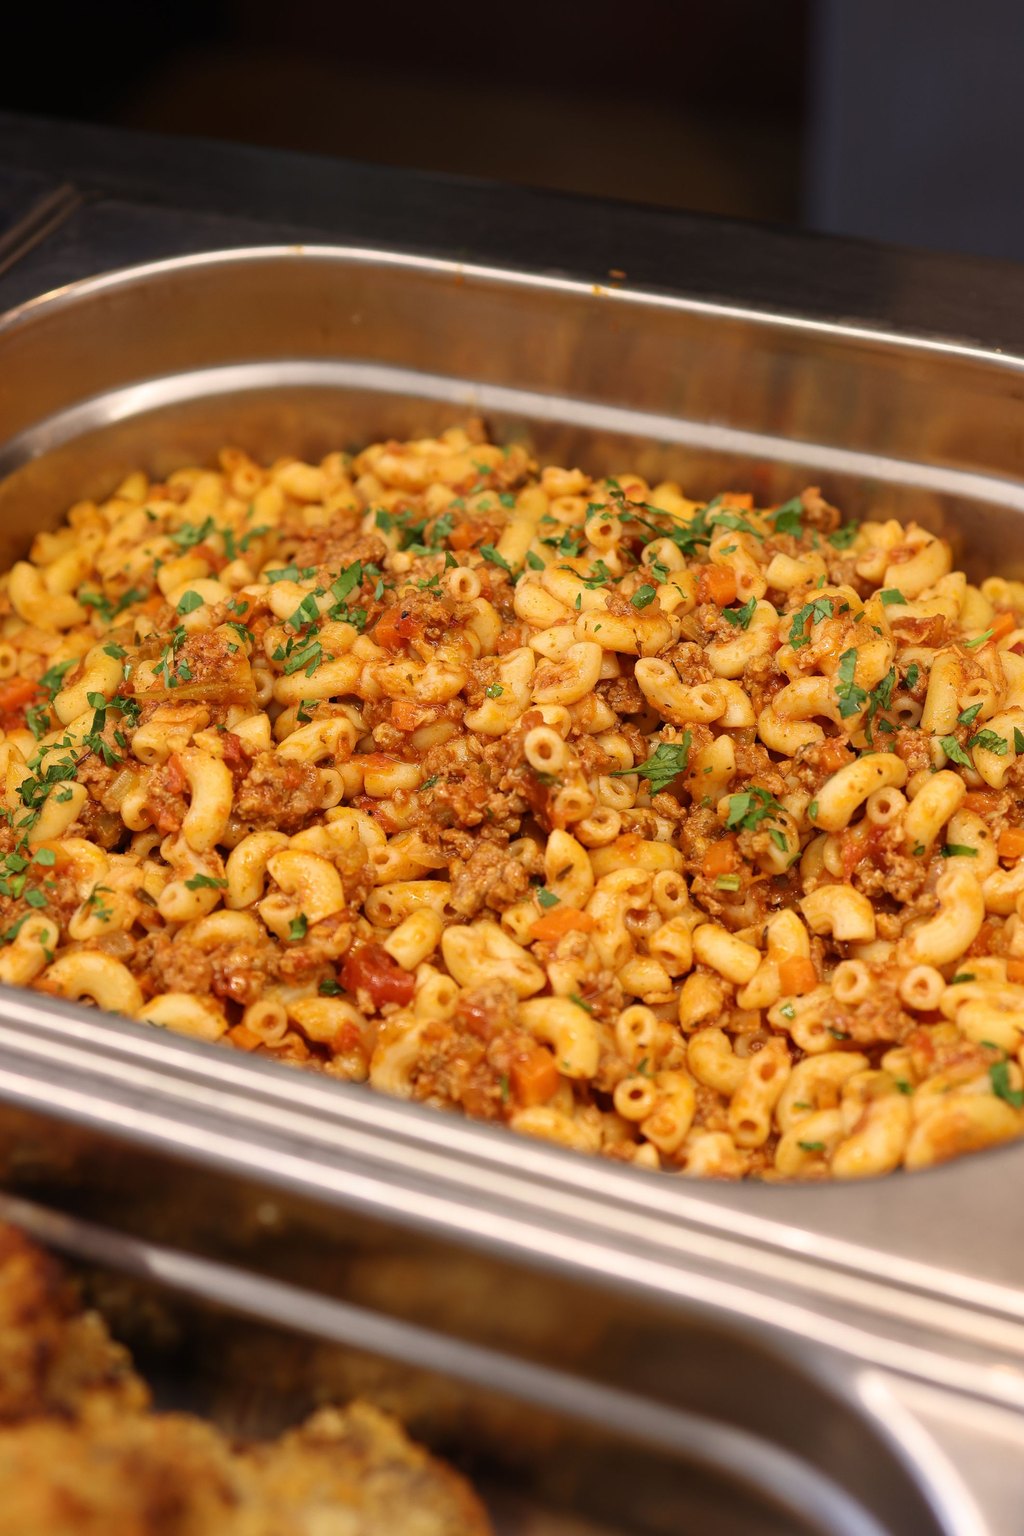
This baked macaroni begins with a velvety homemade sauce of sharp cheddar and nutty Gruyere. The noodles come out of the water a little early so they can finish baking and still hold their shape. A buttery panko topping gives each creamy, cheesy scoop a satisfying crunch.
This is the side dish that disappears first at every holiday dinner, right next to the ham and the turkey. Serve it straight from the baking dish so everyone gets a bit of the crispy top. For a cozy supper, I pair it with a simple green salad and some roasted broccoli.
Ingredients
1 lb elbow macaroni
6 tablespoons unsalted butter
1/3 cup all purpose flour
3 cups whole milk
1 cup half and half
1 teaspoon dry mustard powder
1/2 teaspoon smoked paprika
1 teaspoon salt
1/2 teaspoon black pepper
4 cups shredded sharp cheddar cheese, divided
2 cups shredded Gruyere cheese
1 cup panko breadcrumbs
2 tablespoons unsalted butter, melted
Shred your own cheese from blocks, because bagged cheese has a coating that keeps the sauce from turning silky. Gruyere can be pricey, so Swiss or Monterey Jack make a fine stand in. If you assemble it ahead and refrigerate it, add the panko just before baking and give it an extra 10 minutes.
Instructions
Heat the oven to 350F. Butter a 9×13 inch dish. Boil the macaroni in salted water 2 minutes short of the package time, drain, and set it aside.
Melt the 6 tablespoons of butter in a large saucepan on medium heat. Whisk in the flour and let it bubble for 1 to 2 minutes until it turns pale gold.
Add the milk and half and half gradually, whisking until smooth. Keep whisking off and on for 5 to 7 minutes, until the sauce coats a spoon.
Take the pan off the heat. Stir in the mustard powder, smoked paprika, salt and pepper. Add 3 cups of cheddar and all the Gruyere in handfuls, stirring until silky.
Fold the macaroni into the sauce until every noodle is coated, then pour it into the dish.
Scatter the remaining cheddar across the top. Stir the melted butter into the panko and spread the crumbs over the cheese.
Bake with no cover for 25 to 30 minutes. It is done when the sides bubble and the crumbs are golden.
Let it sit 5 to 10 minutes before scooping so the sauce settles and stays creamy.
This is the macaroni I bring to every holiday table and church supper, and the dish always comes home scraped clean. In our family the crunchy top is required.
Put it together up to a day early and leave off the crumbs, then add them just before baking and allow 10 extra minutes. Any good melting cheese can stand in for the Gruyere.
4) Chicken Pot Pie
4) Chicken Pot Pie
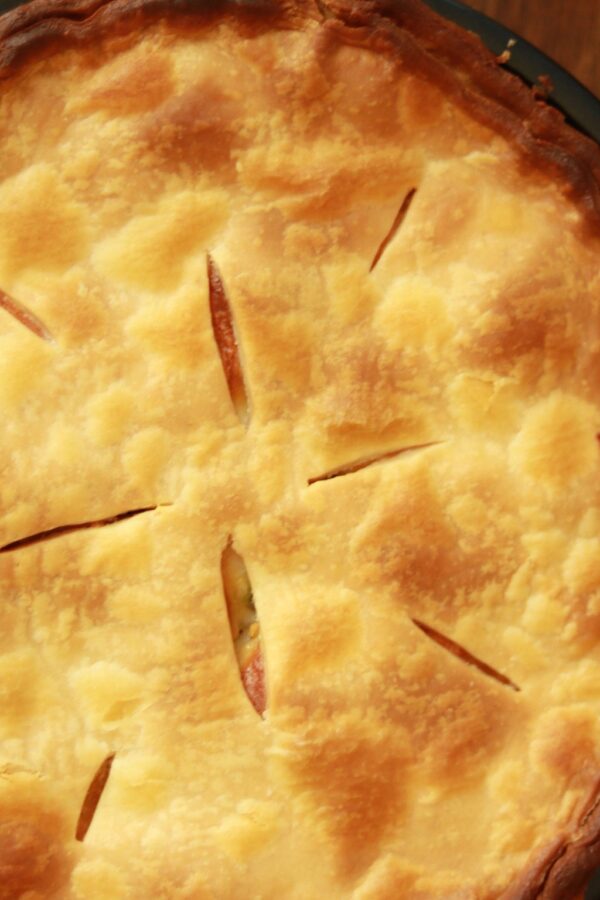
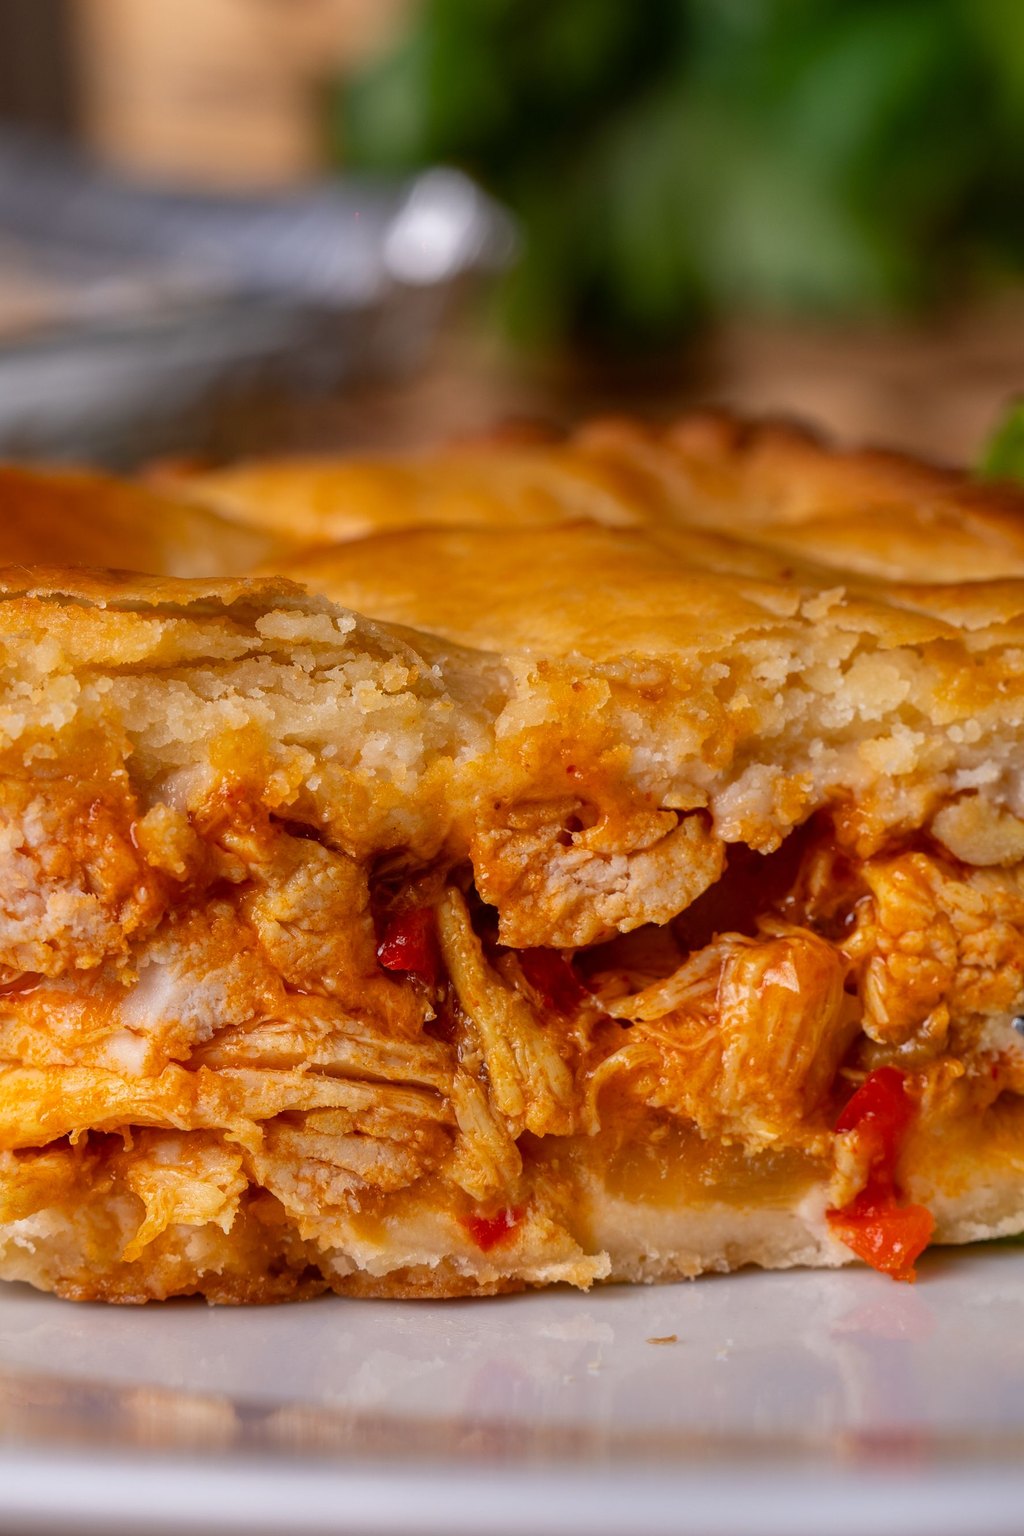
A creamy filling of chicken, carrots, celery and peas bakes between two flaky, golden crusts. It is bound with a simple homemade gravy scented with thyme that thickens beautifully as it bakes. A brush of egg wash on top gives it a bakery shine and a deep golden color.
Bring the whole golden pie to the table before you cut it, because it always gets a few happy sighs. Serve it with a light salad of greens and sliced pears to balance the rich filling. It is a lovely Sunday supper for two, with plenty left over for lunch the next day.
Ingredients
2 refrigerated pie crusts
1/3 cup unsalted butter
1 small yellow onion, diced
2 carrots, diced
2 celery stalks, diced
2 cloves garlic, minced
1/3 cup all purpose flour
1 3/4 cups chicken broth
2/3 cup whole milk
3 cups cooked shredded chicken
1 cup frozen peas
1 teaspoon dried thyme
1 teaspoon salt
1 large egg, beaten with 1 tablespoon water
Leftover turkey works just as well as chicken, which makes this a great dinner the weekend after Thanksgiving. A rotisserie chicken also gives you plenty of meat with almost no work. Bake the pie on the lower rack of the oven for a crisper, better browned bottom crust.
Instructions
Heat the oven to 400F. Fit one crust into a deep 9 inch pie dish and chill it while you make the filling.
Melt the butter in a big skillet on medium heat. Cook the onion, carrots and celery 6 to 8 minutes, until soft. Add the garlic and stir for a minute.
Dust in the flour and keep stirring for 1 to 2 minutes so it cooks a little.
Pour in the broth and milk a little at a time while whisking. Let it simmer 3 to 5 minutes, stirring often, until thick and creamy.
Add the chicken, peas, thyme and salt. Taste for seasoning, then set the skillet aside for 10 minutes to cool a bit.
Spoon the filling into the chilled crust. Lay the second crust on top, trim the overhang, and pinch the edges to seal. Brush with egg wash and cut 4 small vents.
Place the pie on a rimmed baking sheet and bake 30 to 35 minutes. Look for a deep golden crust with filling bubbling up through the vents. If the edges darken too fast, cover them with strips of foil.
Wait 15 minutes before you slice it, which gives the filling time to firm up.
Whenever there is roast chicken left over, I turn it into pot pie. It turns humble scraps into a supper that feels like a party.
You can freeze the assembled, unbaked pie for up to 3 months and bake it straight from the freezer at 375F, allowing about 1 1/4 hours. Store bought crust saves time, and nobody will ever know.
Want the whole story, plus my storage and swap notes? Here is my full Easy Chicken Pot Pie From Scratch recipe.
5) Chicken Fried Steak with Country Gravy
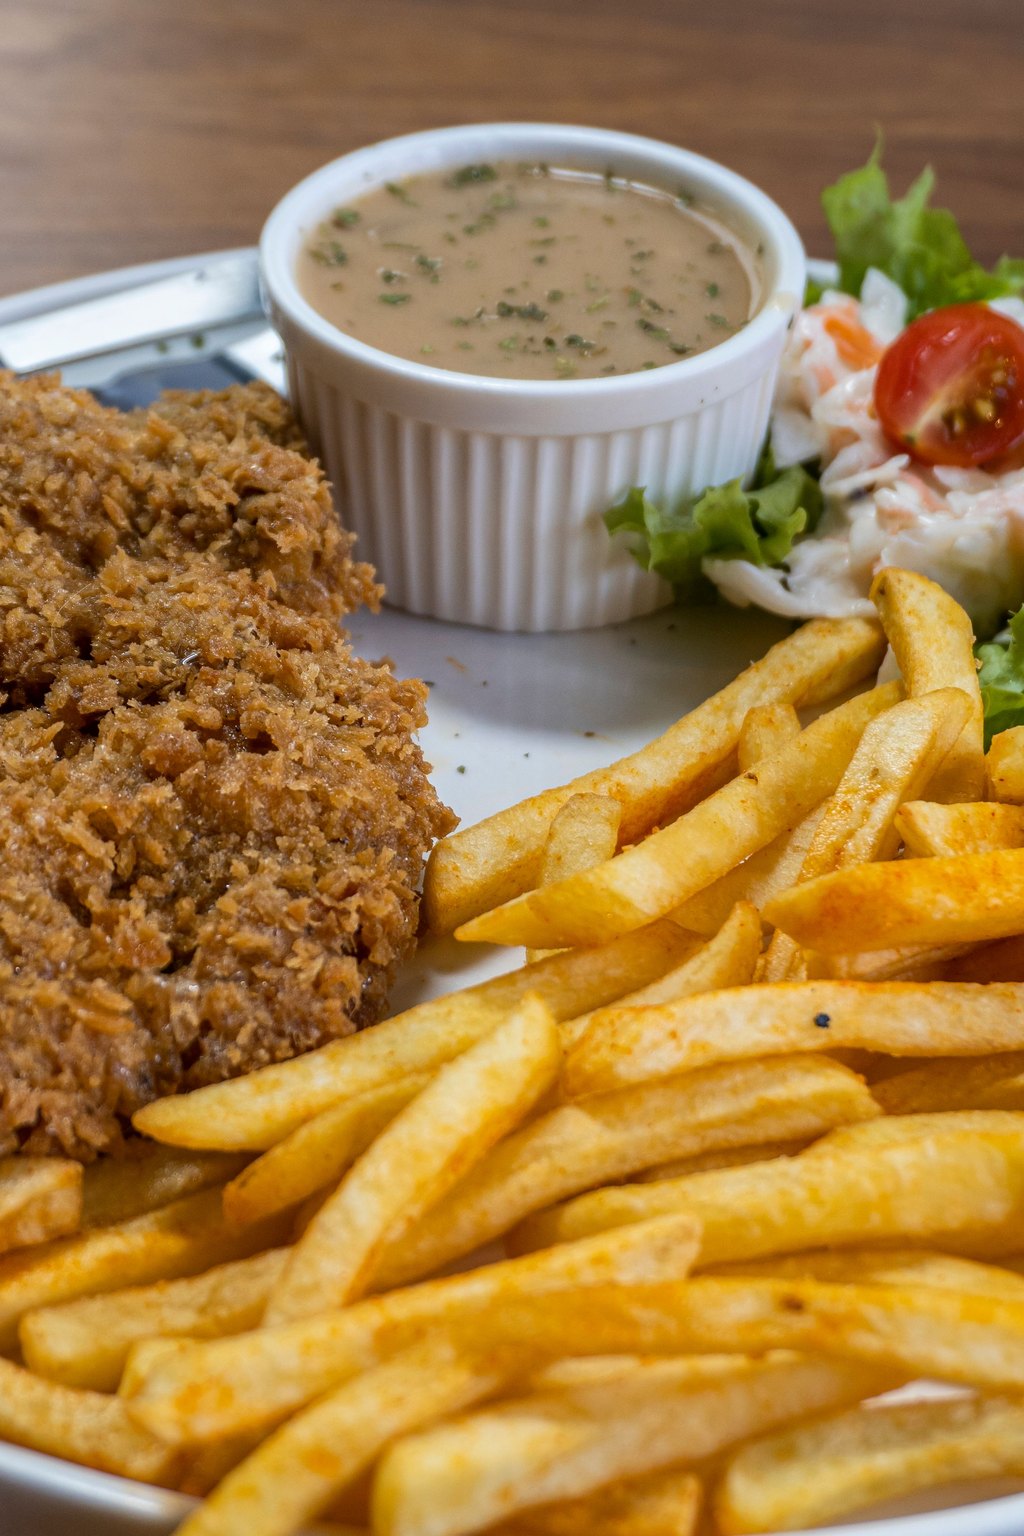
5) Chicken Fried Steak with Country Gravy
Cube steaks get coated twice in seasoned flour and buttermilk and then fry until golden and crunchy. A creamy country gravy loaded with black pepper is whisked together in the same skillet using the drippings and crispy bits. It is classic Texas diner food served right at your own kitchen table.
Plate each steak with a warm biscuit and a little dish of extra gravy on the side. Sliced tomatoes or a cucumber salad add something cool and fresh to a rich plate. It is a special treat for Tom on his birthday, and he always asks for seconds of gravy.
Ingredients
4 cube steaks, about 4 oz each
1 1/2 cups all purpose flour
1 teaspoon garlic powder
1 teaspoon paprika
1 1/2 teaspoons salt
1 teaspoon black pepper
2 large eggs
1 cup buttermilk
1 cup vegetable oil, for frying
For the gravy
3 tablespoons all purpose flour
2 1/2 cups whole milk
1/2 teaspoon salt
1 teaspoon coarse black pepper
Keep a thermometer in the oil, because cooler oil makes the crust greasy and hotter oil burns it before the meat cooks through. Press the flour on firmly with your palm on the second dredge, which helps the crust cling during frying. If the gravy thickens too much while it stands, whisk in a splash more milk.
Instructions
In a shallow dish, whisk the flour together with the salt, pepper, paprika and garlic powder. In a second dish, beat the eggs with the buttermilk.
Blot the steaks dry. Coat each one in flour, dip it in the egg mixture, and then press it back into the flour so both sides are thickly covered. Rest them on a rack for 10 minutes.
Pour the oil into a big cast iron skillet and heat it on medium high to 350F.
Fry two steaks at a time, 3 to 4 minutes per side, until crisp and golden and 160F in the middle. Drain them on a rack set over a sheet pan and hold them in a 200F oven.
Carefully drain the skillet until only about 3 tablespoons of oil remain, keeping the browned bits in the pan. Lower the heat to medium.
Sprinkle in the gravy flour and whisk for 1 to 2 minutes, until golden.
Add the milk slowly while whisking, then let it bubble 4 to 5 minutes, stirring the whole time, until thick. Season with the salt and a generous amount of black pepper.
Ladle the gravy over the steaks and serve with mashed potatoes and green beans.
My father always ordered this at our little hometown diner, so I taught myself to make it. We save it as a treat for cold Saturday nights.
Coating the steaks twice creates that shaggy, extra crunchy crust, so please do not skip it. Resting the coated steaks before frying helps the breading cling.
6) Southern Fried Chicken
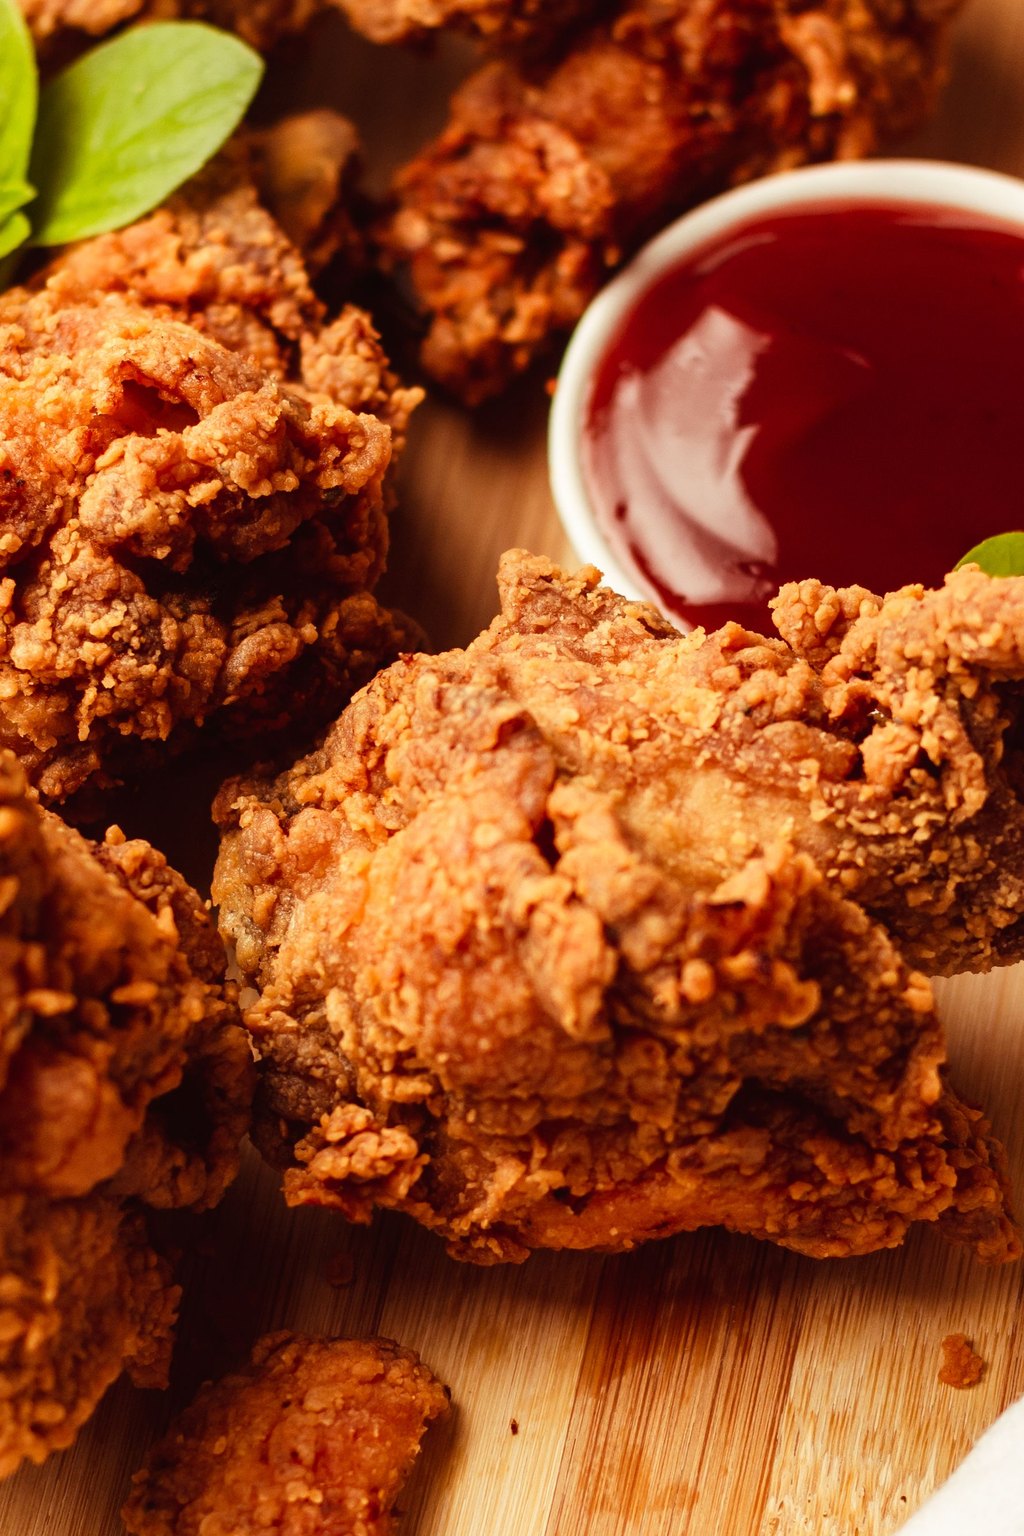
6) Southern Fried Chicken
Bone in chicken soaks in tangy buttermilk spiked with hot sauce, which keeps the meat moist and tender. A seasoned dredge of flour and cornstarch fries up into a thick, crackly, golden crust. Holding the oil at a steady temperature is the secret to chicken that is crisp outside and cooked through inside.
Pile the chicken on a big platter and set it in the center of the table so everyone can grab a favorite piece. Corn on the cob, potato salad and sweet tea turn it into a perfect summer supper. It is just as good cold the next day, which makes it a classic for picnics.
Ingredients
3 1/2 lbs bone in chicken pieces, drumsticks, thighs and breasts
2 cups buttermilk
1 tablespoon hot sauce
2 teaspoons salt, divided
2 cups all purpose flour
1/4 cup cornstarch
1 tablespoon paprika
2 teaspoons garlic powder
1 teaspoon onion powder
1 teaspoon black pepper
1/2 teaspoon cayenne pepper
Vegetable or peanut oil, for frying
Take the chicken out of the refrigerator about 20 minutes before frying, so the cold meat does not drop the oil temperature as much. Adjust the burner between batches to keep the oil in range. If the crust browns before the inside reaches 165F, finish those pieces on a rack in a 350F oven.
Instructions
In a big bowl, whisk 1 teaspoon of the salt into the buttermilk along with the hot sauce. Add the chicken pieces, turn them to coat, cover, and chill them for an hour at the very least, or overnight if you can.
Whisk the flour and cornstarch in a shallow dish with all the spices and the rest of the salt.
Lift out one piece at a time, let the extra buttermilk drip away, and press it firmly into the flour mixture to build a craggy coating. Rest the pieces on a rack for 15 minutes.
Add 2 inches of oil to a heavy Dutch oven, or to a cast iron skillet with tall sides, and heat it to between 325F and 350F.
Fry in batches so the pot is never crowded, turning the pieces every few minutes, for 12 to 16 minutes. They are done when deep golden and the largest pieces read 165F. Thighs and drumsticks may need a few more minutes than breasts.
Drain on a wire rack over a rimmed pan, and hold finished pieces in a 200F oven while the rest cook.
Rest the chicken 5 minutes, then serve with biscuits, coleslaw and mashed potatoes.
Fried chicken is my summertime Sunday tradition, and cold leftovers are just as good at a picnic the next day. My family would protest loudly if I ever skipped the buttermilk soak.
Clip a thermometer to the pot and adjust the burner often, because the oil cools every time chicken goes in. To reheat, set leftovers on a rack and give them roughly 15 minutes at 400F.
7) Old Fashioned Beef Stew
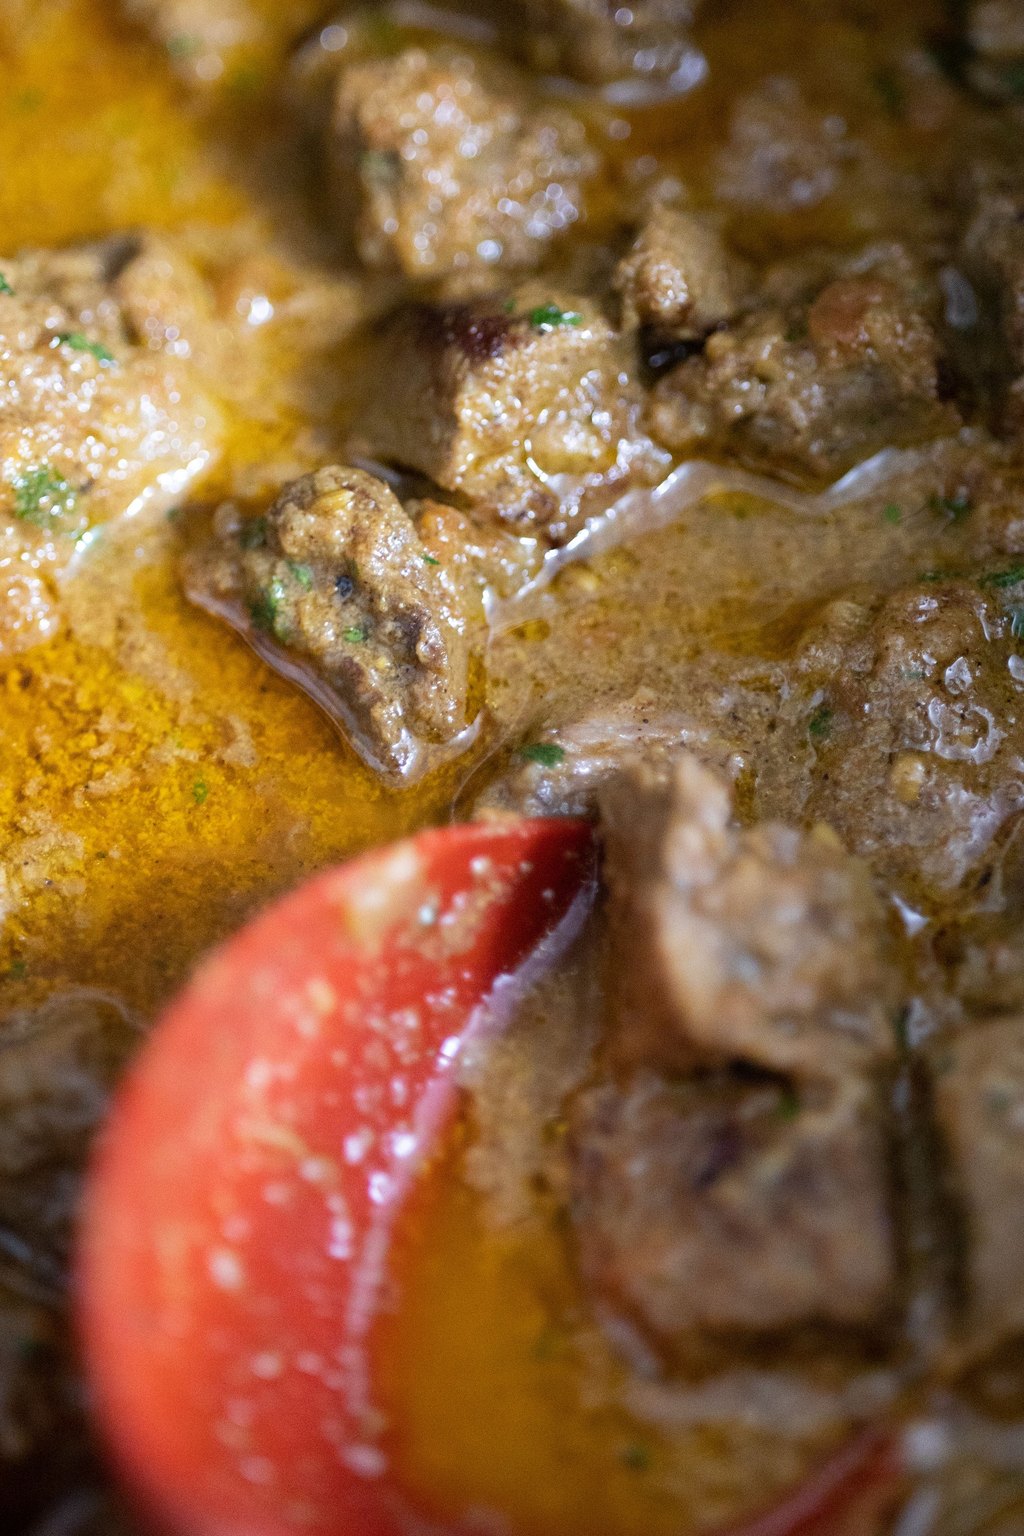
7) Old Fashioned Beef Stew
Cubes of chuck are browned a batch at a time and then simmered slowly until spoon tender. Tomato paste and Worcestershire create a deep, savory gravy that clings to every carrot and potato. A light coat of flour on the meat thickens the stew on its own as it cooks.
Serve this in deep bowls on a cold night with a simple green salad on the side. A sprinkle of fresh parsley on top makes each bowl look bright. Set out a crock of soft butter and some sliced cheddar to go with the bread or biscuits.
Ingredients
2 1/2 lbs beef chuck, cut into 1 1/2 inch cubes
1 1/2 teaspoons salt
1 teaspoon black pepper
3 tablespoons all purpose flour
3 tablespoons vegetable oil
1 large yellow onion, diced
3 cloves garlic, minced
2 tablespoons tomato paste
4 cups beef broth
1 tablespoon Worcestershire sauce
2 bay leaves
1 teaspoon dried thyme
1 1/2 lbs Yukon gold potatoes, cubed
4 carrots, cut into 1 inch pieces
Buy a whole chuck roast and cube it yourself, because packaged stew meat is often a mix of cuts that cook unevenly. Keep the simmer low and gentle, since a hard boil makes chuck tough and stringy. Like most stews, it tastes even better the next day, so make it ahead for company.
Instructions
Dry the beef cubes, season them with salt and pepper, and toss them with the flour to coat lightly.
Set a large Dutch oven on medium high and warm 2 tablespoons of the oil. Brown the beef in two batches, 5 to 6 minutes each, turning until every side is well colored. Transfer to a plate.
Add the last tablespoon of oil and the onion and cook 4 to 5 minutes until soft. Add the garlic and tomato paste and stir for a minute.
Pour in the broth and scrape up every browned bit. Add the Worcestershire, bay leaves, thyme and the beef with any juices.
Bring it to a boil, then lower the heat, cover, and simmer gently for 1 1/2 hours, stirring once in a while.
Tuck in the potatoes and carrots. Put the lid back on for another 40 to 45 minutes. By then the beef should be meltingly soft and a fork should slide easily into the vegetables.
Fish out the bay leaves. For a thicker stew, leave the lid off and simmer 10 minutes more. Taste and adjust the seasoning.
Serve in big bowls with crusty bread or warm buttermilk biscuits.
Beef stew is my favorite snowy day supper, since it fills the whole house with the coziest smell. It is so filling that nobody asks for anything else.
Be patient and brown the beef in batches, because a crowded pot steams the meat and loses flavor. The stew keeps 4 days in the fridge and 3 months in the freezer.
8) Homemade Chicken Noodle Soup
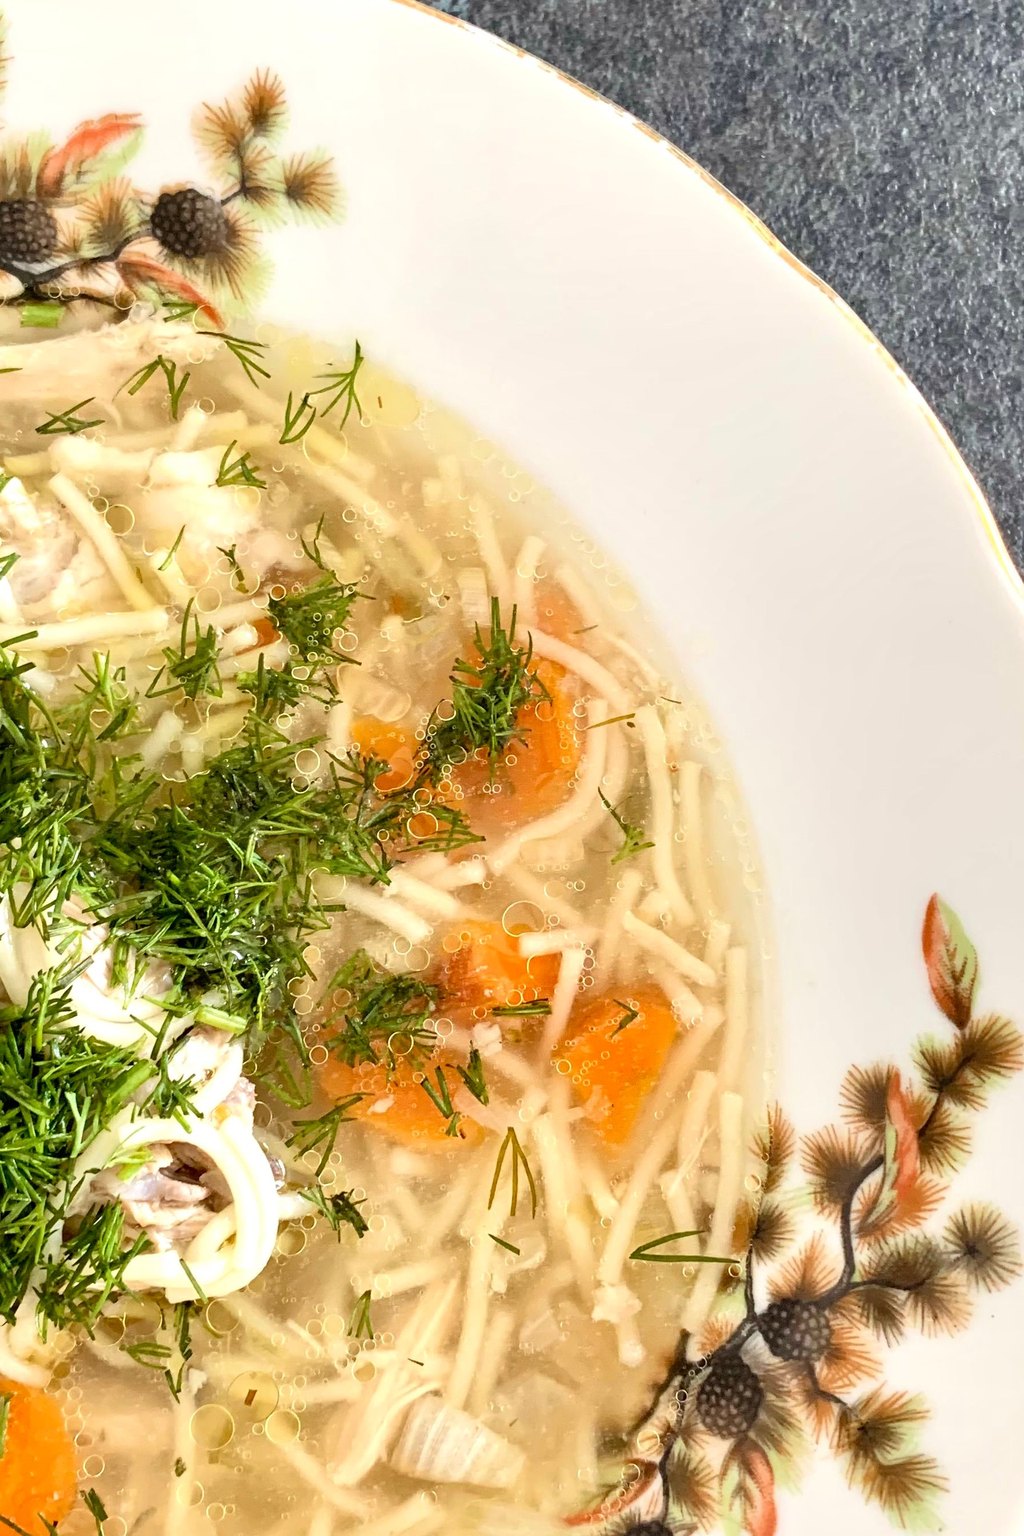
8) Homemade Chicken Noodle Soup
This homemade soup is packed with shredded chicken, soft egg noodles and the classic trio of carrots, celery and onion. Simmering the chicken right in the broth keeps it juicy and gives the soup even more flavor. A squeeze of lemon just before serving brightens the whole pot.
I always carry a pot to a friend who is feeling sick, with a loaf of fresh bread tucked in the basket. A grilled cheese sandwich on the side makes it a cozy lunch the grandkids love. For a pretty finish, add a few extra sprigs of parsley and a thin slice of lemon to each bowl.
Ingredients
2 tablespoons unsalted butter
1 yellow onion, diced
3 carrots, sliced
3 celery stalks, sliced
3 cloves garlic, minced
8 cups chicken broth
1 1/2 lbs boneless skinless chicken breasts
1 bay leaf
1 teaspoon dried thyme
1 teaspoon salt
1/2 teaspoon black pepper
3 cups wide egg noodles
2 tablespoons chopped fresh parsley
1 tablespoon fresh lemon juice
If you plan on leftovers, cook the noodles separately and add them to each bowl, because they soak up broth and turn mushy overnight. Pull the chicken as soon as it reaches 165F so it stays tender. Low sodium broth lets you control the salt, so season at the very end.
Instructions
Melt the butter in a big soup pot on medium heat. Cook the onion, carrots and celery 6 to 8 minutes, stirring now and then, until they soften.
Add the garlic and stir for about a minute.
Pour in the broth and add the whole chicken breasts, the bay leaf, thyme, salt and pepper. Bring it up to a boil.
Lower the heat to a gentle simmer, set the lid partly on, and cook 18 to 20 minutes, until the thickest part of the chicken reads 165F.
Lift the chicken onto a cutting board and pull it into shreds with two forks. Throw away the bay leaf.
Return the soup to a boil, add the noodles, and cook 6 to 8 minutes, until tender.
Add the shredded chicken back to the pot along with the lemon juice and parsley. Taste, and add more salt if it needs it.
Ladle it into bowls and serve piping hot with crackers or crusty bread.
This is the soup I start the second anyone in the family catches a cold. It is simple and soothing and far better than anything from a can.
For a batch headed to the freezer, boil the noodles separately and add them when you reheat, so they stay firm. Leftover roast chicken can replace the raw breasts and cut the cooking time.
9) Biscuits and Sausage Gravy
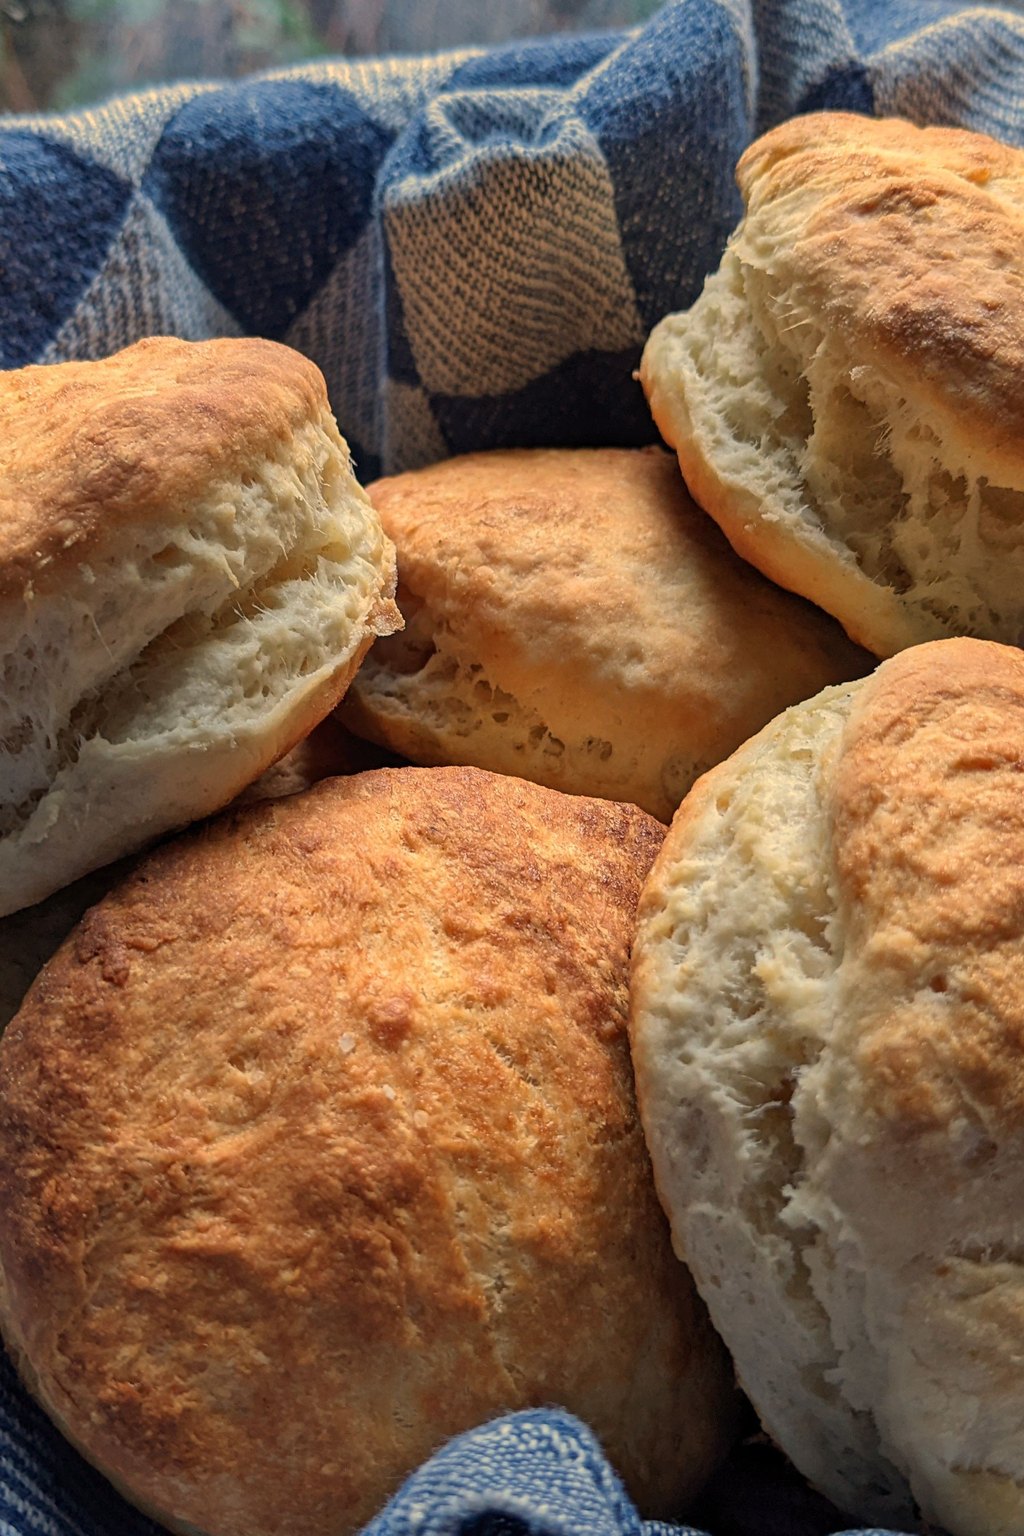
9) Biscuits and Sausage Gravy
Tall, flaky homemade buttermilk biscuits are split and covered in a creamy, peppery sausage gravy. All the flavor in the gravy comes from the browned sausage and its drippings, so nothing at all is wasted. Folding the dough once creates buttery layers that pull apart in each bite.
Biscuits and gravy is our favorite weekend breakfast when the kids and grandkids are visiting. Serve it with scrambled eggs and a bowl of fresh fruit on the side to balance the rich gravy. A pot of hot coffee and some orange juice make it a real country breakfast.
Ingredients
For the biscuits
2 cups all purpose flour
1 tablespoon baking powder
1 teaspoon sugar
3/4 teaspoon salt
1/2 cup cold unsalted butter, cubed
3/4 cup cold buttermilk
For the gravy
1 lb ground breakfast sausage
1/3 cup all purpose flour
3 cups whole milk
1/2 teaspoon salt
1 teaspoon coarse black pepper
1/4 teaspoon red pepper flakes
Freeze the cubed butter for 10 minutes before you start, so it stays in little pieces that turn into flaky layers. Whisk a splash of milk into the gravy if it gets too thick as it stands. Taste before you salt the gravy, because breakfast sausage is already well seasoned.
Instructions
Heat the oven to 425F and cover a baking sheet with parchment.
Whisk the dry biscuit ingredients together. Rub the cold butter into them, leaving pieces about as big as peas. Add the buttermilk and stir only until a shaggy dough comes together.
Tip the dough onto a floured counter, pat it into a rectangle about 1 inch thick, fold it over on itself, and flatten it once more. Cut 6 rounds with a 3 inch cutter, pushing straight down without twisting.
Set the biscuits on the sheet so their sides touch and bake 13 to 15 minutes. They should rise tall and turn golden.
Meanwhile, brown the sausage in a big skillet on medium heat, crumbling it with a spoon, for 7 to 8 minutes or until it reaches 160F. Leave the drippings in the pan.
Dust the flour over the sausage and stir 1 to 2 minutes, until it disappears.
Pour in the milk slowly while stirring. Let it bubble 5 to 7 minutes so it thickens into a creamy gravy, then season with salt, black pepper and pepper flakes.
Split the warm biscuits open and ladle plenty of gravy over them.
This is our favorite Saturday breakfast, and now and then it is supper too. When the grandkids sleep over, they crowd the stove the moment the biscuits come out.
Cold butter and cold buttermilk give you the fluffiest biscuits. Chilled gravy turns quite thick, so whisk in some milk as it warms up.
10) Classic Lasagna
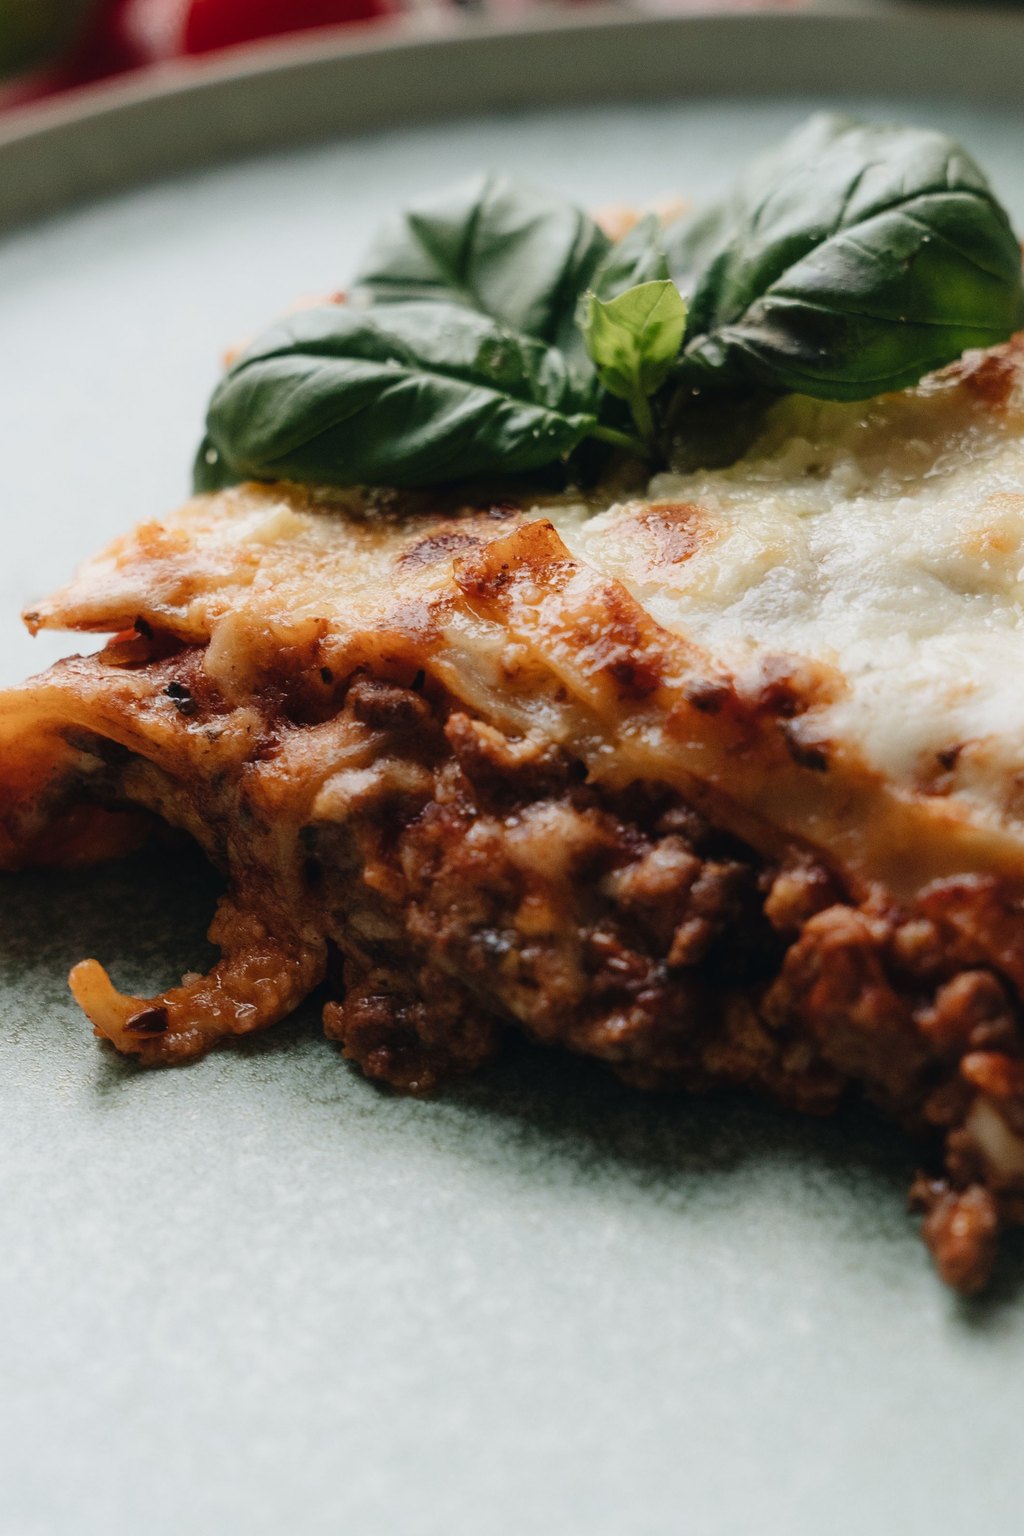
10) Classic Lasagna
Tender noodles, a hearty meat sauce made with beef and sausage, creamy ricotta and plenty of mozzarella bake into the ultimate family supper. A good long simmer thickens the sauce, so the slices stand up tall. Resting the pan after baking is the secret to neat, handsome squares.
Lasagna is the dish I make when the whole family comes home, because one pan feeds everyone. A big Caesar salad and warm garlic bread round out the meal. Leftover squares make wonderful lunches, and Tom says it tastes even better the second day.
Ingredients
12 lasagna noodles
1 lb ground beef
1/2 lb mild Italian sausage, casings removed
1 yellow onion, diced
3 cloves garlic, minced
1 can (28 oz) crushed tomatoes
1 can (15 oz) tomato sauce
2 teaspoons Italian seasoning
1 teaspoon salt
15 oz ricotta cheese
1 large egg
3/4 cup grated Parmesan cheese, divided
4 cups shredded mozzarella cheese, divided
2 tablespoons chopped fresh parsley
Use whole milk ricotta for a creamier filling, because part skim can turn grainy in the oven. Spread the ricotta with a spoon dipped in water, and it will go on smoothly without tearing the noodles. For two, build it in two 8 inch pans and freeze one unbaked for another night.
Instructions
Heat the oven to 375F. Boil the noodles in salted water until barely al dente, drain them, and lay them flat on oiled foil.
Brown the beef, sausage and onion in a big skillet on medium high for 8 to 10 minutes, until the meat reaches 160F. Pour off the fat and stir in the garlic.
Add both cans of tomatoes with the Italian seasoning and salt. Simmer 15 minutes, stirring now and then, until thick.
In a bowl, mix the ricotta and egg with the parsley and 1/2 cup of the Parmesan.
Spread 1 cup of the sauce in a 9×13 inch dish. Add 4 noodles, half of the ricotta filling, 1 1/3 cups of mozzarella and about a third of the sauce you have left. Repeat these layers once.
Finish with the last 4 noodles, then the rest of the sauce, mozzarella and Parmesan.
Cover with foil that has been greased on the underside and bake 25 minutes. Remove the foil and give it another 20 to 25 minutes, until golden and bubbling.
Let it rest a full 15 minutes before cutting so the layers stay together.
Lasagna is our Christmas Eve supper every single year, and my go to whenever the whole crowd is coming. It always feels like a celebration.
Assemble it a day early and refrigerate it, then add 15 minutes to the covered baking time. It also freezes for up to 3 months, baked or not.
Want the whole story, plus my storage and swap notes? Here is my full Homemade Meat Lasagna recipe.
11) Tuna Noodle Casserole
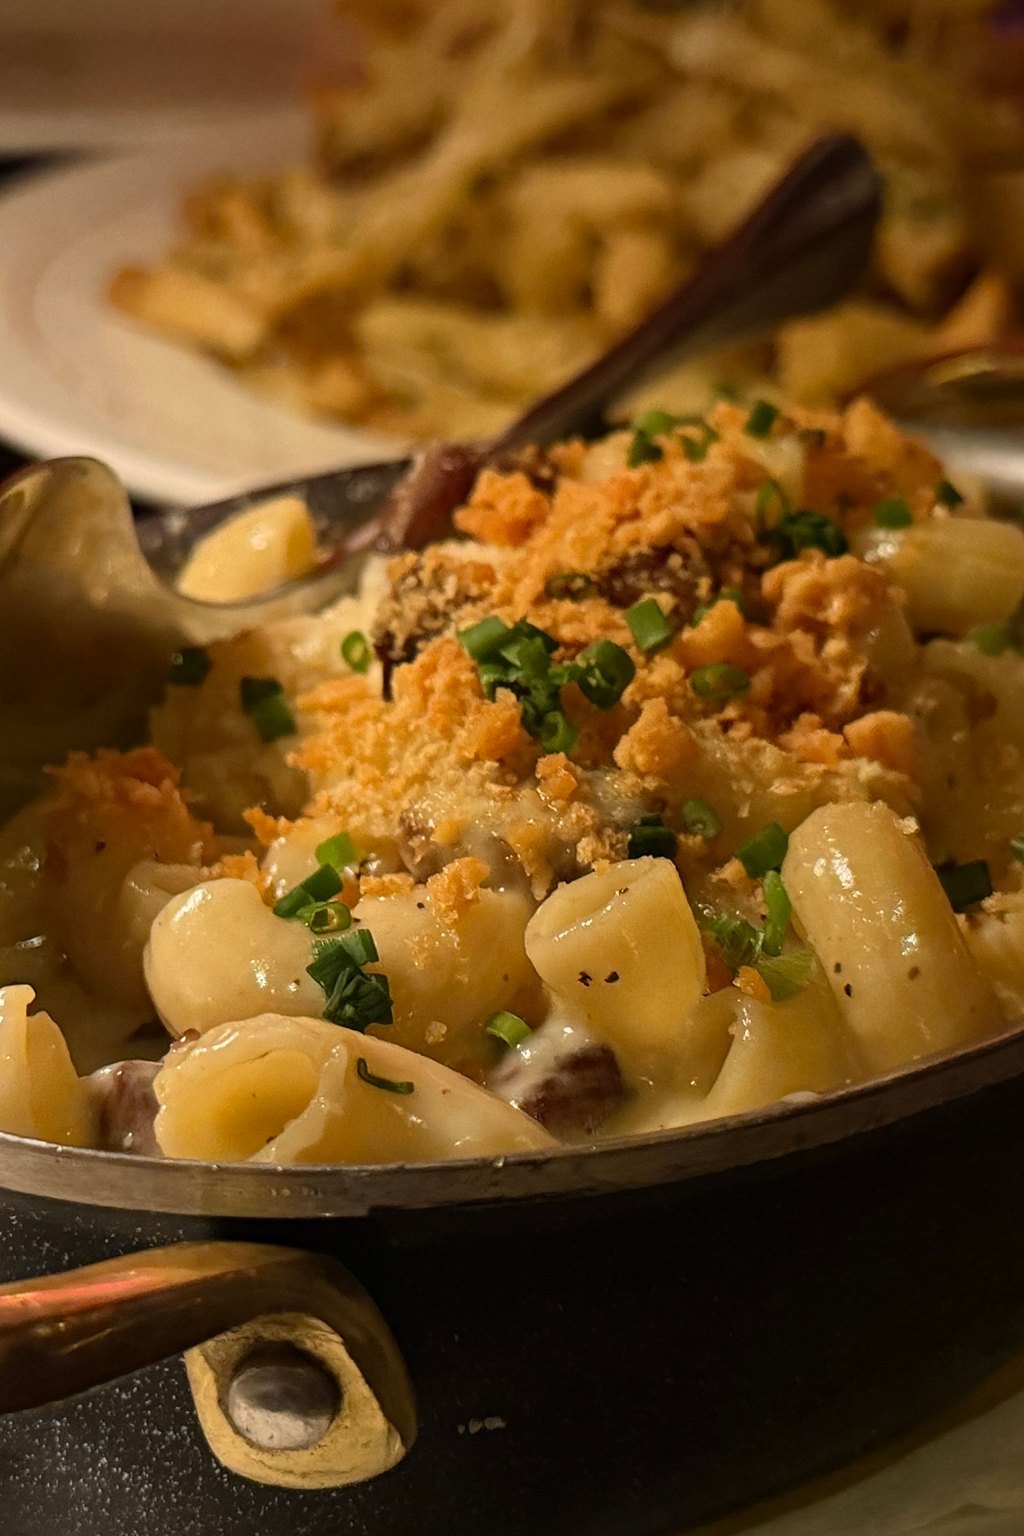
11) Tuna Noodle Casserole
This retro classic gets a fresh update with a homemade mushroom cream sauce in place of the canned soup. Egg noodles, flaked tuna, green peas and sharp cheddar bake together beneath a crunchy, buttery cracker topping. It is thrifty, filling and made almost entirely from cupboard and freezer staples.
Tuna casserole is a simple weeknight supper, and all it needs is a green salad or some steamed broccoli. Serve it in warm bowls with a little extra black pepper on top. It reminds Tom of the meals his mother made on Friday nights.
Ingredients
12 oz wide egg noodles
3 tablespoons unsalted butter
1 small onion, diced
8 oz mushrooms, sliced
3 tablespoons all purpose flour
2 cups whole milk
1 cup chicken broth
2 cans (5 oz each) tuna in water, drained
1 1/2 cups frozen peas
1 1/2 cups shredded cheddar cheese
1 teaspoon salt
1/2 teaspoon black pepper
1 cup crushed buttery crackers
2 tablespoons unsalted butter, melted
Flake the tuna into big chunks, so it does not disappear into the sauce. Do not thaw the peas, since they finish cooking in the oven and stay bright green. If you halve the recipe for two, bake it in an 8 inch square dish for about the same time.
Instructions
Heat the oven to 375F. Butter a 9×13 inch dish. Boil the noodles 2 minutes less than the package says and drain them.
Melt the butter in a big skillet on medium heat. Cook the onion and mushrooms 6 to 7 minutes, until the mushrooms brown and the pan looks dry.
Dust in the flour and stir for a minute.
Gradually whisk in the milk and broth. Let it simmer 4 to 5 minutes, stirring often, until it thickens nicely. Stir in 1 cup of cheddar along with the salt and pepper until melted.
Take the pan off the heat. Gently fold in the noodles, tuna and peas until everything is evenly mixed, then spread it in the dish.
Sprinkle the remaining cheddar on top. Toss the cracker crumbs with the melted butter and scatter them over the casserole.
Bake with no cover for 20 to 25 minutes. Look for bubbling at the edges and crisp, golden crumbs.
Give it 5 minutes of rest before serving.
Tuna casserole showed up on our table every week when I was growing up, and making it from scratch made me love it all over again. It is a great friend at the end of the month when the grocery money runs thin.
Use shredded cooked chicken instead of tuna if your family is not keen on fish. You can assemble it a day early, adding the cracker crumbs just before it goes in the oven.
12) Grilled Cheese and Tomato Soup
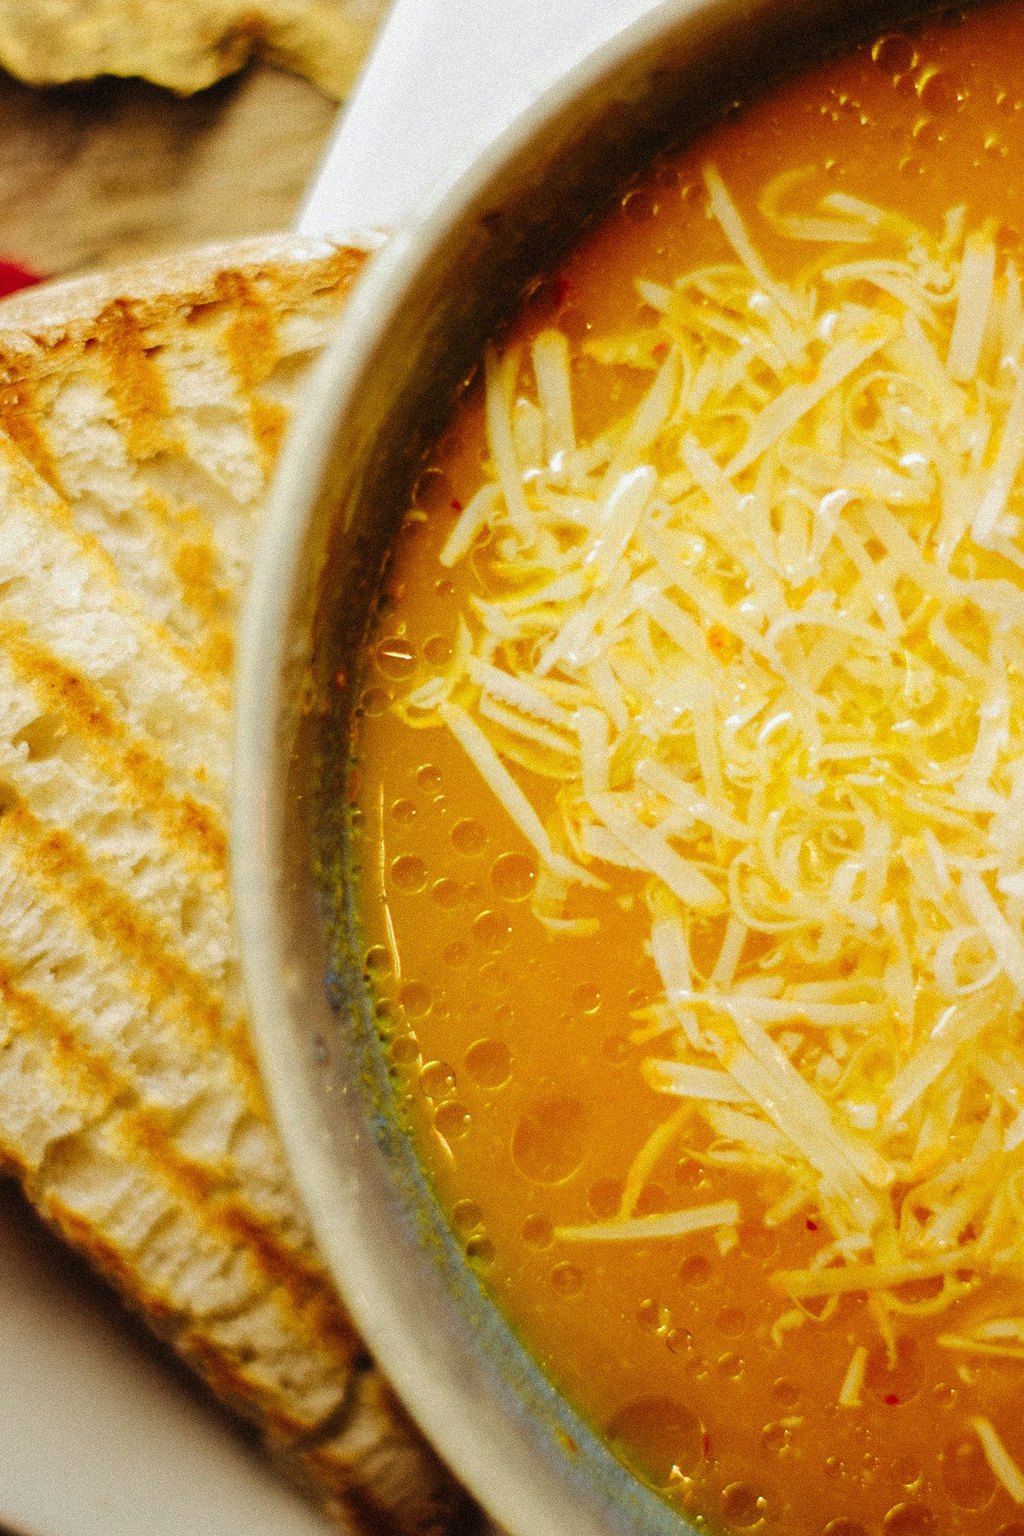
12) Grilled Cheese and Tomato Soup
A pot of creamy tomato soup alongside crisp, buttery grilled cheese makes the perfect pair for a gray, drizzly day. Canned whole tomatoes cooked down with garlic and onion give the soup deep flavor, and a little cream makes it silky. Cooking the sandwiches over gentle heat guarantees crisp bread and fully melted cheese.
Soup and sandwiches are our rainy day lunch, served at the kitchen table with the soup in big mugs for dipping. Cut the sandwiches into strips or triangles for the grandkids, and they will happily dunk away. A few fresh basil leaves and a swirl of cream on each bowl make it feel special.
Ingredients
For the soup
2 tablespoons unsalted butter
1 yellow onion, diced
3 cloves garlic, minced
1 can (28 oz) whole peeled tomatoes
2 cups chicken or vegetable broth
1 teaspoon sugar
1 teaspoon salt
1/2 cup heavy cream
1/4 cup chopped fresh basil
For the sandwiches
8 slices sandwich bread
3 tablespoons unsalted butter, softened
8 slices sharp cheddar cheese
Spread a thin layer of mayonnaise on the outside of the bread instead of butter for an extra golden, crisp crust. Slice the cheese thin so it melts before the bread gets too dark. Never fill a blender more than halfway with hot soup, and hold a folded towel over the lid as you blend.
Instructions
Melt 2 tablespoons of butter in a big pot on medium heat. Cook the onion 5 to 6 minutes, until soft, then add the garlic and stir for a minute.
Add the tomatoes and their juice along with the broth, sugar and salt. Crush the tomatoes with a spoon and bring it to a simmer.
Let it bubble gently with the lid off for 20 minutes, stirring now and then, so the flavor deepens.
Take the pot off the heat and puree the soup with a stick blender, or work in small batches in a countertop blender, leaving the lid cracked for steam. Add the cream and basil and keep it warm on low.
As the soup cooks, spread softened butter on one side of each bread slice. Lay 4 slices buttered side down in a big skillet or on a griddle. Layer on 2 slices of cheddar per sandwich and close each one with more bread, buttered side facing up.
Cook on medium low for 3 to 4 minutes a side, until the bread is crisp and deeply golden and the cheese has melted completely.
Halve the sandwiches and serve them with steaming bowls of soup for dunking.
This is the supper I crave on rainy afternoons, and Tom never says no to it either. Dunking a gooey sandwich into a hot bowl is pure joy.
The soup freezes well for as long as 3 months, so make a double pot. For extra crunch, swap the butter on the outside of the bread for a thin coat of mayonnaise.
13) Smothered Pork Chops
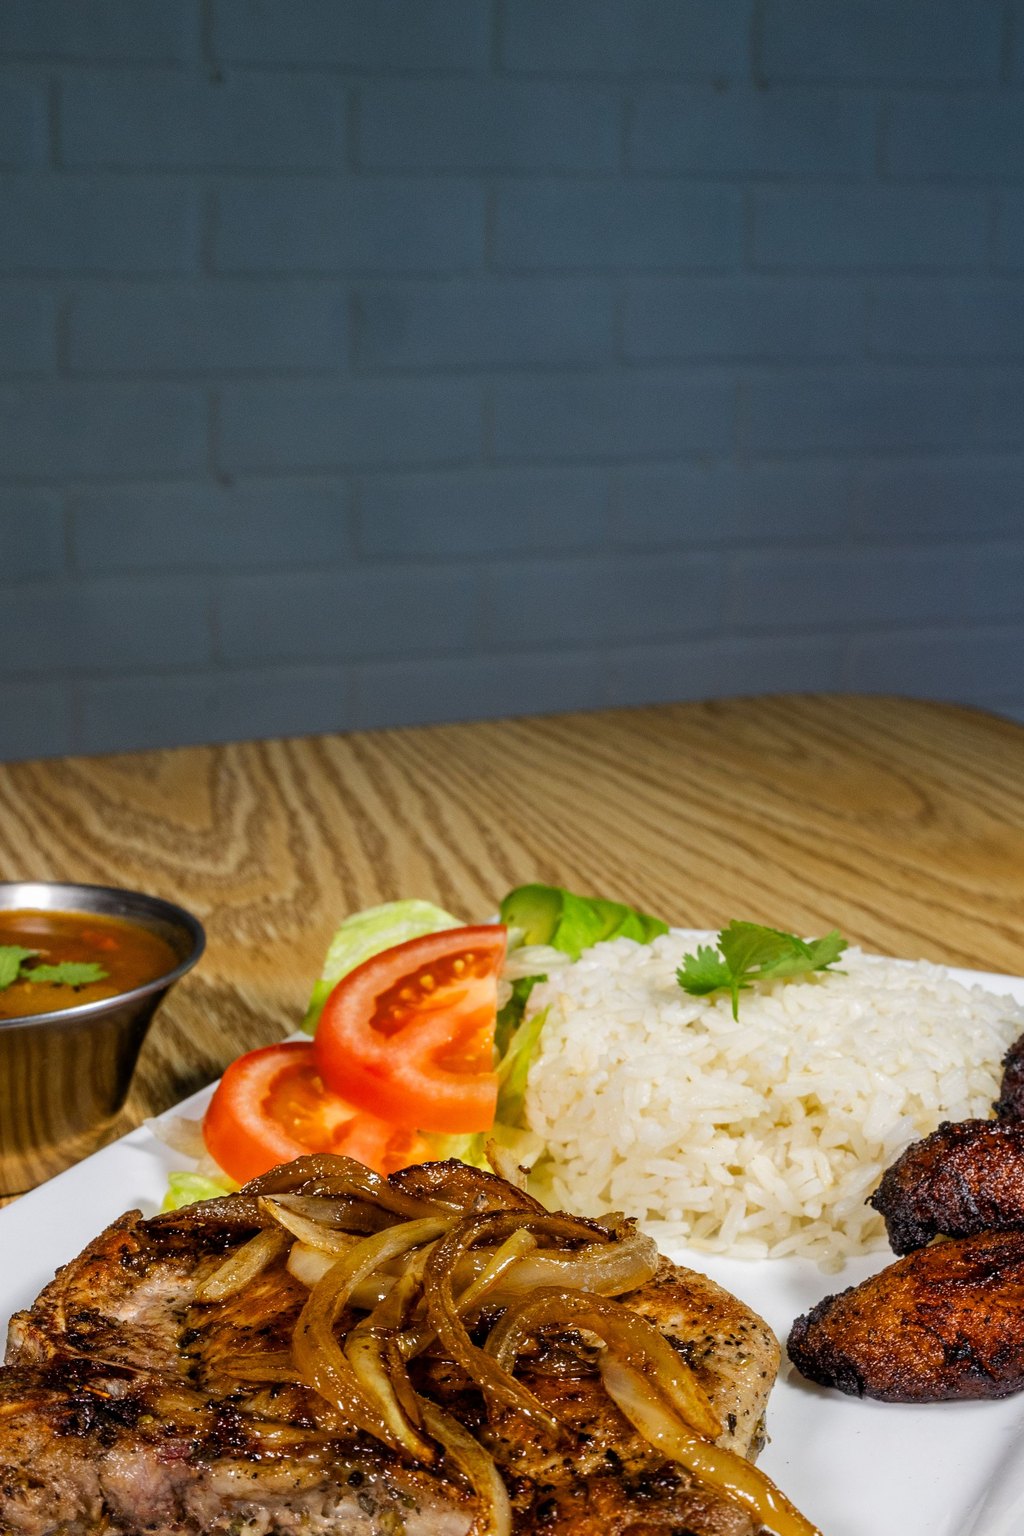
13) Smothered Pork Chops
Seasoned pork chops are browned and then simmered in a savory onion gravy until tender and juicy. Slowly cooked onions and a little cream give the gravy a deep, mellow sweetness. It is true Southern comfort food that tastes like it cooked all day, yet it is ready in under an hour.
Spoon plenty of the onion gravy over each chop and set the skillet right on the table. Collard greens or green beans on the side make it a true Southern supper. Add a pan of warm cornbread, and you have the kind of meal that makes everyone linger at the table.
Ingredients
4 bone in pork chops, about 1 inch thick
1 teaspoon salt
1/2 teaspoon black pepper
1 teaspoon garlic powder
1 teaspoon paprika
1/2 cup all purpose flour, plus 2 tablespoons for the gravy
3 tablespoons vegetable oil
2 tablespoons unsalted butter
1 large yellow onion, thinly sliced
2 cloves garlic, minced
2 cups chicken broth
1/2 cup heavy cream
1 teaspoon dried thyme
2 tablespoons chopped fresh parsley
Bone in chops about 1 inch thick stay juicy, while thin chops dry out before the gravy is ready. Shake off every bit of extra flour before searing, or it will scorch in the pan and turn the gravy bitter. If the gravy gets too thick during the simmer, add a splash of broth to loosen it.
Instructions
Dry the chops with paper towels. Stir the seasonings together and rub the blend over both sides. Coat the chops in the 1/2 cup of flour and tap off the extra.
Warm the oil in a 12 inch skillet on medium high. Sear the chops until golden, 3 to 4 minutes a side, and set them on a plate.
Turn the heat to medium, then melt the butter and stir in the sliced onion. Cook 6 to 8 minutes while you scrape at the browned bits. The onion should end up soft and caramel colored. Add the garlic for 30 seconds.
Sprinkle the other 2 tablespoons of flour into the pan and stir for a minute.
Whisk in the broth gradually, then add the cream and thyme. Let it bubble 2 to 3 minutes, until a little thicker.
Nestle the chops back into the skillet and spoon gravy over the tops. Cover and keep it at a low simmer for 12 to 15 minutes. Pull it when the pork registers 145F.
Let the chops sit in the gravy for 3 minutes. Top with parsley and serve with rice or mashed potatoes.
These chops take me back to Sunday suppers at my aunt’s farmhouse, always with a big bowl of rice for the gravy. Now our grown kids ask for them whenever they visit.
Bone in chops stay juicier than boneless, though either works if you adjust the simmering time. Use an instant read thermometer and take them off at 145F so they stay tender.
14) Classic Beef Chili
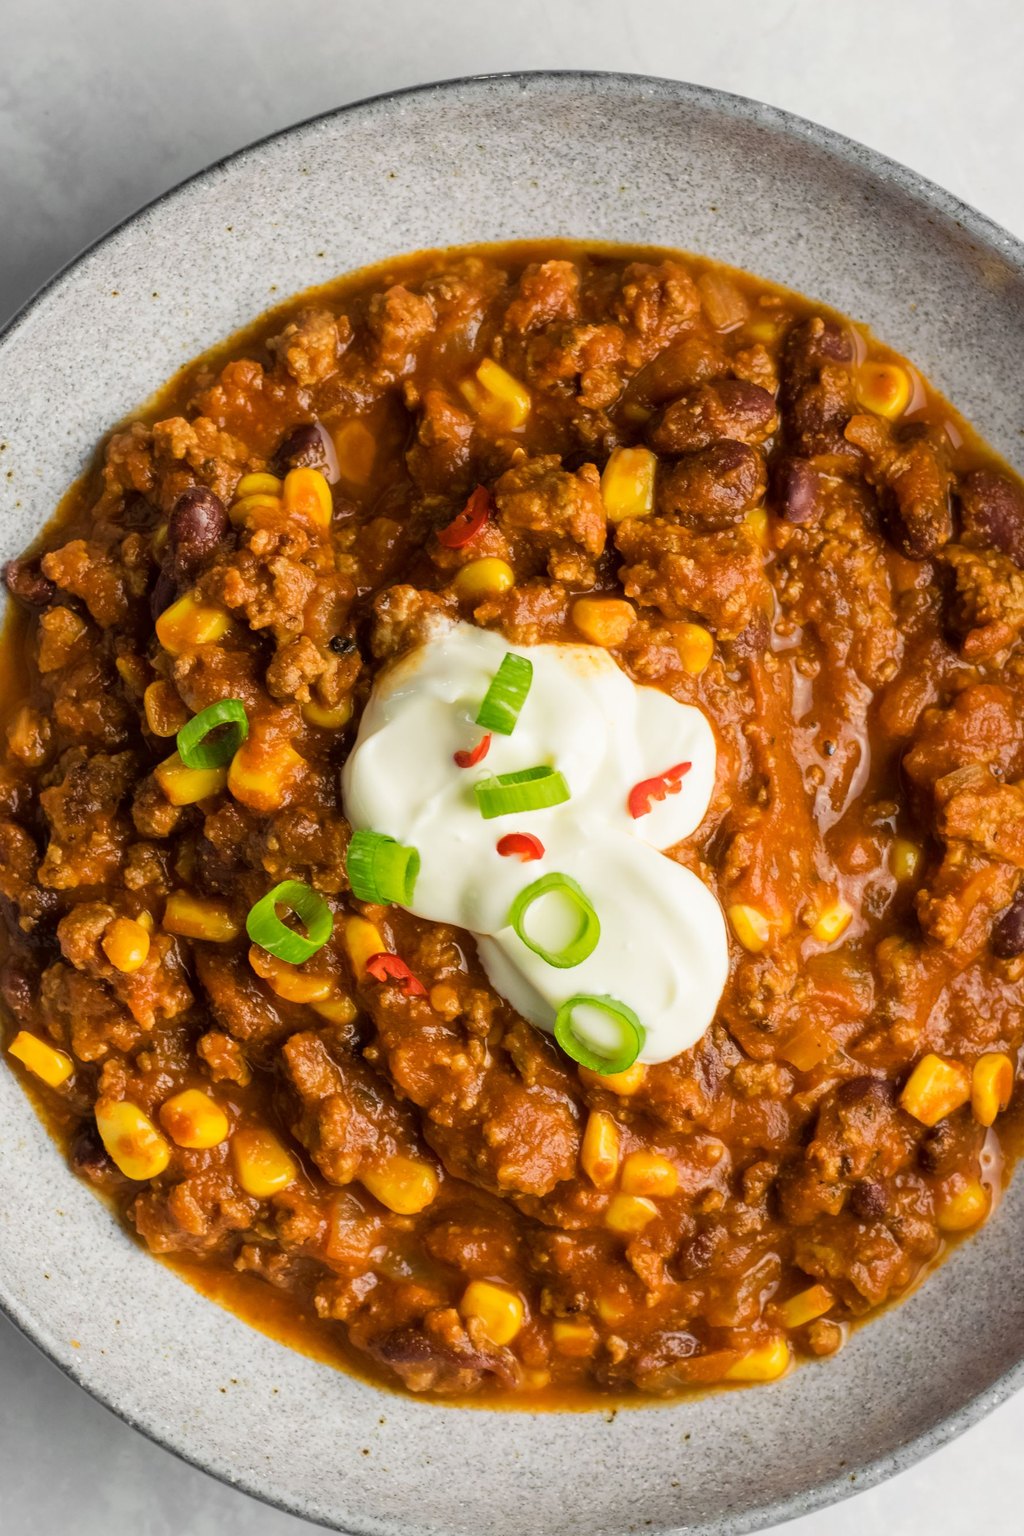
14) Classic Beef Chili
This thick and hearty chili is full of ground beef, kidney beans and peppers in a richly spiced tomato base. A minute of toasting in the hot pot wakes the spices up before the liquid goes in. A long, slow simmer pulls everything together into a deeply satisfying bowl that is even better the next day.
Chili is our go to for football Sundays, and I set the pot right on the stove so everyone can serve themselves. For a fun twist, ladle it over baked potatoes or hot dogs. It also makes a great supper for a church fundraiser or a cold night around the fire.
Ingredients
2 lbs ground beef
1 large yellow onion, diced
1 green bell pepper, diced
4 cloves garlic, minced
3 tablespoons chili powder
2 teaspoons ground cumin
1 teaspoon smoked paprika
1 teaspoon dried oregano
1 1/2 teaspoons salt
1 can (28 oz) crushed tomatoes
1 can (15 oz) tomato sauce
2 cans (15 oz each) kidney beans, rinsed and drained
1 cup beef broth
Shredded cheddar, sour cream and green onions, for serving
Choose 85 percent lean beef for good flavor without too much grease to drain. Make it a day ahead if you can, since the flavors deepen overnight in the refrigerator. If it gets too thick as it simmers, stir in a splash of broth or water.
Instructions
Brown the beef with the onion and green pepper in a large Dutch oven on medium high. Break up the meat as it cooks, 8 to 10 minutes, until it reaches 160F. Pour off the extra fat.
Add the garlic and stir for a minute.
Sprinkle in the salt and all of the spices. Stir for a minute so they toast and bloom in the fat.
Add the crushed tomatoes, tomato sauce, beans and broth. Stir well and bring it to a boil.
Turn the heat to low and set the lid on slightly ajar. Simmer 45 minutes to 1 hour, giving it a stir every 10 to 15 minutes, until the chili is thick and the flavors have come together.
Taste it and adjust with more salt or chili powder, or a pinch of cayenne for extra heat.
Spoon into bowls and pile on cheddar, sour cream and green onions. Cornbread or tortilla chips on the side are a must at our house.
Chili is my go to for football Sundays, harvest parties and any cold night when the house is full. I set out a topping bar so everyone can dress up their own bowl.
The flavor is best when you cook it a day early, since chili gets richer overnight in the fridge. Extra portions keep in the freezer for 3 months and make quick lunches or chili dogs.
Want the whole story, plus my storage and swap notes? Here is my full Simple Homemade Chili recipe.
Before You Start Cooking
Comfort cooking is made for cooking once and eating twice. Nearly every dish here holds for 3 to 4 days in the refrigerator, and soups, stews, chili and lasagna freeze well for as long as 3 months in sealed containers.
I hope these old favorites bring some warmth to your table and stir up a few sweet memories of your childhood kitchen. Call your people to the table, pass the biscuits, and enjoy every cozy forkful together.
Frequently Asked Questions
Which dishes count as classic American comfort food?
Think pot roast, meatloaf, fried chicken, mac and cheese, pot pie, chicken noodle soup, chili, and a grilled cheese with tomato soup. They are warm, filling and full of memories, and many recipes are handed down through generations. Most rely on inexpensive, everyday ingredients.
What comfort foods hold up best in the freezer?
Soups, stews, chili, lasagna, pot pie and most casseroles freeze beautifully for as long as 3 months. Let them cool fully, then pack them in sealed containers or wrap them snugly in foil. Pasta and potatoes may soften slightly once thawed. Thaw in the fridge overnight and reheat until steaming in the center.
Can comfort food be made a bit lighter?
Yes. Replace part of the cream with whole milk, choose lean beef or skinless chicken thighs, and pile more vegetables into stews and casseroles. Baking can replace frying in some recipes. Small swaps like these keep all the coziness while making the meal feel less heavy.
What should I serve with these dishes?
A simple green salad, steamed green beans or roasted carrots balance the richness nicely. Warm biscuits, cornbread or crusty bread are always welcome for soaking up gravy and sauce.